Information about individual colleges is easily managed in the AVCOLLEGES file. ADVOCATE comes installed with over 5000 college records that include name and address information. You will need to enter additional information to complete college profiles.
Creating College Profiles
- Navigate Home > View/ Edit College records.
This will navigate you to the AVCOLLEGES file.
- Find the college for which you wish to create a profile using FileMaker Pro’s Find mode.
- Navigate to Overview > Profile.
- Unlock the solution by clicking the Lock icon at the top right of the screen if necessary.
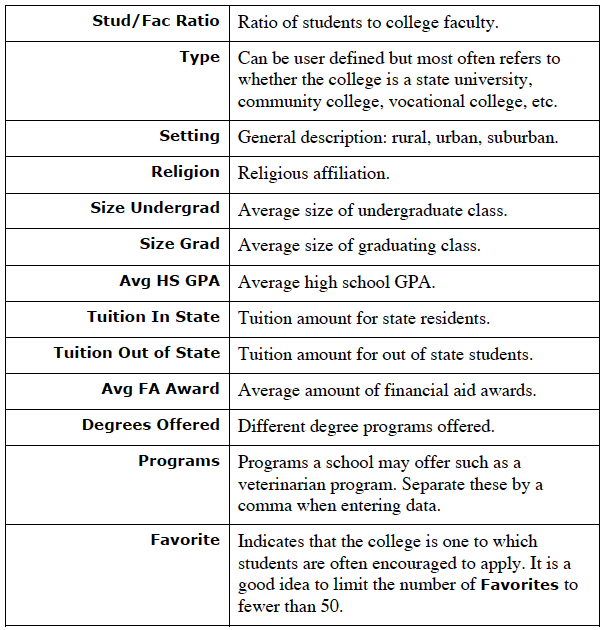
- Complete the Profile information. Refer to the table below for definitions of terms.
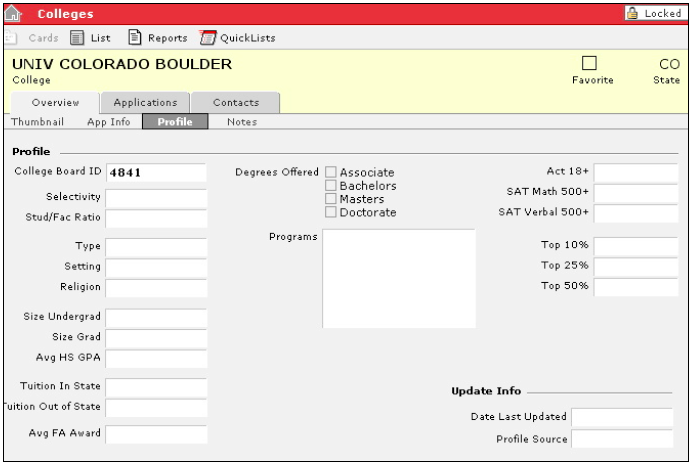

- Complete the Degrees Offered information.
- Complete the Act 18+, SAT Math 500+, SAT, Verbal 500+, Top 10%, Top 25%, and Top 50% information.
- If the college is one that you want to mark as a favorite, check the Favorite checkbox in the Header area. This will let ADVOCATE know to display the college in a variety of pop up lists throughout the solution.
- Enter the Update Info.
- Click the Notes sub tab and enter any notes about the college.
- Navigate to Overview > App Info.
- Complete the application information.
- Enter any application requirements in Requirements.
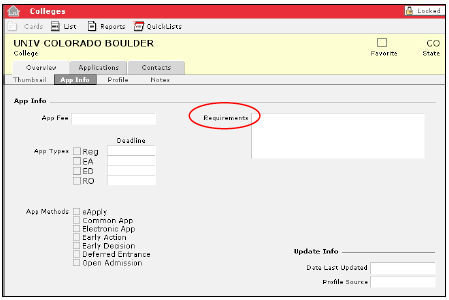
NOTE: Any information entered in the requirements field will appear on individual college applications as they are created.
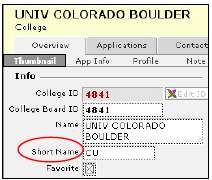
- Navigate to Overview > Thumbnail.
- Enter the college Short Name and website address if you would like.
Creating and Managing College Contacts
You can track names, phone numbers and email addresses of individuals with whom you communicate at individual colleges. You can also generate mailing labels for these individuals and send them bulk email.
- Navigate to Home > View/Edit College records > Contacts.
- Find the college for which you wish to add a contact.
- Click New Contact at the bottom of the screen.
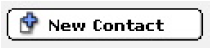
The Create College Contact dialogue box will appear.
- If need be, you can create a contact for a different college by clicking the Find button and searching for the desired college. Or, click in the College ID field and select the desired college from the list that has been marked as a favorite.
- Enter the contact information.
- If this individual is the primary contact, place a check in the Primary checkbox.
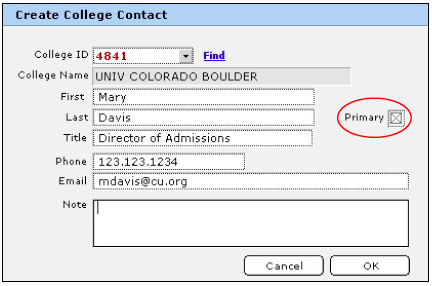
- Click the OK button at the bottom of the screen.
This will navigate you back to AVCOLLEGES > Contacts, and the new contact will be displayed.
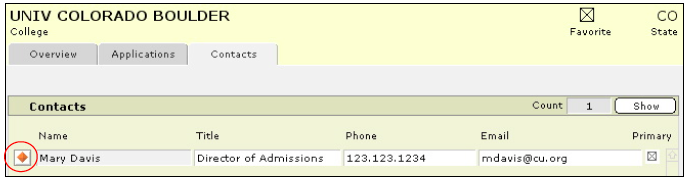
- To view detailed information about that contact, or to modify contact information, click the More Info button beside the desired contact’s name.
- This will navigate you to AVCOLLEGE > Contacts. You can search for a particular contact and either view, modify, or delete information accordingly.
Viewing and Printing College Information
Viewing a Simple List of Individual College Contacts
- Navigate to Home > View/Edit College records > Contacts.
- Find the college for which you wish to view a contact list.
- Click the Show button.
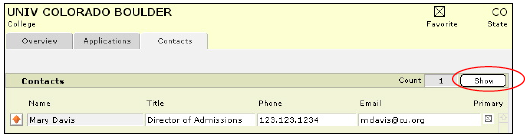
- If you’d like to print the list, select Print from the FileMaker Pro File menu at the top of your screen.
Printing a QuickList of College Names and Favorites
- Navigate to Home > View/Edit College records > Overview.
- Find the group of colleges for which you wish to print a list that displays the favorite field.
- Sort them in the desired order by selecting Sort from the Records menu.
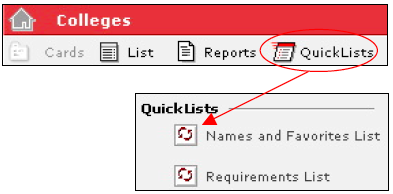
- Click the QuickLists button in the Task Bar.
- Select Names & Favorites List.
- Select Print from the FileMaker Pro File menu at the top of your screen.
- The Print Dialogue box will appear. Make your selections and choose Print.
To Print a QuickList of College Requirements
- Navigate to Home > View/Edit College records > Overview.
- Find the group of colleges for which you wish to print a list of their requirements.
- Sort them in the desired order using FileMaker Pro’s Sort from the Records menu.
- Click the QuickLists button in the Task Bar.
- Click the Requirements List button.
- Select Print from the FileMaker Pro File menu at the top of your screen.
- The Print Dialogue box will appear. Make your selections and choose Print.
To Print College Labels and Envelopes
- Navigate to Home > View/Edit College records > Overview.
- Find the group of colleges for which you wish to print labels or envelopes.
- Sort them in the desired order by selecting Sort from the FileMaker Pro Records menu.
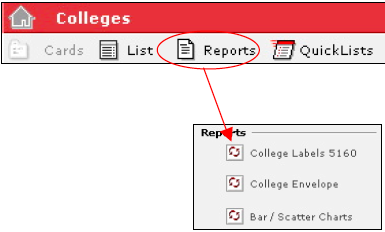
- Click the Reports button in the Task Bar.
- Click either the College Labels 5160 or College Envelope button.
- Select Print from the FileMaker Pro File menu at the top of your screen.
- The Print Dialogue box will appear. Make your selections and choose Print.
NOTE: To view your labels or envelopes on the screen as they will be printed, select Preview from the FileMaker Pro View menu at the top of your screen.
Tracking Applications to Individual Colleges
- Navigate Home > View/Edit College records > Applications.
- Find the college for which you wish to view existing applications.
- Choose the admission season for which you wish to view applications by selecting the appropriate choice from the pull down Filter Admission Season list.
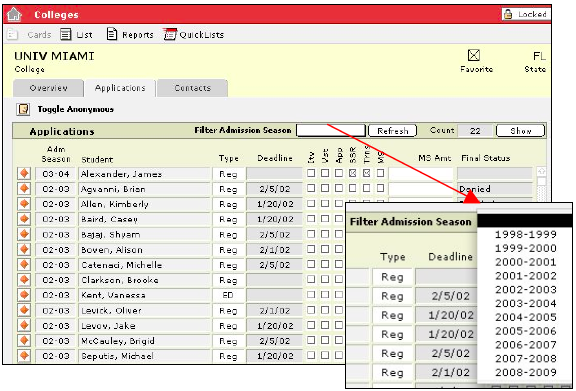
NOTE: If the blank is selected, all years will be shown.
- To ensure that you are looking at an accurate list, click the Refresh button.
- A list of all applications for that Admin Season will appear.
- To view the applications in a list format, click the Show button.
- Sort the list, if desired, by selecting Sort from the FileMaker Pro Records menu.
- If you’d like to print the list, select Print from the FileMaker Pro File menu at the top of your screen.
Tracking Historical Trends
As college applications are created and students and colleges make their decisions, you will be able to graphically view admission patterns on a per-college basis. Historical college data is displayed on the Thumbnail screen in the AVCOLLEGES file. The ability to view graphical data requires a third party FileMaker Pro plug-in. Refer to ADVOCATE Administration for details.
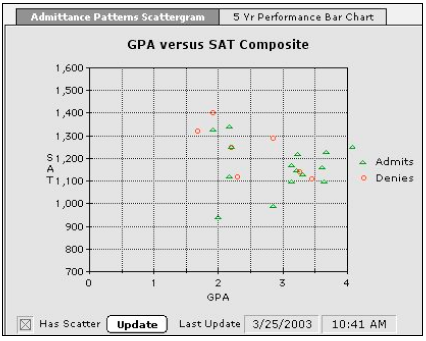
Admittance Patterns Scatter Grams
Scatter grams indicate college admittance patterns based on GPA and SAT composite scores.
Five (5) Year Performance Bar Charts
Bar charts indicate for the previous five (5) years how many students applied to the college, how many were accepted, and how many were denied.
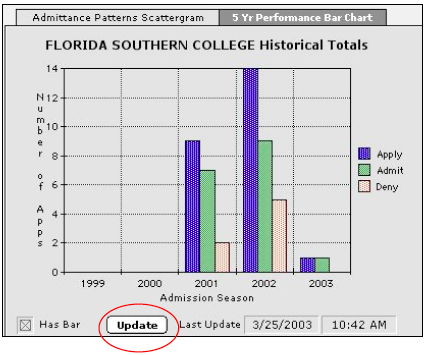
Click the Update button to refresh the data and to ensure that you are viewing current information.
Printing Scatter Charts and Bar Charts
In ADVOCATE you have the ability to print college scatter and bar charts. To print graphs:
- Navigate Home > View/Edit College records > Overview.
- Find the college(s) for which you wish to print graphical data.
- You can sort the found set by selecting Records > Sort from the FileMaker Pro menu at the top of your screen.
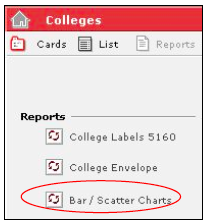
- Click the Reports button in the Task Bar.
- Click Bar/Scatter Charts.
- Ensure that your computer is configured to print to a printer and select Print from the FileMaker Pro File menu at the top of your screen.
- Click Continue once your report has been sent to the printer.