iR’s BillPay is a web service for Student Billing that allows a school to publish invoices and payment records to each family/fee payer in the family’s secure web account; if the school uses iR’s Payment Services, the fee payer can make payments online using credit cards or e-checks (if the school’s payment service allows EFT transactions), and even allocate payments to specific invoices. The fee payer can review invoices and see their full payment history within BillPay.
BillPay is part of the paperless workflow for the iR Enrollment Suite.
BillPay comprises two different aspects: the FileMaker side, where the Student Billing administrator works, and the web side, where the fee payers interact with BillPay online.
NOTE: We do not offer scheduled or recurring payments; for security purposes, we do not store any credit card or bank information on our servers.
The FileMaker side
The Student Billing admin will perform daily workflow tasks in the BillPay FileMaker interface:
- Retrieve and Process Payments
- Publish Data to the Web
Retrieve and Process Payments
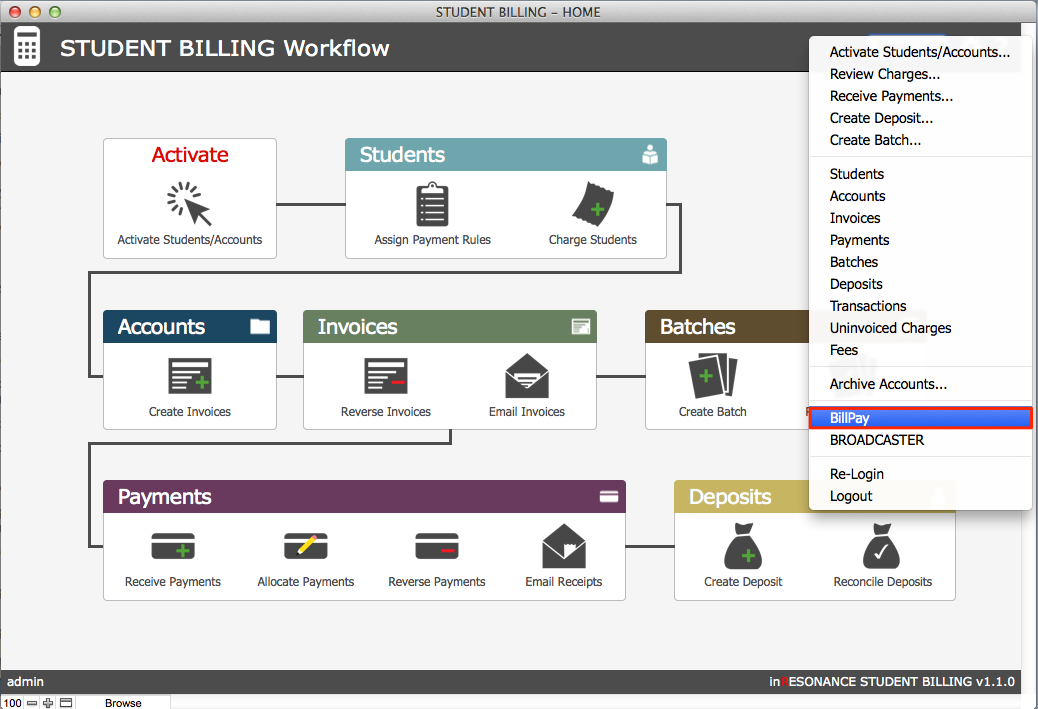
- Use the More menu in Student Billing to navigate to the FileMaker interface for BillPay.
- In Retrieve from Web, on the Retrieved Payments list, click the button Retrieve Payments.

- Click the button Process Payments.
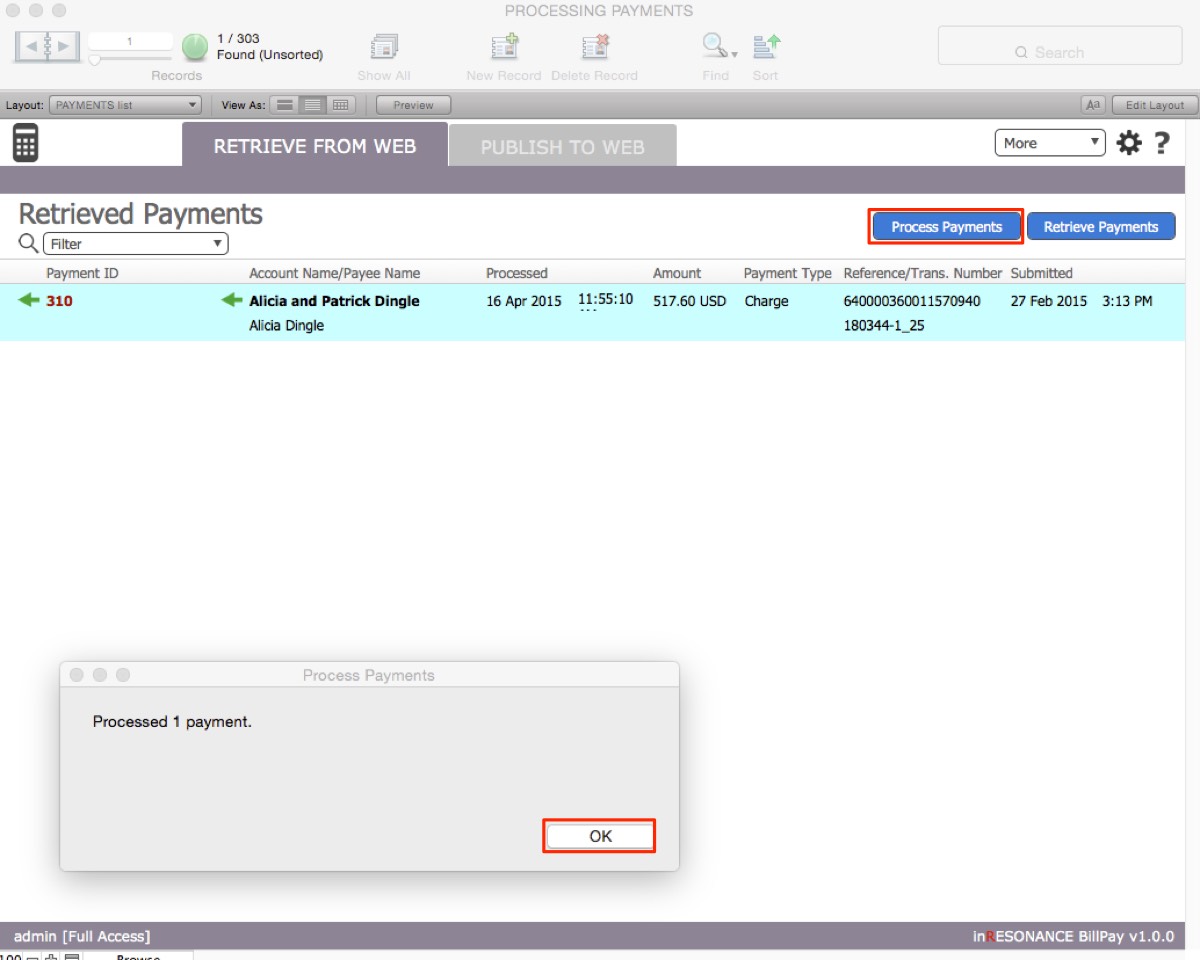
Clicking these buttons retrieves and processes any payments that have been made since you last retrieved payments. Displayed on this screen are:
- Payment ID – Each payment record has a unique ID that is generated by BillPay.
- Account Name – This is the account to which the payment will be applied.
- Payee Name – This is the payer who made the payment to the account.
- Processed – This is the timestamp marking when the payment was retrieved and processed.
- Amount – This is the total amount of the payment made.
- Payment Type – This is the type of payment made online, credit card or e-check/EFT
- Reference/Transaction Number – This is the number you will use to reconcile with your Merchant Services statement.
- Submitted – This is the timestamp marking the date on which the payee made the payment online.
When you retrieve and process a payment, the following steps take place automatically and immediately:
- The transaction record is created in Student Billing,
- The payment is automatically applied to the proper account,
- The payment is allocated according to the way the fee payer entered the payment online,
- The amount paid is deducted from the related invoice(s),
- The payment status on the web changes to Processed.
Note: The school does have the ability to reverse allocations selected by the Fee Payer in BillPay, and can reallocate a payment to a different invoice in that same account.
Publish Data to the Web
On any given workday, the Student Billing admin may be entering charges, creating invoices, or processing payments. At the end of each day, the admin can publish all work to the BillPay family accounts on the web. This will update Student Billing data for all online accounts.
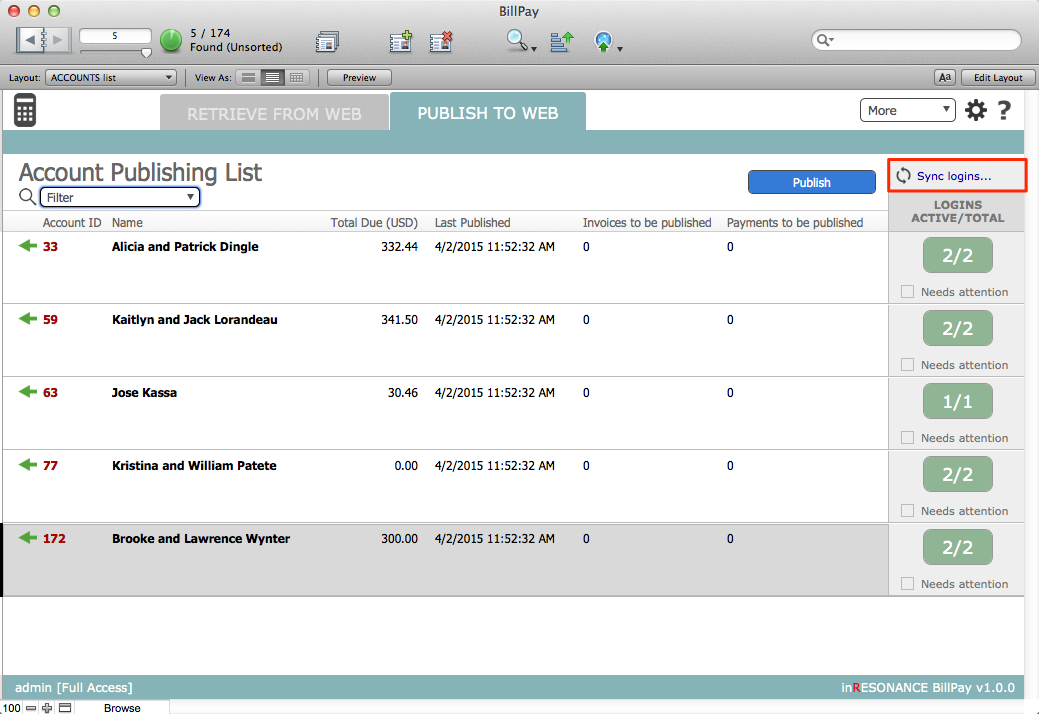
- In Publish to Web, on the Account Publishing List, BillPay displays records with data that has not been published. Unpublished data includes invoices and payments. There is a count displayed for each record in the list.
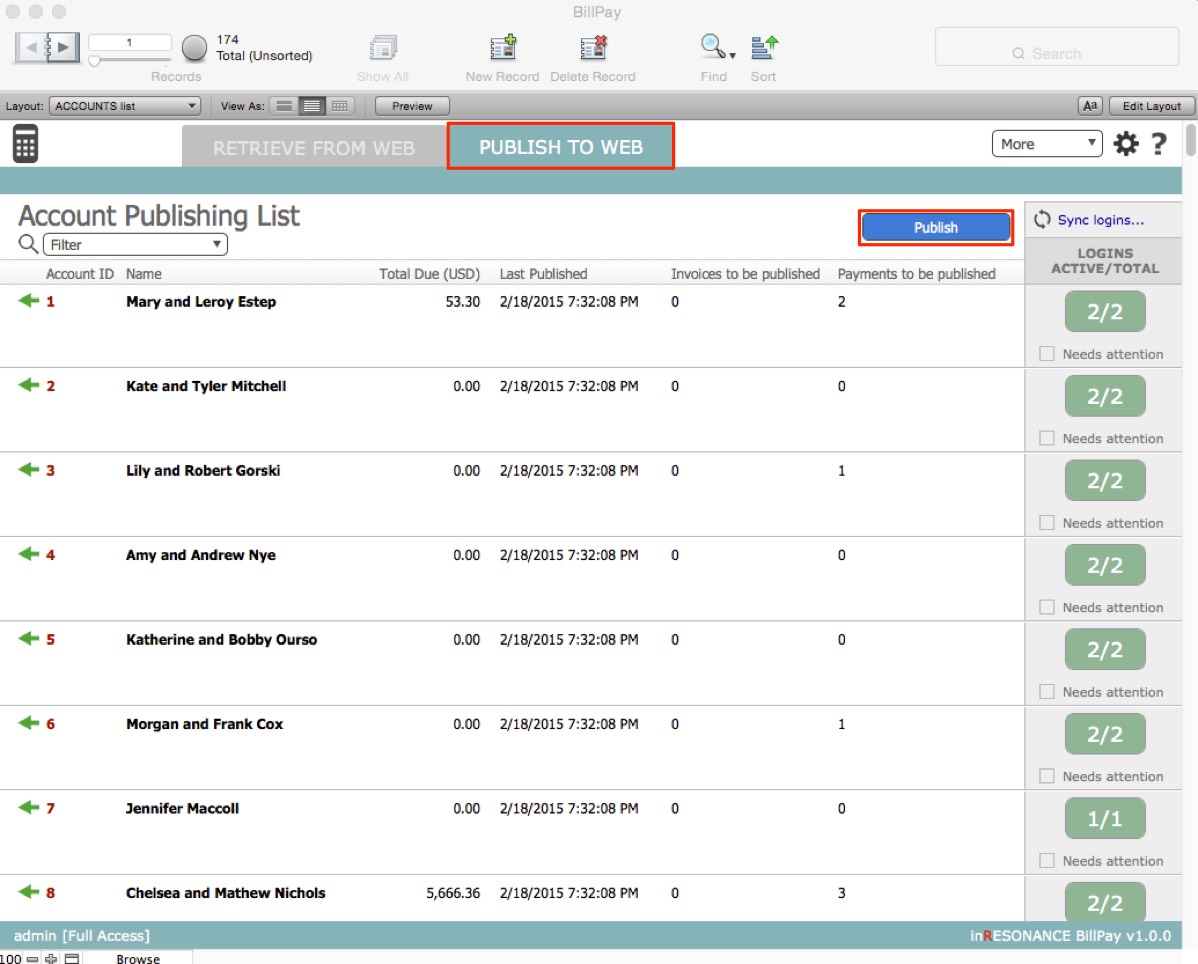
Displayed on this screen:
- Account ID – This is the Student Billing Account ID. The green arrow navigates you into the Student Billing account.
- Name – This is the account name in Student Billing.
- Total Due – This is the total amount due for all outstanding invoices for this account.
- Last Published – This is the last date when data was published to BillPay for this account.
- Invoices to be published – For any account where invoices to be published is > 0, the unpublished invoices will be published to BillPay when the admin clicks the button Publish.
- Payment to be published – For any account where payments to be published is > 0, the unpublished payments will be published to BillPay when the admin clicks the button Publish.
Notice that in the BillPay Account List, the number of accounts matches the number of accounts in Student Billing: this is the same data. There is no sync mechanism.
- Click the button Publish. Only unpublished data will be pushed to the web; after publishing, the count will display as “0”.
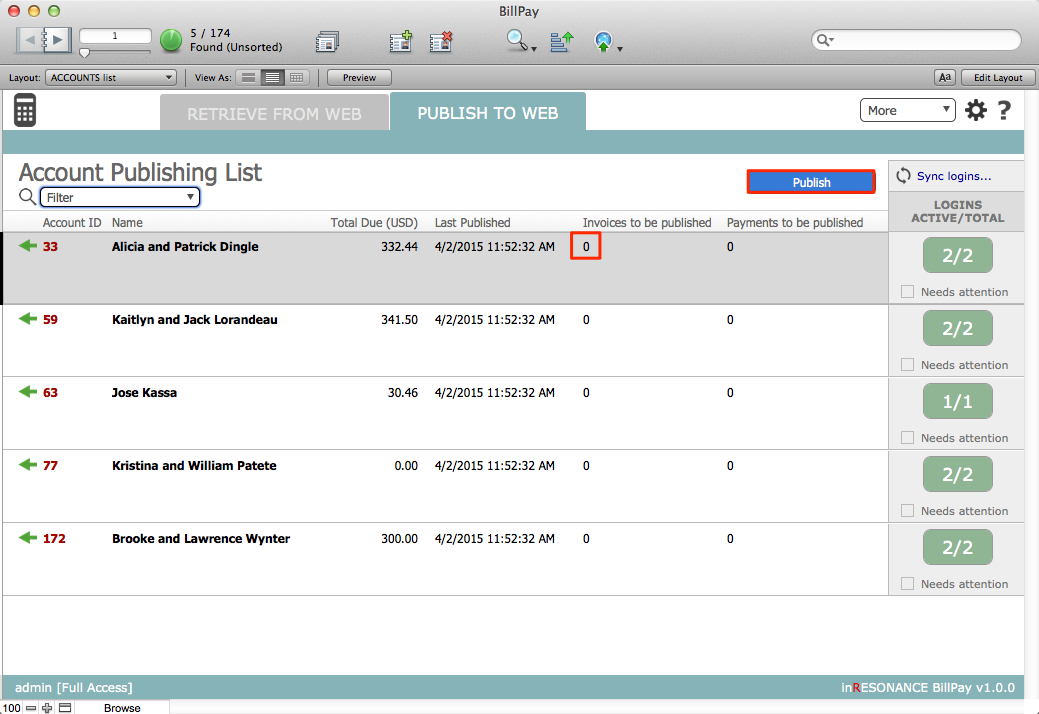
When you click the Publish button:
- All unpublished items are published to the web.
- The number of unpublished items in all records changes to zero.
- The publish date is current.
Sync Accounts
Whenever you need to add new families to BillPay, you will Sync accounts. Syncing accounts here will add a Fee Payer role to Student Billing in iR Common for the family.
- Click Sync accounts at the top of the column; this acts upon all accounts.
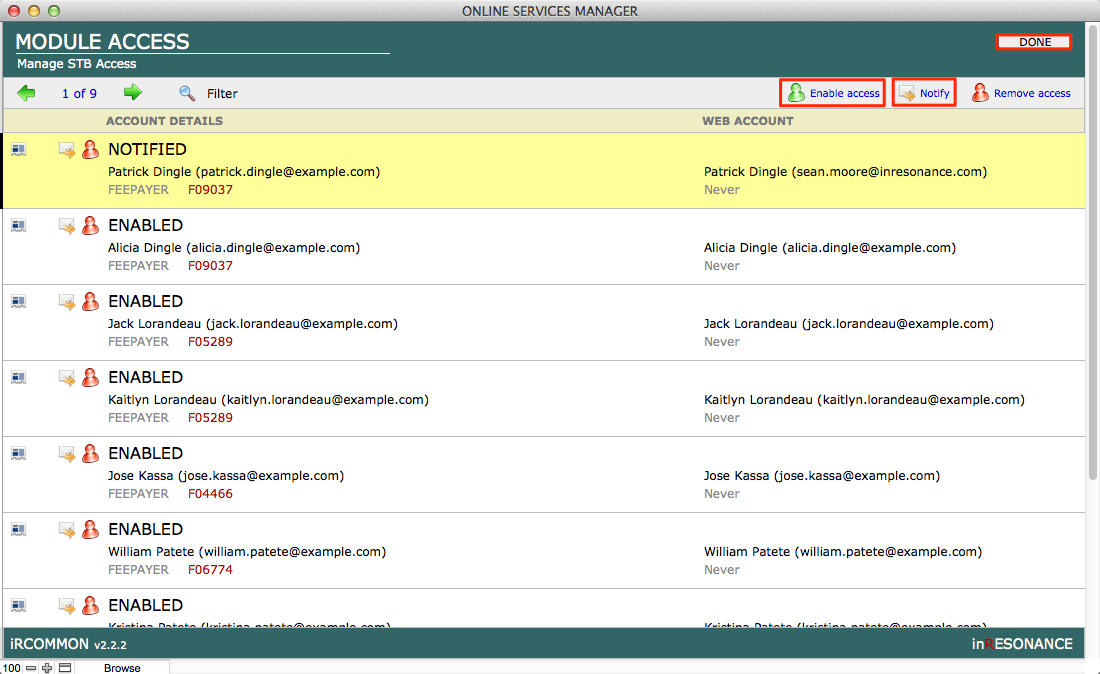
- The Module Access window of iR Common opens. Click Enable access.
When you enable access for accounts, the role “Fee Payer” is added to the account, for Student Billing, in iR Common.
- If you wish to send an email to the account(s), click Notify. The iR Common system is intelligent about which email will be sent to each account: If they already have an account for other iR web services (SFO, or FAM, for example), they get a reminder email. If this is their first web services account, they will get a new account notification.
Note: When you first implement BillPay, you can use BROADCASTER to send an email to all fee payers/accounts to alert them that a new service has been added (“Stay tuned”). Encourage them to watch for an email with their personal account login information.
- Click Done.
For a more detailed explanation, read the following article, Creating Accounts in BillPay.
BillPay Preferences
Setup for BillPay is minimal. Most tasks will be completed by your implementor.
Re-retrieving Online Payments from BillPay
- Navigate to BillPay Preferences by clicking the gear icon in the top right task area.

- Retrieval timestamp on the General tab shows the last time data was retrieved. To re-retrieve transactions, you can manually change this date to the past and re-retrieve.

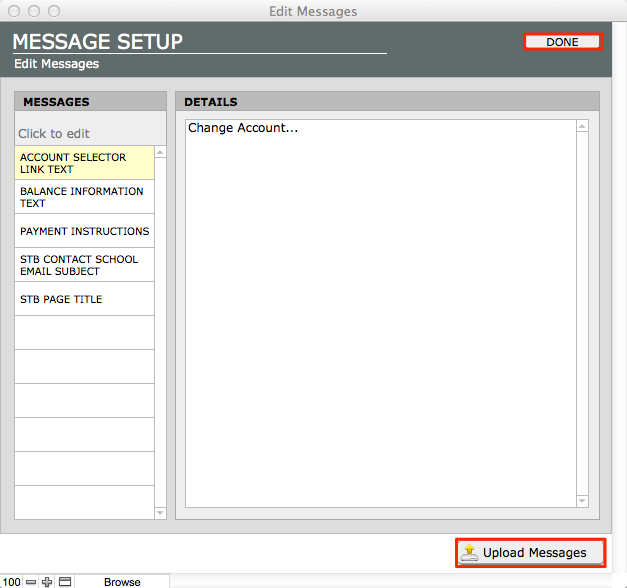
Editing BillPay Messages
General messages can be edited in BillPay Preferences > Website > Edit Messages. This will open Message Setup.

- Click on the message that you would like to edit. These messages are specific to BillPay.
- Click Upload Messages.
- Click Done.
The Web Side (Family View)
What the Family/Fee Payers will see online
When the family (and potentially, a corporate fee payer) logs in, they will be presented with the BillPay website screen. At the top of the screen, the name of the Student Billing account is displayed. If this fee payer has multiple accounts, a drop-down menu will allow the account holder to navigate among their accounts.
There are two possible modes for BillPay. These modes are set within BillPay Preferences:
- If the school accepts online payments
- If the school displays billing information only
The school accepts online payments
The BillPay website has three tabs:
- Make a Payment
- Invoices
- Payment History
Make a Payment tab
On the Make a Payment tab, the account holder can:
- View account balance.
- See all invoices with a balance remaining.
- By default, the payment amount entered next to a given invoice is the minimum amount due now for the invoice. The payer can edit the amount of the payment to be allocated to each invoice displayed.
Note: If a tuition invoice is scheduled, the amount due will reflect only the payment due now, not the entire balance.
- See PDFs of the invoices listed on this page.
- See pending payments – These are payments that have been successfully completed online but the transactions have not yet been retrieved and processed by the school.
- Make a payment and allocate the payment to specific invoices. Payment amounts are editable.
- Continue to a secure payment page.
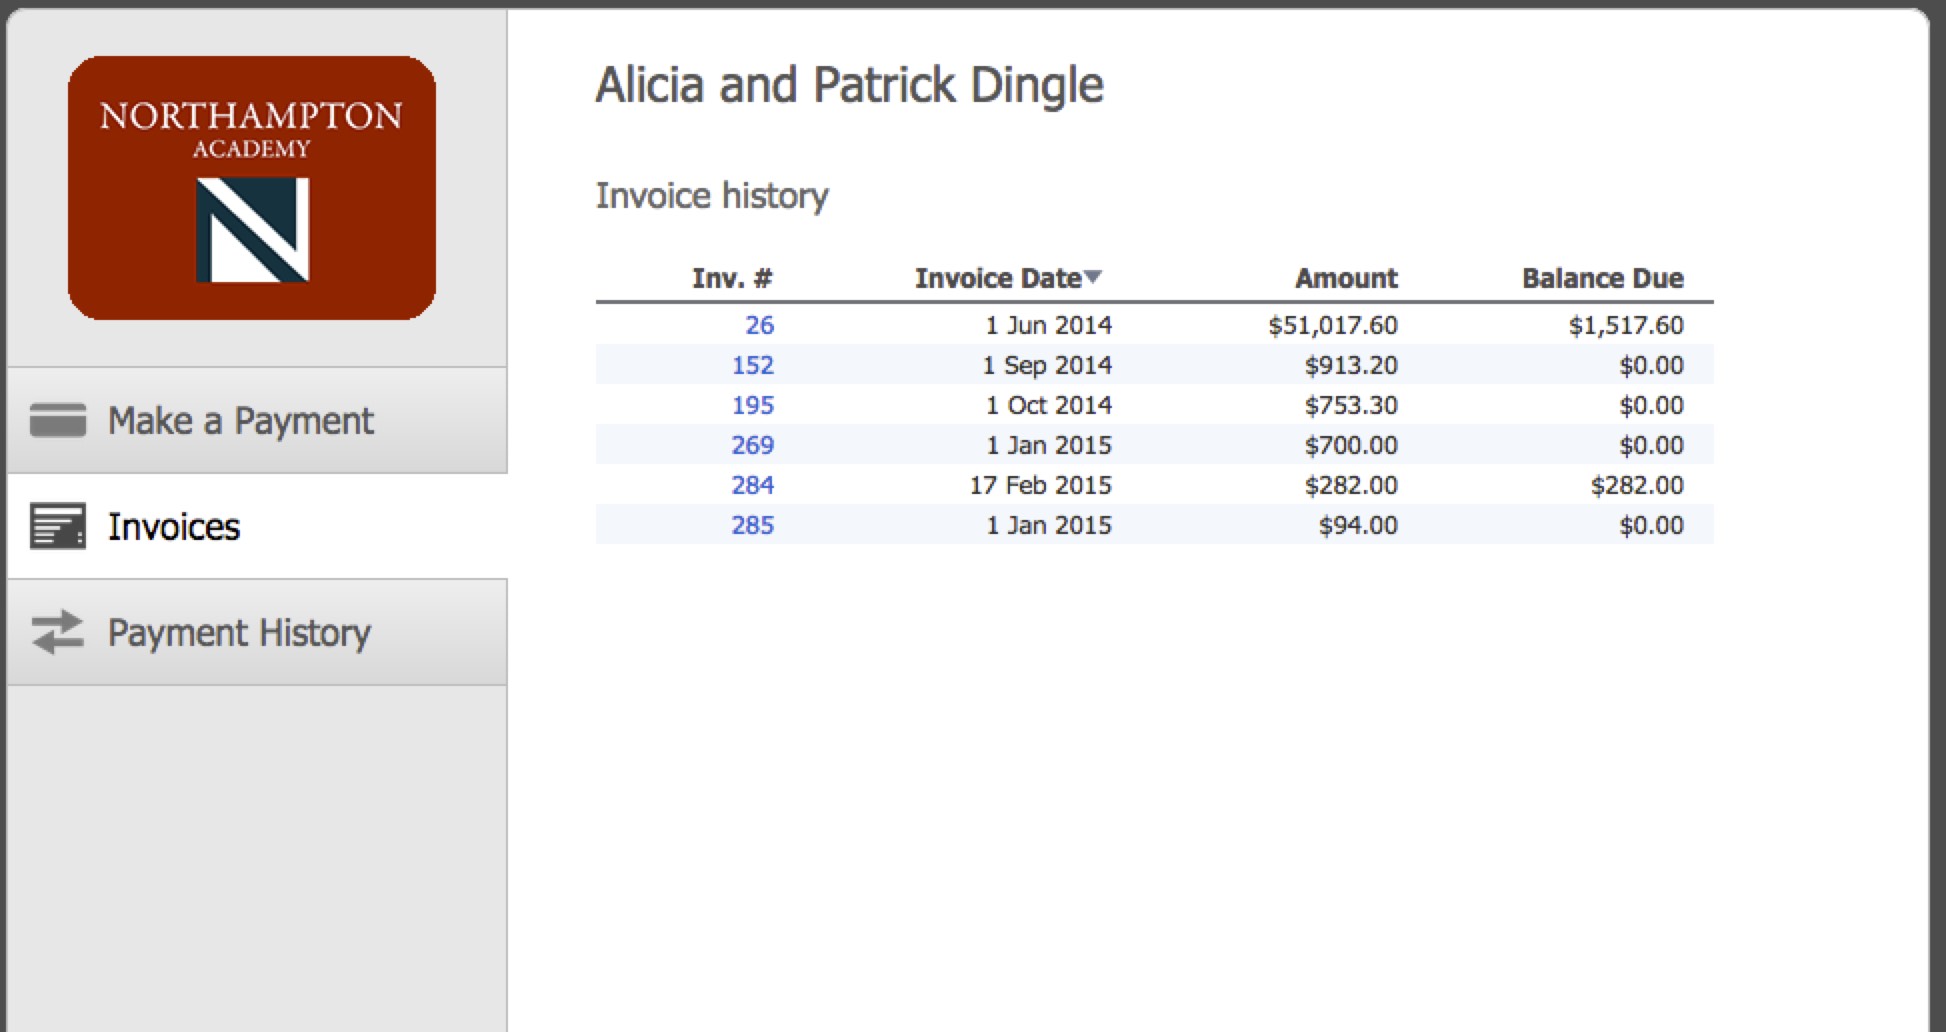
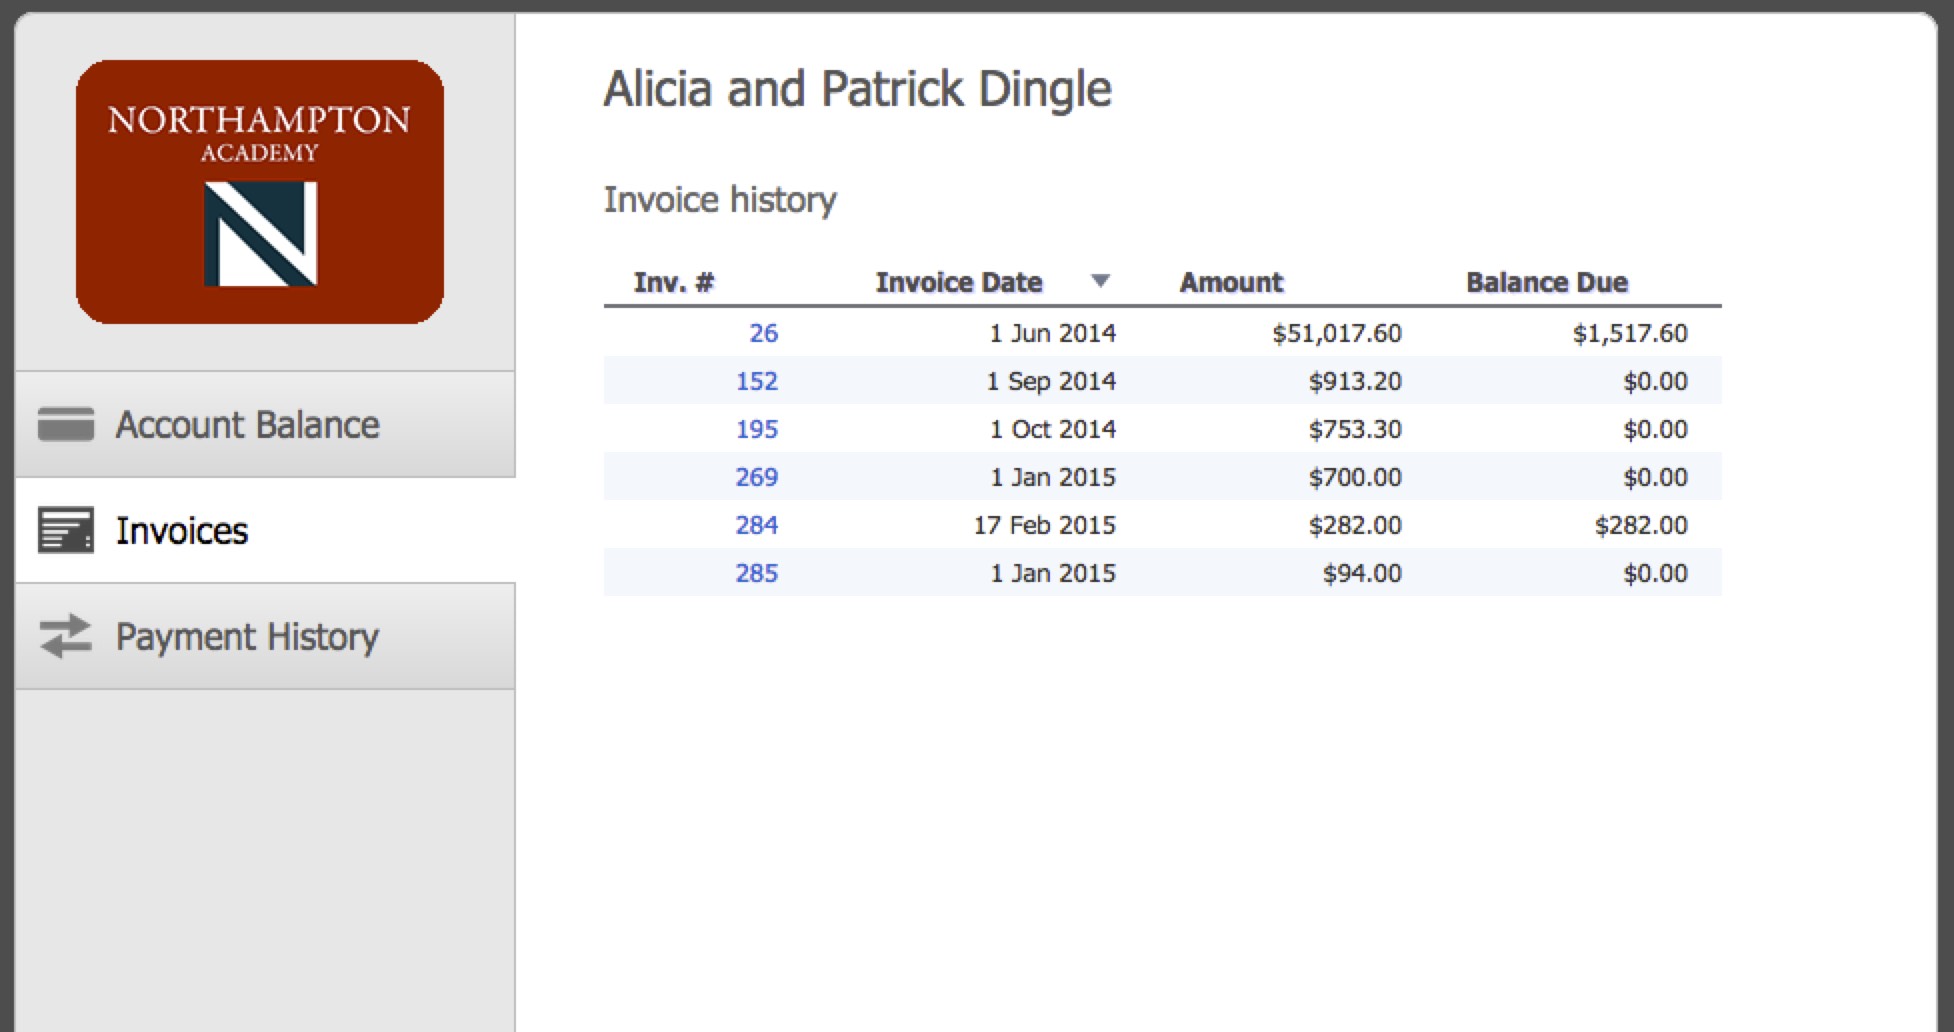
Invoices tab
On the Invoices tab, the account holder can:
- View all invoices issued to this account, as PDF documents.
Payment History tab
On the Payment History tab, the account holder can:
- View their full payment history, from the date Student Billing first became operational at the school.
My Login
When a fee payer is logged into their BillPay account, they can adjust their email address and password by clicking on the link My Login in the top task bar.
The school displays billing information only (no payments)
The BillPay website in this case has has three tabs:
- Account Balance
- Invoices
- Payment History
Assisting a Family
Want to assist a family? The Student Billing admin can impersonate a family and log into their BillPay account to see what the family will see.
- From Student Billing, use the More menu to enter Accounts. This navigates you into iR Common Account Manager.
- Select your test account.
- Find the Student Billing Fee Payer line. Enter the Family ID for the family you wish to impersonate.
- Click Upload changes.
- In a browser, enter the url for the family website and login using the credentials for the test account.
You will be looking at the family you wanted to impersonate.
NOTE: Do not change any data here. You are in the live account for the family.