Create a deposit for cash and check payments received.
NOTE: Deposit records for EFT payments will be created automatically.
Creating a Deposit
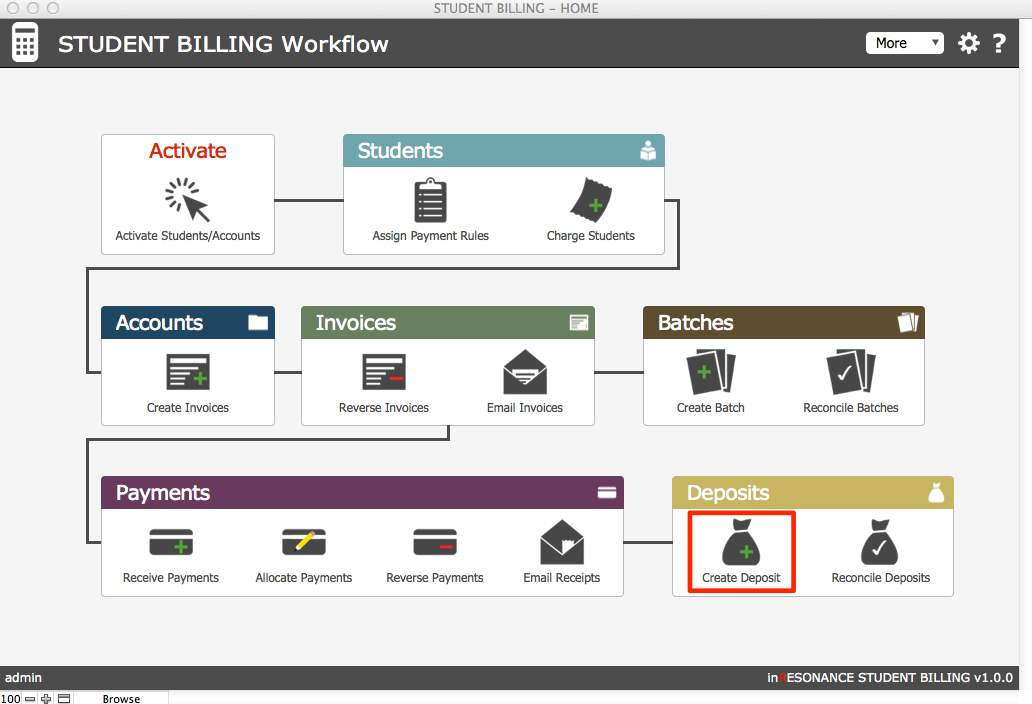
- From the Student Billing Workflow screen, click the task Create Deposit.
The Create Deposit window opens, where payments that have not yet been deposited will appear. You may deposit all that appear, or only some of these payments.
- Enter the Deposit Date.
- Enter the GL Code for this deposit.
- Add a Memo if you wish.
- You may select only one certain type of payment to deposit, or Select All using the button above the list. Alternatively, click the checkmarks next to payments you wish to deposit. A total at the bottom of the screen will show you the deposit of payments selected for this deposit.
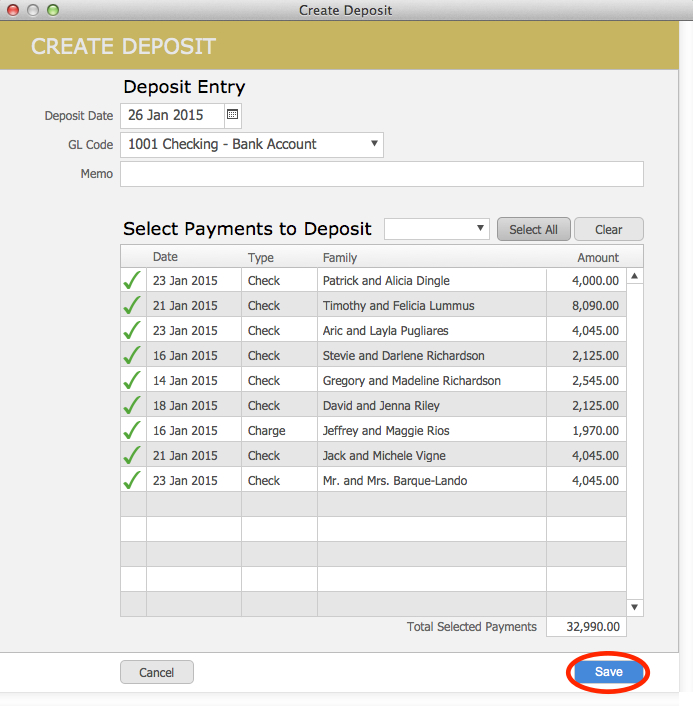
- Click Save. Your deposit record will be locked.
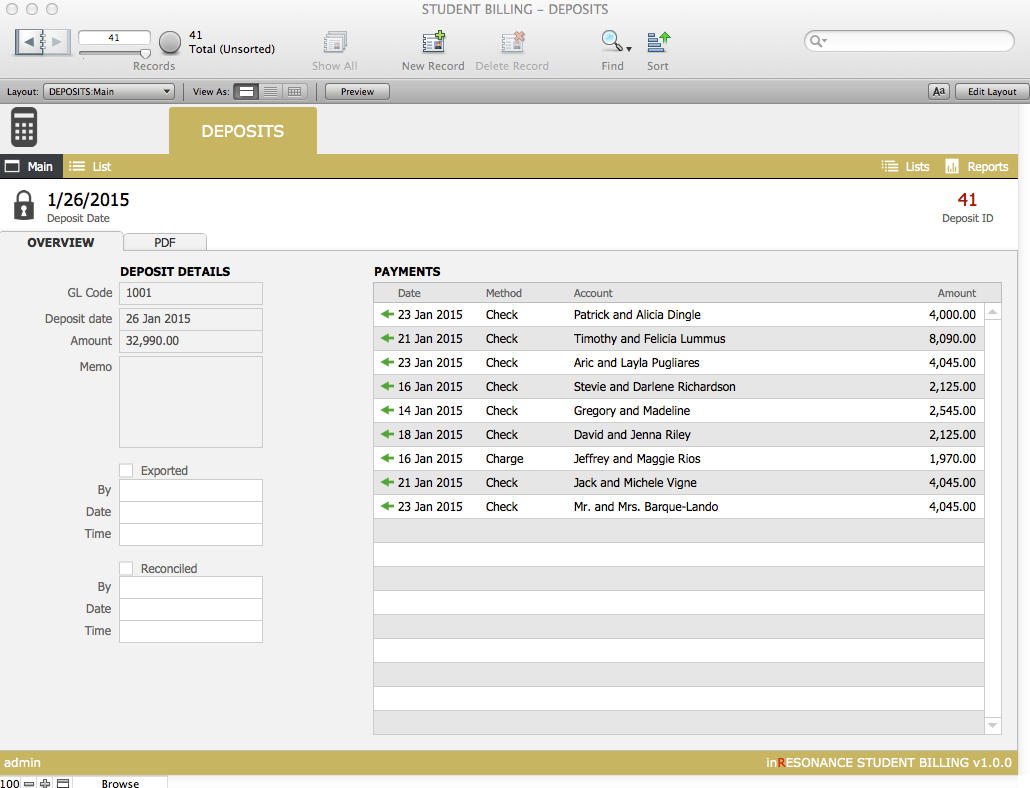
- The Main detail view of the new deposit record will open.
- Click on any green arrow to view an individual payment record, with allocations.
Exporting Deposits
For accounting purposes, you will want to export a GL Summary Report of Deposits. The GL Summary Report can be run for a single deposit or a found set of deposits.
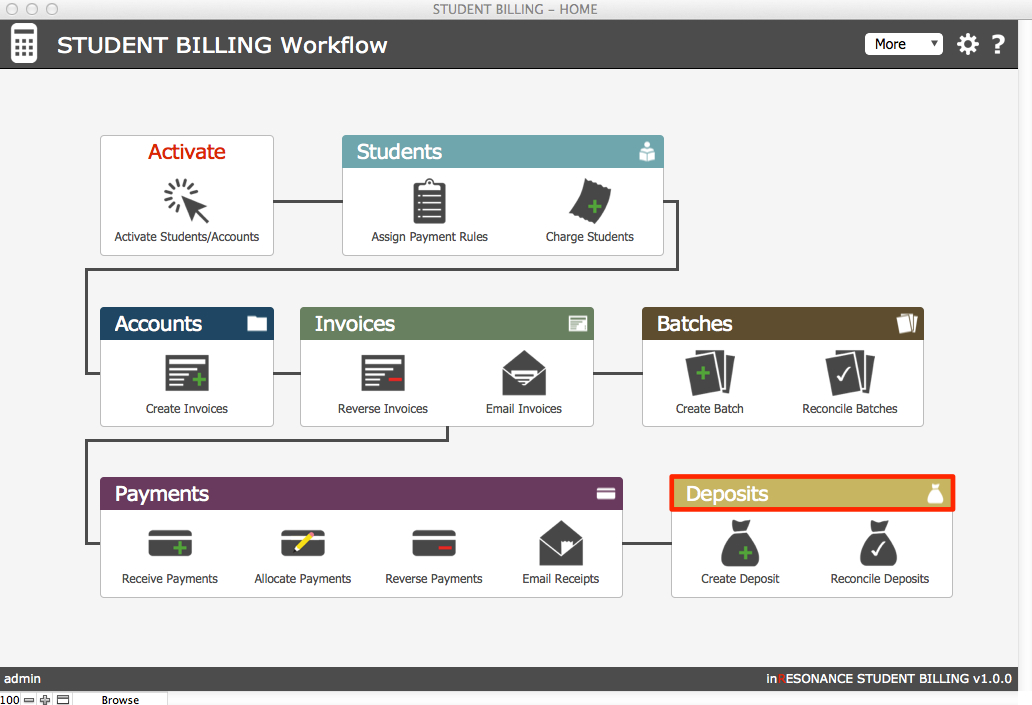
- From the Student Billing Workflow screen, click on the Deposits color bar to enter the Deposits domain.
- In List view, you can see a list of all deposits. This is a good place to perform a find for a deposit or group of deposits by Deposit ID number or Deposit Date range.
- When you have your found set of deposits, click Reports in the task bar.

- This opens the Reports screen for Deposits domain. Click on GL Summary Report. This is the report you will share with accounting for deposits.

- Return to the Deposit List or the Main view of a deposit record to mark it as Exported and/or Reconciled.