Creating a new letter template
This chapter will detail how to create a letter. For each letter you will follow these steps (DRAE):
- Duplicate an existing letter;
- Rename the duplicate letter;
- Attach the new, renamed letter to the Letters Org screen;
- Edit the letter.
The letters you create for these exercises can be deleted later as they are for training purposes only. It is important that you do not edit the existing sample letters but leave them as they are so that you and others can refer back to them as needed.
To create a letter:
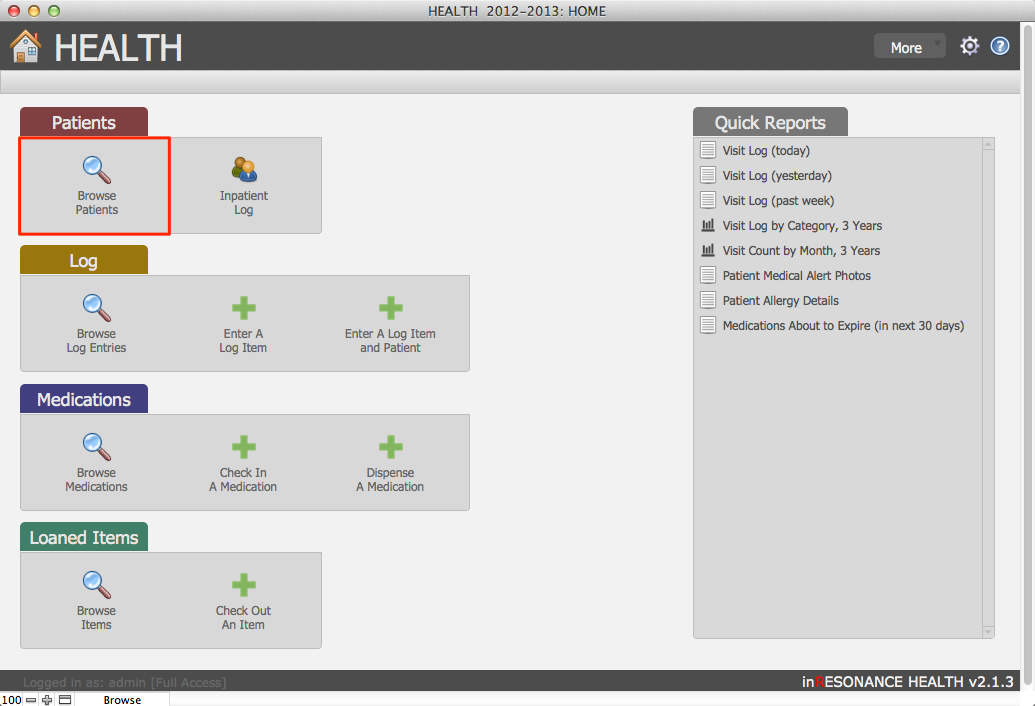
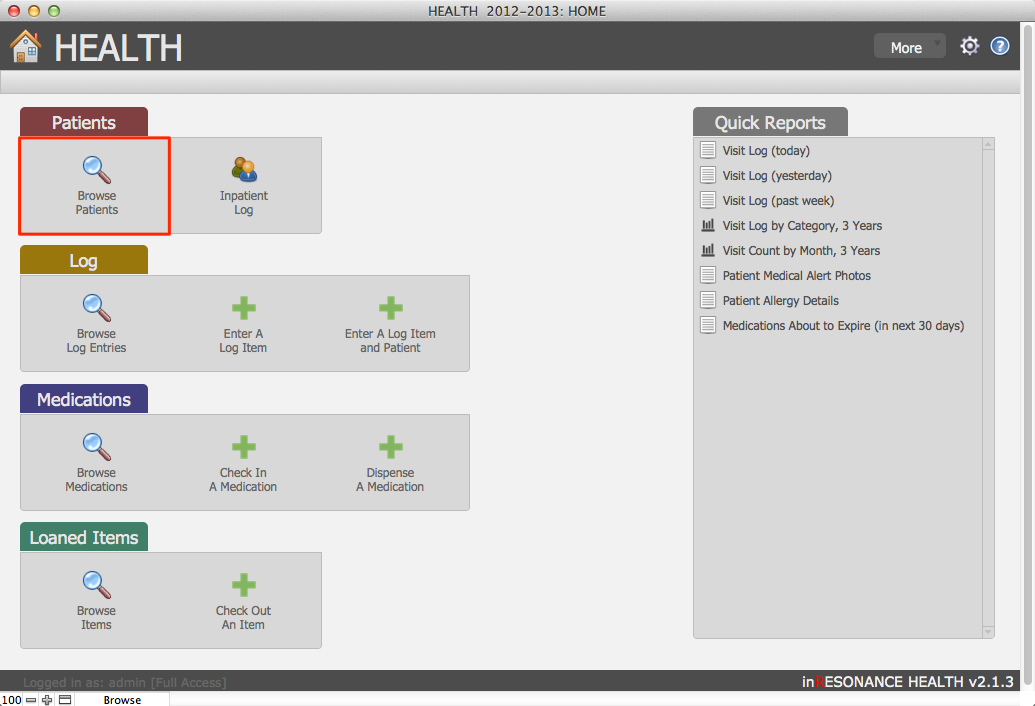
- From the Home screen, in the Patients section, click Browse Patients.
- Click the Letters & Labels button in the top right of the task bar. This will take you to the Letters & Labels Org screen.
Step 1: Duplicate a Layout
- Make sure you are on the letter layout that you wish to duplicate. For this documentation we will use the Example Letter.


- Switch to Layout mode by selecting Layout Mode from the FileMaker Pro View menu.
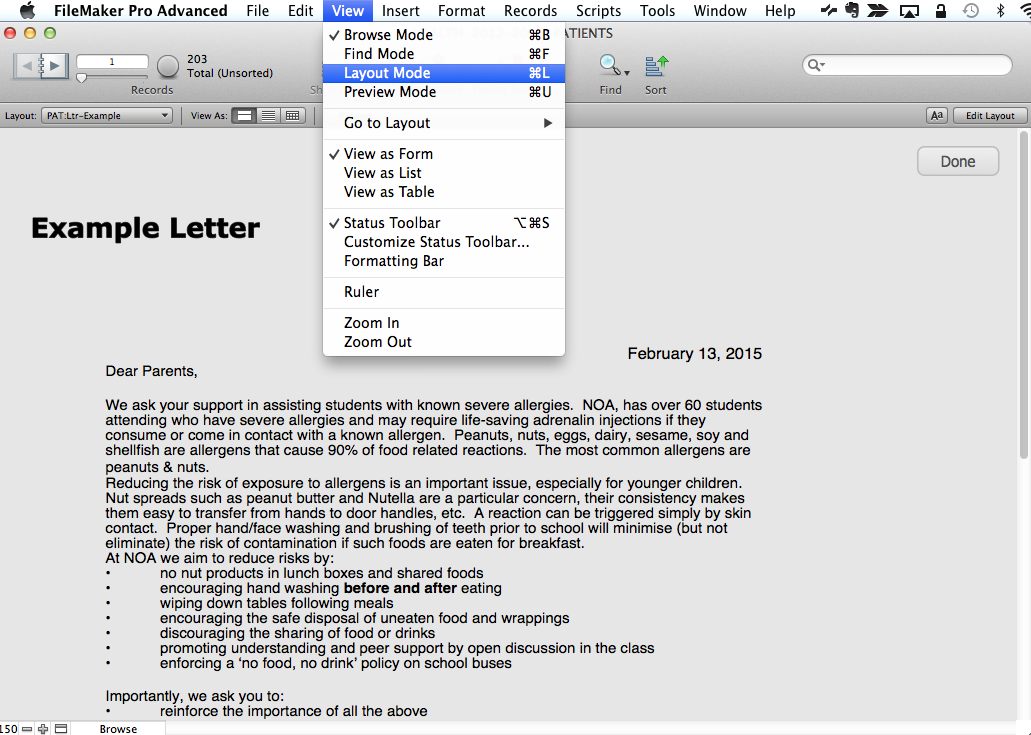
- Select Duplicate Layout from the FileMaker Pro View menu.

- You may not notice anything new but the existing layout has been duplicated and renamed with the original name and the word copy appended to it.
- In this case, the duplicated letter is named PAT:Ltr-Example Copy.

- To verify this, click on the Layout menu below the Book. A list of all the existing layouts in the file will appear.
- Scroll all the way to the bottom. You will see your new layout listed as the last layout with a checkmark next to the name to indicate that you are currently on that layout. Make sure your cursor is on the PAT:Ltr-Example Copy and release the cursor. This will return you to your new letter.
Step 2: Rename the New Layout
Now you need to give your layout a more meaningful name. Letters in HEALTH start with the prefix PAT:Ltr-. To be consistent, your letter layout should follow the same convention. The name of the layout should indicate the letter’s purpose.
- In Layout mode, select Layout Setup from the FileMaker Pro Layouts menu.
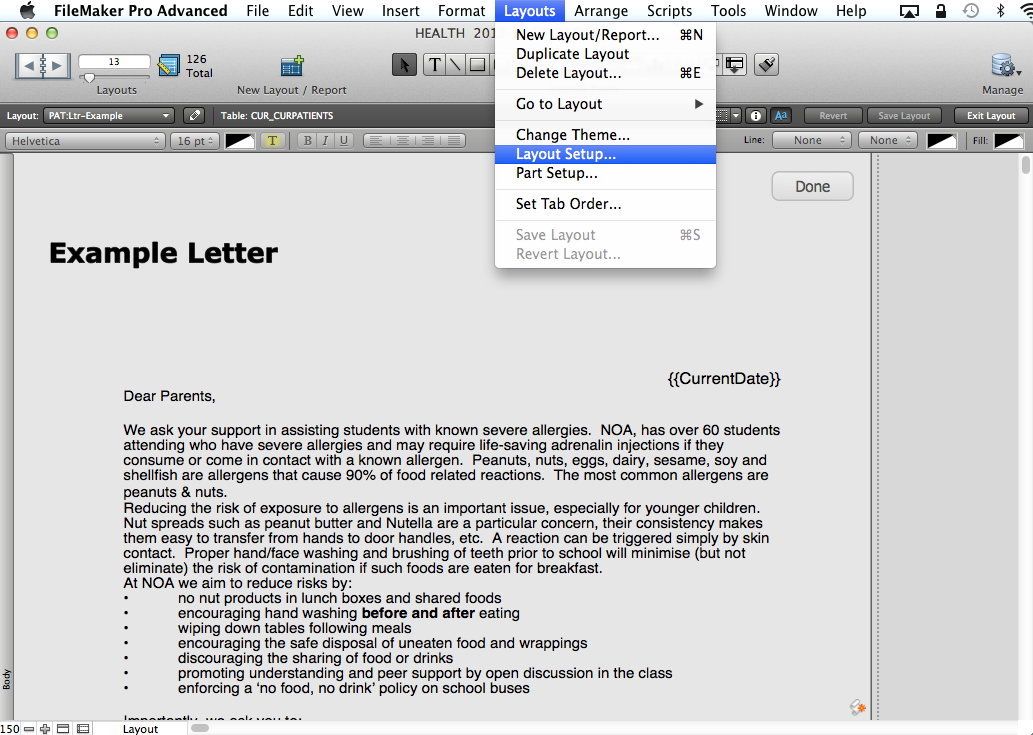
- Type a name in the Layout Name area. For example, PAT:Ltr-Allergies.

- Make sure that there is NOT a check in the Include in layouts menus checkbox.
- This will remove your letter from the Layout menu while in Browse mode.
- You can always navigate to your letter from the Layout menu while in Layout mode but you want to keep the Layout menu uncluttered in Browse mode.
- Users will navigate to your letter via the Letters & Labels Org screen once you attach it with a button to the Org screen.
- Click OK. Your letter now has a name.
- You can verify this by clicking on the Layout menu as you did before while in Layout mode. Your new letter will still be at the bottom of the list but it will now reflect the new name.
Switch to Browse mode and click on the Layout menu.

Notice that your new letter does not display in the menu while in Browse mode. Until you attach your letter to the Letters & Labels Org screen, you will have to switch to Layout mode to navigate to it.
Step 3: Attach Your New Layout to the Letters & Labels Org Screen
Letters in HEALTH get connected to buttons in the Letters & Labels Org screen. To connect your letter to a button:
- In Browse mode, navigate to the Letters & Labels Org screen.
- Switch to Layout mode from the View menu.
- With the arrow pointer tool, hold the option key on the keyboard and click and drag the Example Letter button to an unpopulated space on the screen.
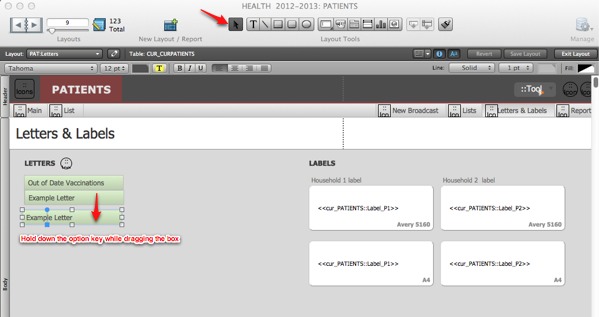
- With the arrow pointer tool, double click on the newly copied button. The Specify Button dialog box will appear.
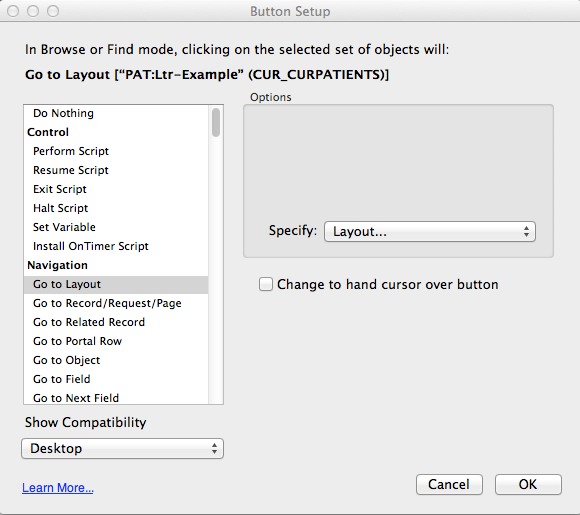
- Select Go to Layout under Navigation in the window on the left side of the dialog box.
- Click the Specify pull-down menu in the Options area on the right side of the dialog box. A list of all the layouts in the file will appear.

- Click to select your new layout from the list. It will be at the bottom. For example, if you named your letter PAT:Ltr-Allergies, you will see that name at the bottom of the list. Click OK.
- Make sure that the Change to hand cursor over button checkbox has a checkmark in it.

- If it doesn’t, click in the checkbox.
- When the user moves his or her cursor over the button, it will indicate that it is indeed a button as the cursor changes to a hand icon.
- Click OK. You will be returned to the Letters & Labels Org screen.
Now you need to rename the button to reflect the letter’s purpose. To rename your button:
- In Layout mode, select the Text tool from the Tool Pallet. Your pointer becomes a cursor.

- Double-click on your button. The name of the button will be highlighted. If not, double-click again on the name.
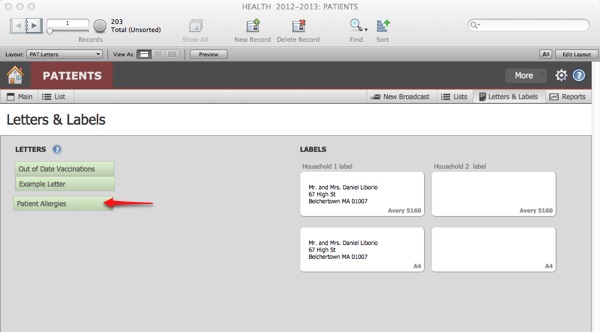
- Type the name of your button. The name should reflect the letter’s purpose. For example, if your layout is named PAT:Ltr-Allergies, name your button something like Patient Allergies.
- Switch back to Browse mode. Click save changes when prompted.
- Click on your button. It will navigate you to your letter.
Step 4: Edit the Layout
Now that you have a new letter layout that has a name and is connected to the Letters & Labels Org screen, you can edit the letter. For more details, see the article Working with Text.
- In Browse mode, navigate back to your letter using your newly created button on the Letters & Labels Org screen.

- Click Edit Layout to enter layout mode.
- Using the arrow pointer tool, point to the body of your letter and click once to select it. Handles will appear around the block of text.
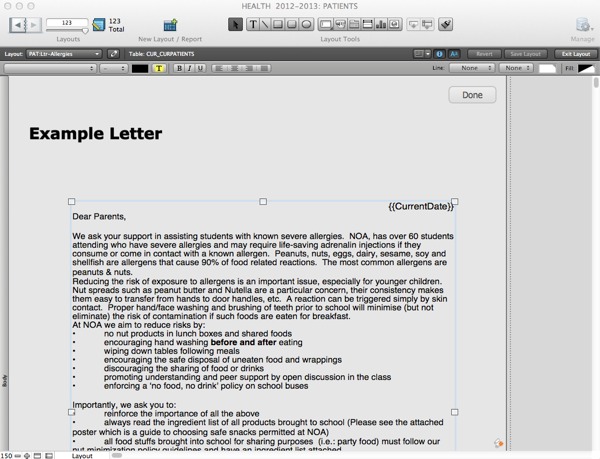
- Using the text tool, click into your letter and edit the body text as needed.
- Switch back to Browse mode, click Save changes in dialog box.
Producing and printing a letter for a found set
- From the Home screen, in the Patients section, click Browse Patients.
- Use the Find icon in the FileMaker status bar across the top of the screen to perform a find for the patients for whom you would like to produce a letter.

- Click Letters & Labels in the top right of task bar. This will take you to the Letters & Labels Org screen.
- Select the letter you would like to use by clicking the appropriate button.

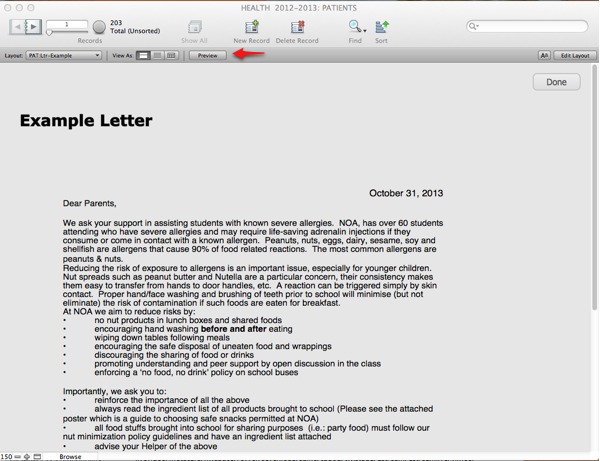
- In the FileMaker status bar click Preview.
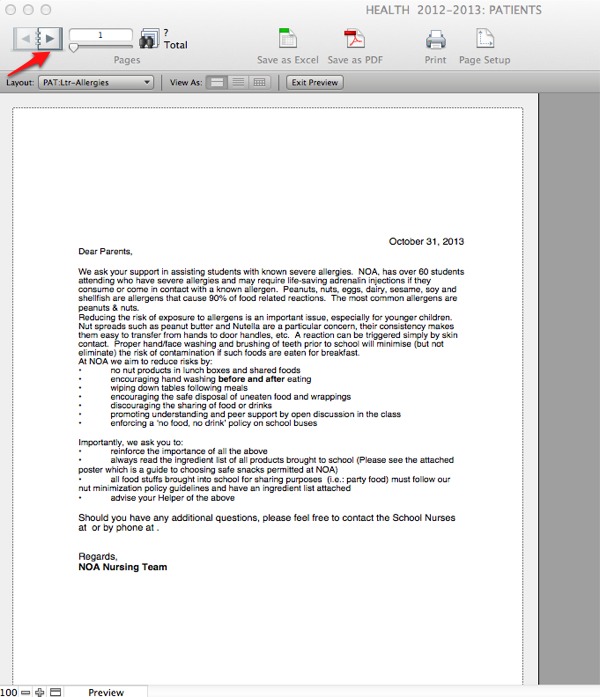
- Click through the book. Notice there are letters for each patient in your found set and check that the formatting of your letters is correct.
- In the FileMaker status bar click Print.
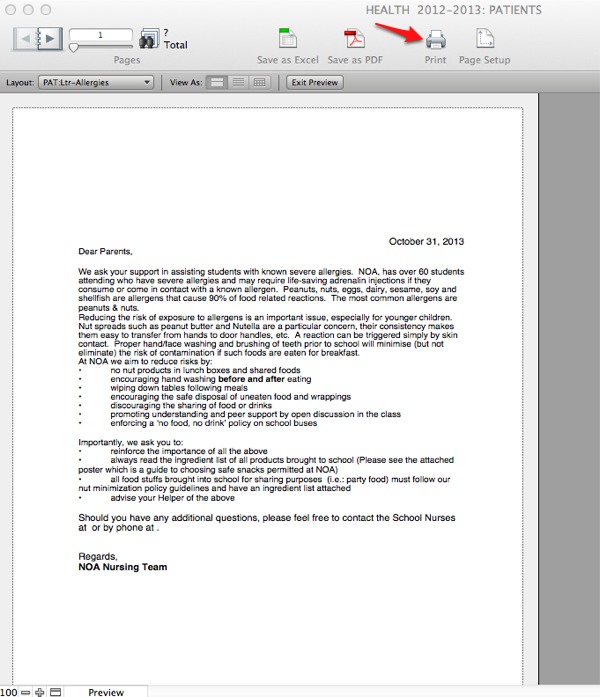
- Check that your printing settings are correct.
- Click Print.
Printing labels for a found set
- After you have printed your letters, click Exit Preview.
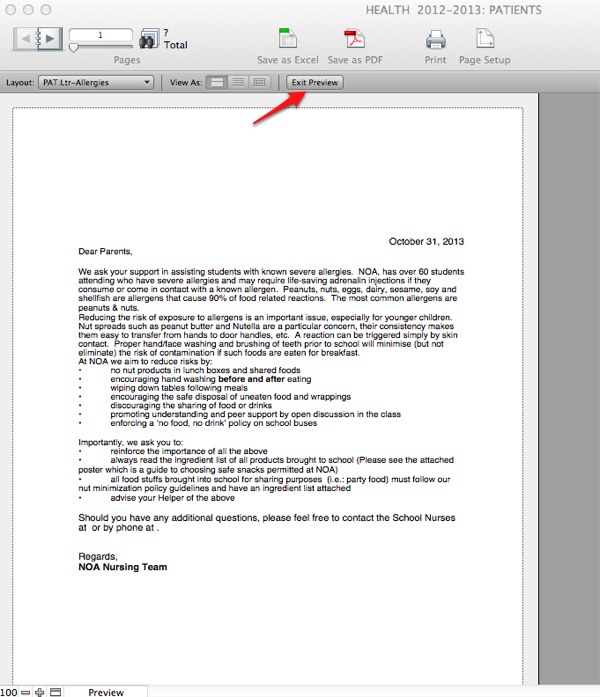
- This will bring you back to your letter. Click Done.
- Check that you still have the correct found set.
- From the Letters & Labels Org screen, select the label you want to print.

- Enter Preview mode by selecting from the FileMaker View menu.
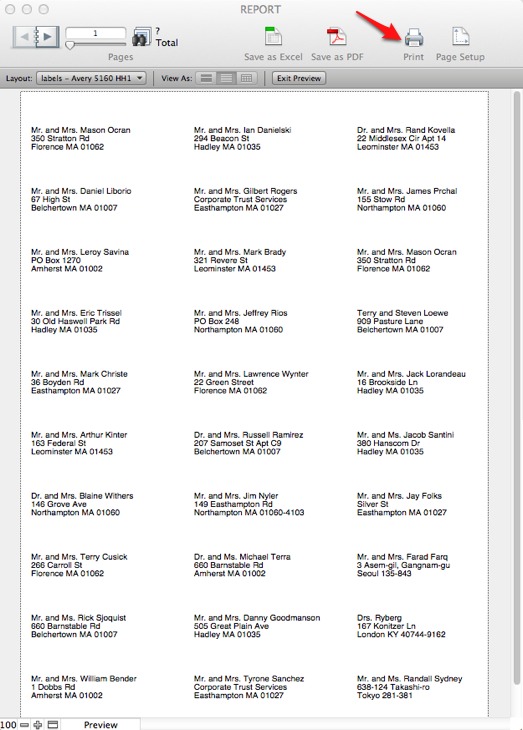
- In the FileMaker status bar click Print.
- Check that your printing settings are correct.
- Click Print.


