The most efficient way to populate your new solution is to import data into ADVOCATE from existing files. Student biographical information, SDQs, GPA and test data, and college applications can all be imported into ADVOCATE directly from other Excel file formats. It is important to refer to the information on the Import Help screen when importing data into ADVOCATE, as necessary data formats will be detailed. You may want to refer to the FileMaker Pro User’s Documentation for a more complete explanation of importing data.
NOTE: New students, colleges, college applications, test scores, and counselor records can all be created manually at any time.
Importing Student Biographical Data
Student information can be imported into ADVOCATE from an existing Excel file.
- Navigate Home > Utilities.
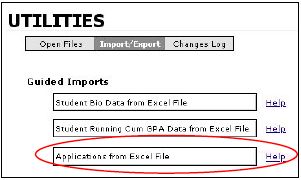
- Click the Import/Export tab.
- Click the Help button next to the Student Bio Data from Excel File button for a description of how your data must be formatted. It is important that you follow the detailed conventions or your data will not import correctly.

- Click Close when finished.
- Make sure your data is in the necessary format and click the Student Bio Data from Excel File button.
A message will appear, reminding you of how data must be formatted.
- Click Continue.
- Navigate to the file you wish to import. Click Open.
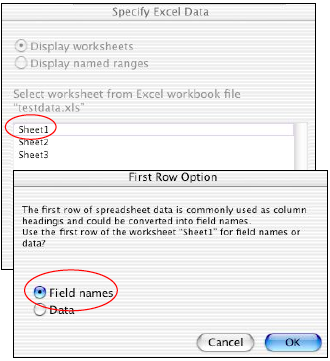
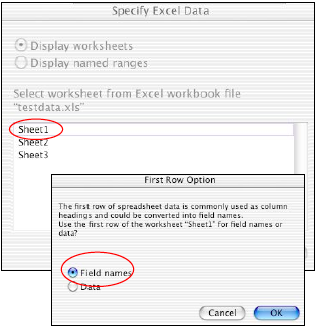
- The Specify Excel Data dialogue box may appear. Select the desired worksheet if there is more than one.
- Select Field Names from the First Row Option dialogue box.
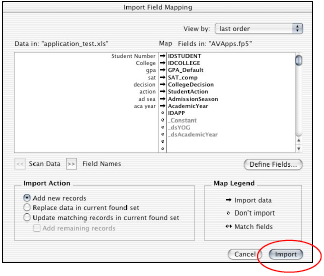
- The FileMaker Pro Import Field Mapping dialogue box will appear. Leave the View by and Import Actions options as they are. Click Import.

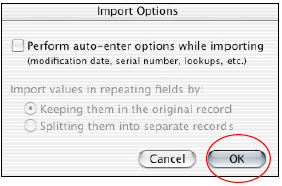
- The Import Options dialogue box will appear. Make sure nothing is selected and click OK.
You will get a message saying that the import is complete.
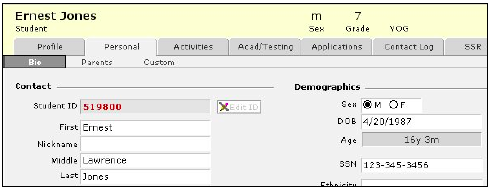
- Check your data to ensure it has been imported correctly by navigating Home > View/Edit Student records > Personal > Bio.
The student ID, name information, sex, date of birth, age, SSN and ethnicity are completed.
- Navigate Profile > Overview. Notice that the students’ enrollment status is Enrolled.
- Navigate Personal > Parents. Notice that the Family Salutation has been completed based on the parent’s name and that that information has been entered in the Override. The address information is also completed.

NOTE: Student ID numbers will be auto assigned upon record creation. If you wish to change these numbers, you should do so now. Refer to the section, Managing Student Information for directions.
Importing SDQ Data
Student SDQ data is imported along with SAT1 and SAT2 data. See Importing Test Scores for directions.
Importing GPA Data
Student GPA data can be imported into ADVOCATE from an existing Excel file. The process is very much the same as the process for importing student biographical data described above.
- Navigate Home > Utilities.
- Click Import/Export button.
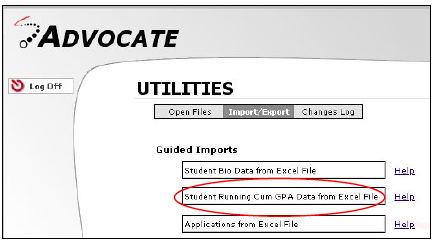
- Click Help next to Student Running Cum GPA Data from Excel File to understand how data must be organized to be imported correctly into ADVOCATE.
- Click Close when finished.
- Click Student Running Cum GPA Data from Excel File.
A message will appear, reminding you of how data must be organized.
- Click Continue.
- Navigate to the file you wish to import.
- Click Open.
- The Specify Excel Data dialogue box will appear. Select the desired worksheet if there is more than one.
- Select Field Names from the First Row Option dialogue box.
- The FileMaker Pro Import Field Mapping dialogue box will appear. Leave all the default options as they are and click Import.

- Leave the default setting in the Import Options dialogue box as they are and click OK.

You will get a message saying that the import is complete.
- Navigate Home > View/Edit Student records > Profile > Overview to ensure your data has been imported correctly.
Importing Test Scores
PSAT, ACT, AP and SAT scores can all be imported from standard electronic score reports provided by testing boards. SDQ data can be imported along with SAT scores as well. Test score files are: AVPSAT, AVSAT1, AVSAT2, and AVACT.
When importing test score data, ADVOCATE attempts to match student social security numbers from the test score file with those in ADVOCATE. If a match is found, new test score records are linked to student records in AVSTUDENTS when the import is complete. If no match is found, test score data is imported into the appropriate test score file regardless. The test score record will have the test score data and student name but will not be linked to individual students in AVSTUDENTS. At some point you may choose to delete these records if these students never enroll in your school. When a student does enroll you can easily link his or her test score records to his or her student record in AVSTUDENTS once it has been created.
Importing SAT PSAT, ACT or AP Scores
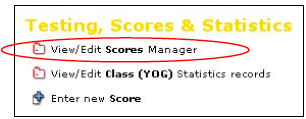
- Navigate Home > Testing, Scores and Statistics > View/Edit Scores Manager.
The Scores Manager screen will appear.
- Select Import Scores & SDQ.

- Select the electronic scores you wish to import by selecting the appropriate radio button from the Import Scores window. Click OK.
- The Import “Score Type” window will appear. For PSAT, ACT, and AP the choices are the same. If you select SAT, there are a few more options. Make the desired choices by clicking the appropriate radio buttons.
For all test data you will need to decide whether you would like to display All Records or Unreconciled records.
During the import process All records will display all students from the test file whether or not ADVOCATE is able to match them with existing students in the AVSTUDENTS file. Displaying all records gives you the ability to examine all students from the import file and adjust them as needed one at a time.
Unreconciled records displays only those students that ADVOCATE is not able to match during the import process. You can then manually attempt to match the remaining students at this point.
Regardless of whether or not a match is found, all data from the test file will be imported into the appropriate test file in ADVOCATE.
If you wish to have all records displayed:
- Select All records.
- Click OK.
- Navigate to the file from which you wish to import data and click Open.
The import will begin. Depending upon the amount of test data, this may take a moment or two.
- When the import is complete, if ADVOCATE has not been able to match all the test data to existing student records, a dialogue box will appear and ask if you wish to enter missing IDs or ignore them for unmatched data.
- If you select Ignore, a dialogue box will appear asking you if you are sure you wish to import all scores without matching IDs. If you are certain you wish to do this, click Import.
ADVOCATE will complete the import and you will get a message stating that the process is complete.
NOTE: Remember, all scores will be imported into the targeted ADVOCATE test file. Those that are not matched will not be linked to related student records in AVSTUDENTS, but a record for every test will be created in the appropriate test file. These unlinked records can be linked to student records at a later date or deleted if desired.
- If you select OK, the Score Reconciliation window will appear.
- From the list of students, select the corresponding student in ADVOCATE by clicking in the Student ID field or on the Find button.
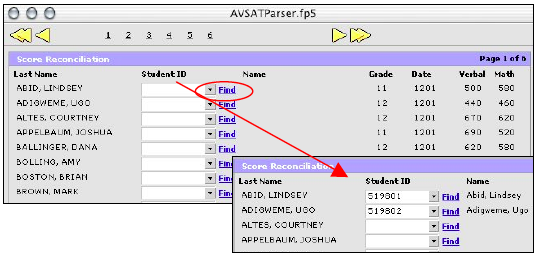
- Once you have reconciled the list of students, click Import at the bottom of the screen. It is ok to have some students not reconciled.
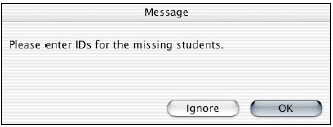
- If there are students who have not been reconciled, a dialogue box will appear asking you to enter missing student IDs. Click Ignore.
- A second dialogue box will appear asking if you are certain you wish to do this. Click Import.
- A dialogue box will appear when the import is complete. Click Continue.
ADVOCATE will navigate you back to the Scores Manager and the test scores will have been imported into the appropriate file. Check to make certain this has occurred by navigating to the appropriate test file.
If you wish to only have unreconciled records displayed:
- Select Unreconciled records. Any records for which ADVOCATE has found a match, will not be displayed.
- Click OK.
- Navigate to the file from which you wish to import data and click Open.
An Import dialogue box will appear and the import will begin. When the import is complete a dialogue box will appear asking you to enter missing IDs.
- Click OK.
The Score Reconciliation window will appear.
- From the list of students, select the corresponding student in ADVOCATE by clicking in the Student ID field or on the Find button.
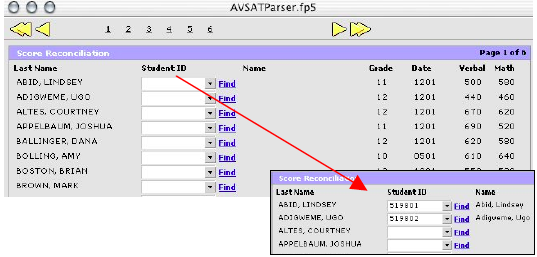
- Once you have reconciled the list of students, click Import at the bottom of the screen.
- If there are students who have not been reconciled, a dialogue box will appear asking you to enter missing student IDs. Click either Fix IDs or Ignore.
- If you choose Fix IDs, the Score Reconciliation window will appear again giving you another opportunity to match students. If you choose Ignore, a second dialogue box will appear asking if you are certain you wish to do this. If so, click Import.
- A dialogue box will appear when the import is complete. Click Continue.
ADVOCATE will navigate you back to the Scores Manager, and the test scores will have been imported into the appropriate file. Check to make certain this has occurred.
Importing College Applications
Students’ college application data can be imported into ADVOCATE from an existing Excel file.
- Navigate Home > Utilities > Import/Export.
- Click Help next to Applications from Excel File to understand how data must be organized to be imported correctly into ADVOCATE.
- Click Close when finished.
-
Click Applications from Excel File.
A message will appear, reminding you of how data must be organized.
- Click Continue.
- Navigate to the file you wish to import and click Open.
- The Specify Excel Data dialogue box will appear. Select the desired worksheet if there is more than one.
- Select Field Names from the First Row Option dialogue box.
- FileMaker Pro Import Field Mapping dialogue box will appear. Keep the default selections and click Import.
- Keep the default selections from the Import Options dialogue box and click OK.

A message will appear saying that the import is complete.
- Navigate Home > View/Edit Student records > Applications to ensure your data has been imported correctly.