There are several label and envelope layouts in PORTAL. Navigate to the Labels screen by clicking the Labels button in the top right task bar.
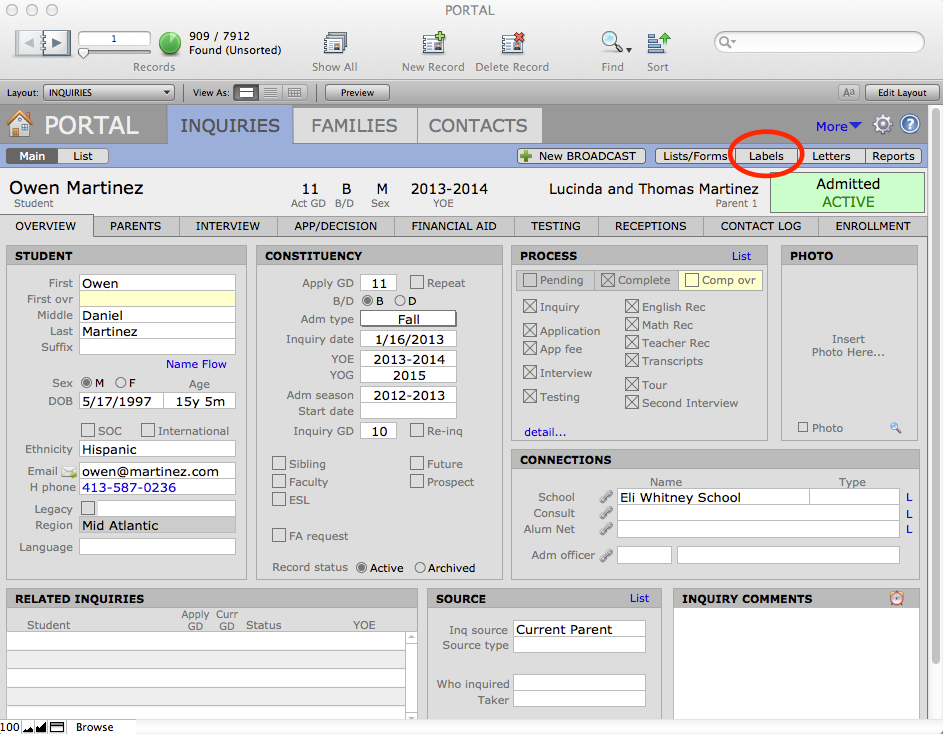
Each label, nametag, or envelope layout on the Labels screen is itself a button to navigate to that specific label layout.
- Get the found set of individuals for whom you want to print labels, nametags or envelopes.
- Navigate to the Labels screen by clicking the Labels button in the task bar.
- Click the button for the label you wish to print; note there are several choices of Address Labels, each with a different address format.
- The labels will be merged and displayed in Preview mode.
- You will see buttons across the top of the Preview screen to Save as Excel, Save as PDF, or Print.
Adding a New Label Layout
- Navigate to Layout mode.
- Under the Layouts menu, select New Layout.
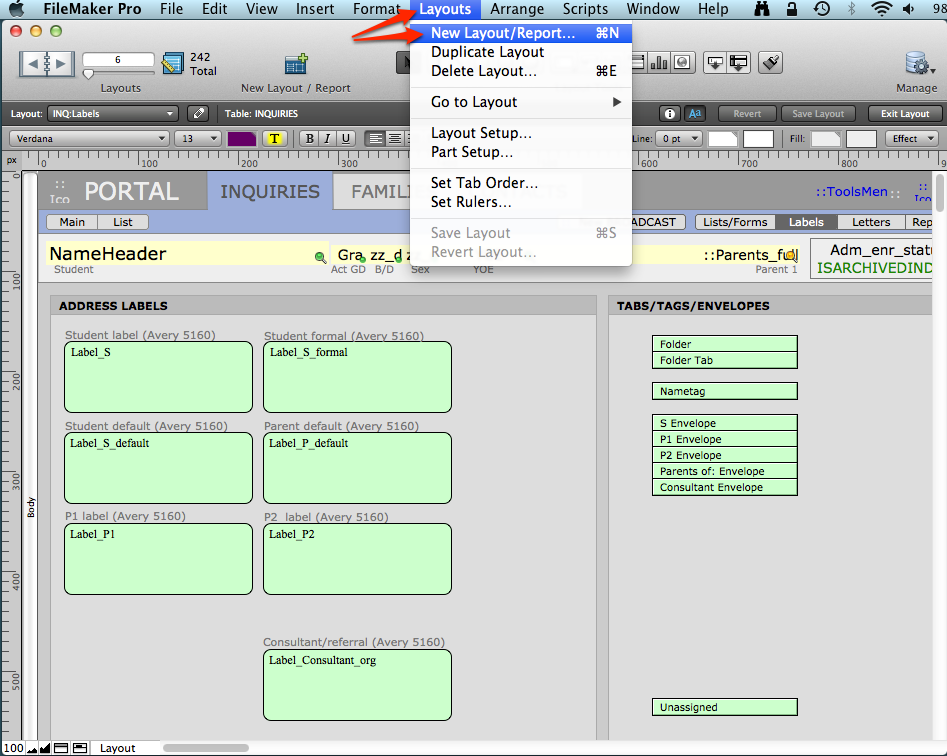
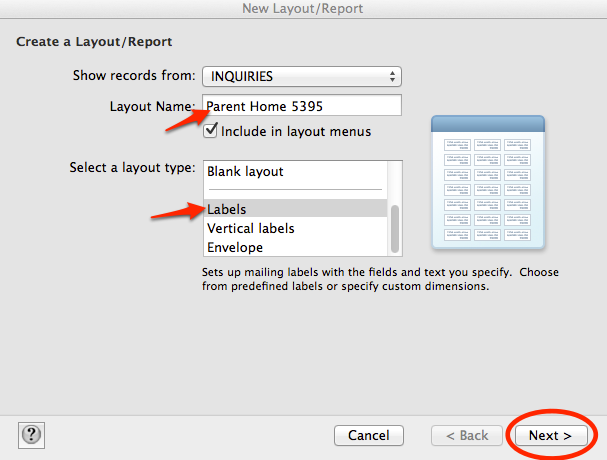
- In the New Layout/Report window, select the source file and name the layout as a descripton of the purpose and label size, in this example: Parents Home Address 5395.
- From the Select a layout type, scroll down until you see Labels. Select Labels and click Next.
- In the Specify Label Layout, select the radio button by “Use label measurement for”, and select your layout from the drop-down menu (in this case, Avery 5395). Click Next.
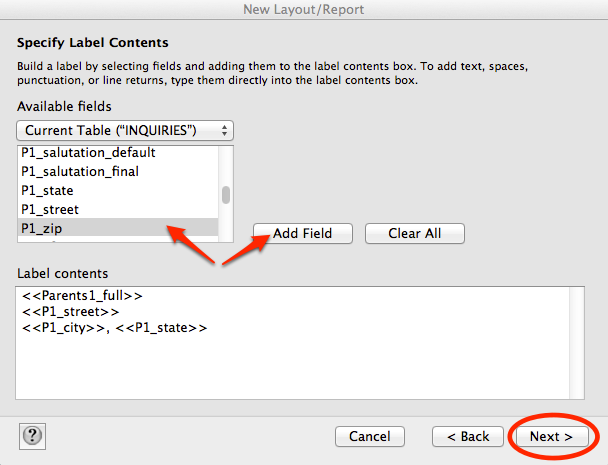
- In the Specify Label Contents window, select the fields and text elements needed for the label. For example, select Parents1_full, click Add Field. Then insert a Return after the merge field in the label Contents window. Then select P1_street, Add Field, press Return; select P1_city, Add Field, insert a comma and space; then select P1_State, Add Field, insert a space; select P1_zip, Add Field.
- Click Next.
- View in Preview mode to see your results.
NOTE: Often labels need several test printing rounds. Since label sheets are expensive, we recommend you Print page1-to-page1 on regular paper and hold it up to the light over a label sheet to see if it needs adjusting.
Specialized Tabs, Tags and Envelopes
Specialized labels, such as folder tabs and nametags, as well as a choice of envelope layouts are also found on the Labels screen. Specialized tabs/tags and envelopes included in PORTAL are:
- Folder—This is a half sheet label that is used to place on a file folder cover to identify the folder. It contains any basic information that exists at the time of folder creation with lines for adding data as the admission season progresses.
- Folder Tab—This is used to label file folder tabs. They contain the Name, Grade, Sex and Boarding Status of the candidate.
- Name Tags—This label contains the NameFull_formal = P2_full_final and P1_City, State and Country fields.
- Envelopes—Standard envelopes are included that are addressed to the same constituents as the labels — Students, Family 1, Family 2, Parents and Consultants.

