When a payment is received, you will record it and allocate funds to appropriate invoices within an account.
NOTE: Be sure to set the Payment Priority in STUDENT BILLING Preferences > Category tab. Doing so will direct the auto-allocation script to pay the higher priority line items on invoices before the lower priority items. Number 1 is highest and 5 is lowest.
Allocating a Payment
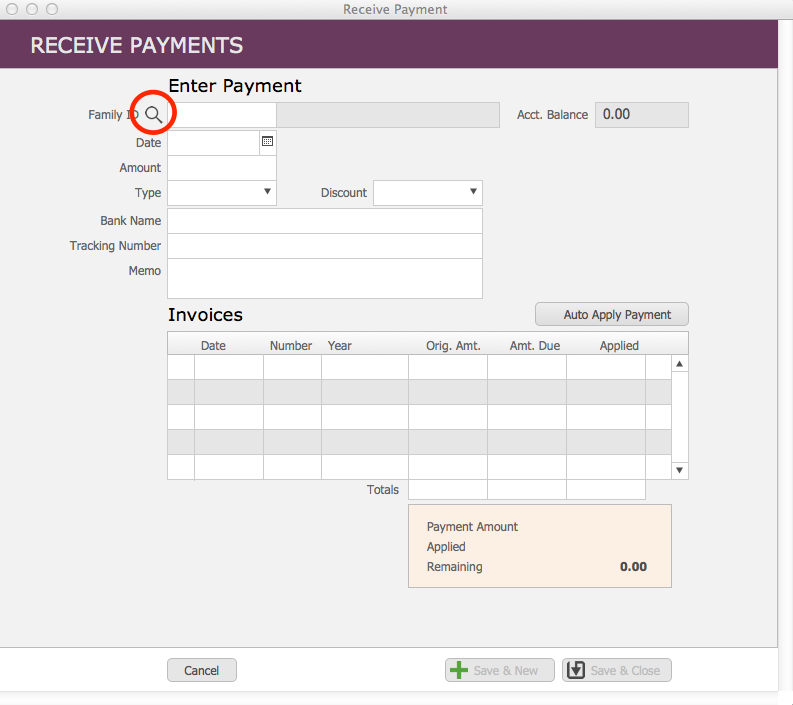
- From the Student Billing Workflow screen, click Receive Payments.

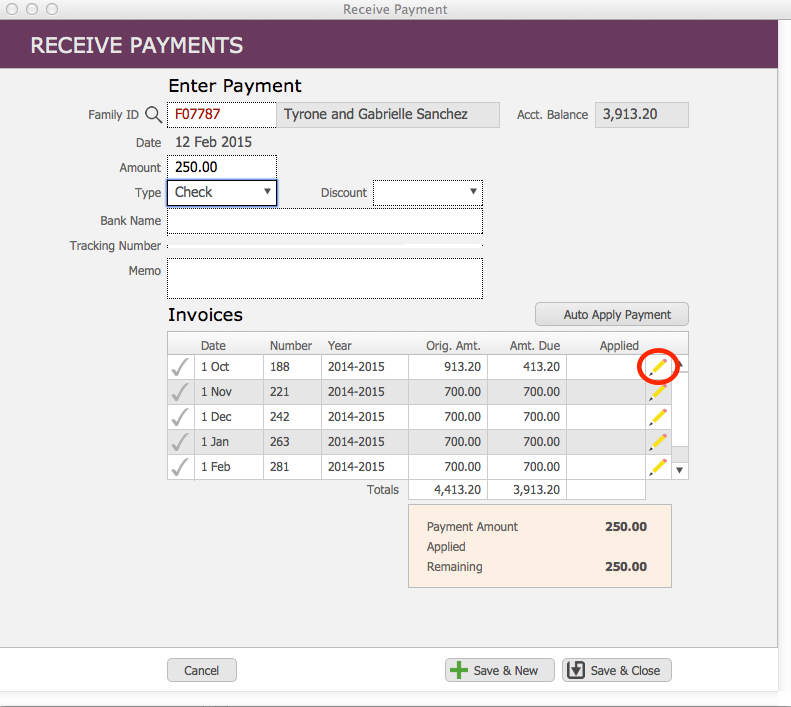
- The Receive Payments window will open.
- Click the spyglass icon to search for the Fee Payer by last name.
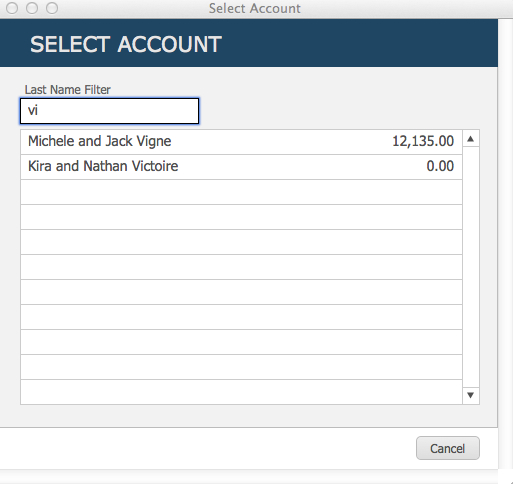
- A search window will open. Enter the last name of the account. A list of possible matches will appear. Click on the appropriate account. As soon as you click on a name, this window will close and the account information will autofill in the payment screen.
- Enter Date.
- Enter Amount received.
- Select the Payment Type from the drop-down menu; a second drop-down menu allows you to designate this as a Credit or Discount rather than a payment.
- Add Bank, Tracking Number, Memo if desired.
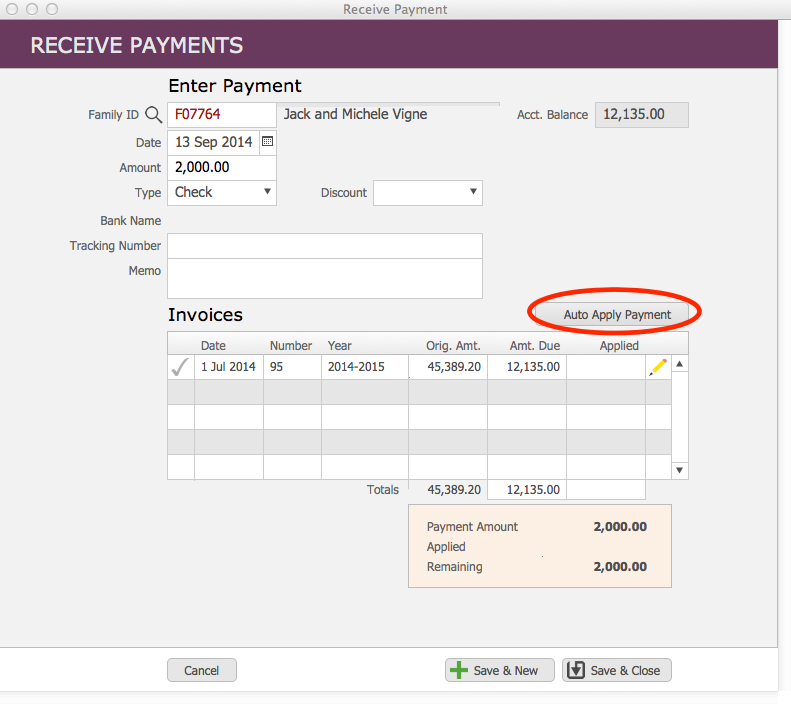
- Payments, credits, and discounts are applied to invoices. From the list of invoices, select the invoice(s) where this payment will be applied:
- Click Auto Apply Payment to have Student Billing allocate the payment (according to the payment allocation priority setup in Preferences), or click the checkmark(s) next to individual invoices displayed in the list to override the auto payment allocation.
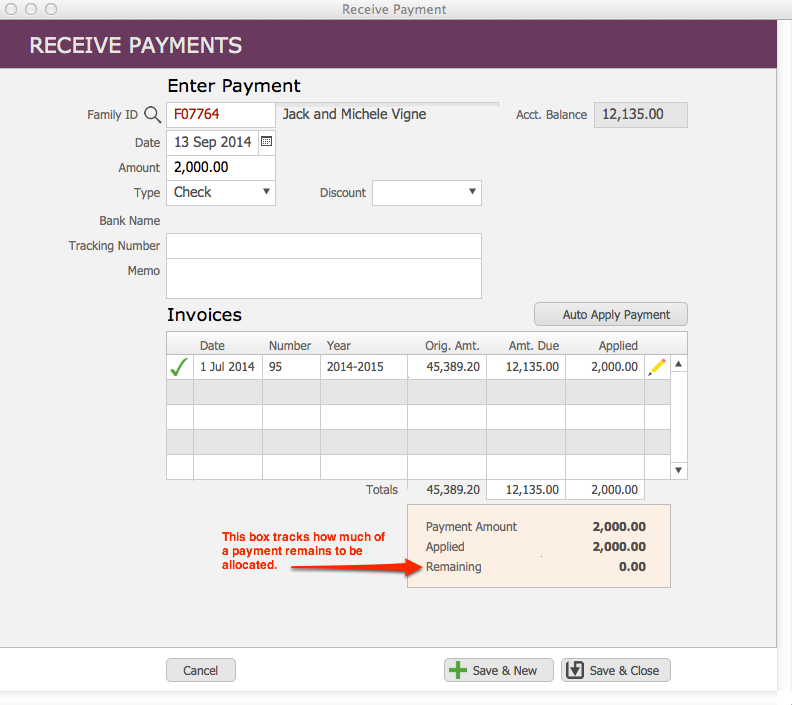
- Continue allocating until the amount remaining to be allocated is zero.
- Or you may manually edit allocation amounts for any invoice by clicking the pencil icon related to the invoice and entering an allocation for any charge with a balance.
- Enter amounts to be allocated.

- Continue allocating the payment until the balance remaining to be allocated is 0.00. Click Back to return to the Receive Payment screen.
- Click Save & Close.
- Find the Payment in the Payment List view.
- Click the Go To Related Invoices button.
- Identify the Invoice that was affected by the payment.
- Click the Generate Invoice PDF.
- Click the Go to related Accounts in BillPay and Publish.
Changing the Allocation of a Payment
- From the STUDENT BILLING Workflow screen, click on the colored bar Payments to enter the Payments domain.
- Find the payment to be changed.
- Click Reverse Allocations button. Click OK.
- Go to Payment List.
- Click on the pencil icon.
- Click on the spreadsheet icon, to the right of the Applied column, of the respective invoice to which you will apply the payment.
- Apply the payment as you wish.
- Click the Back button.
- Click Save & Close.
- Find the Payment in the Payment List view.
- Click the Go To Related Invoices button.
- Identify the Invoice that was affected by the payment.
- Click the Generate Invoice PDF.
- Click the Go to related Accounts in BillPay and Publish.