When an applicant sends an email request to a recommender from PWS, the recommender will receive an email that includes not only the applicant’s request, but also instructions for logging into a secure, personal account (just like the ones applicants have). A recommender will have one account; if more than one of your applicants requests a recommendation from the same recommender, all the requests from different applicants will appear inside the recommender’s account.
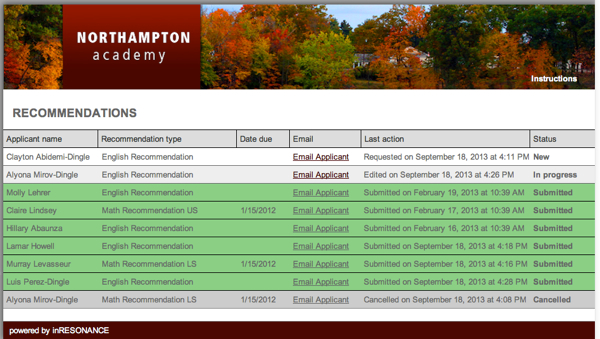
After a recommender has logged in, they will be able to view all recommendation requests in the RECOMMENDATIONS section.
The RECOMMENDATIONS statuses are:
- New: The applicant has requested the recommendation from recommender.
- In Progress: The recommender has begun working on the recommendation.
- Submitted: The recommender has submitted the recommendation.
- Cancelled: The recommendation request has been cancelled.
Starting a New Recommendation
- Login or follow the instructions in the request email for creating an account.
- Click on a recommendation with Status as New. The recommender will be navigated to a form page.
- Complete information as desired. Required information will be marked with a red asterisk.
- We suggest the recommender save periodically using the Save button at the top of the form.
- When finished, save and press Back to exit or Review/Submit if the form is completed (see below for submission help).
- If you exit before submitting the recommendation, notice that the Status has been changed to In Progress in the RECOMMENDATIONS area.
Submitting a Completed Recommendation
- Login or follow the instructions in the request email for creating an account.
- Click on a recommendation with Status as In Progress or New.
- Finish filling in information. All required fields must be completed before submission.
- Click Review/Submit. A review dialog box will appear with a review of the recommendation.
- Click the I agree checkbox.
- Click Cancel to exit or Submit.
- A dialog box will appear. Press Submit to submit the form, or Cancel to make further changes.
- Notice that the recommendation now appears grayed-out in the RECOMMENDATIONS area.