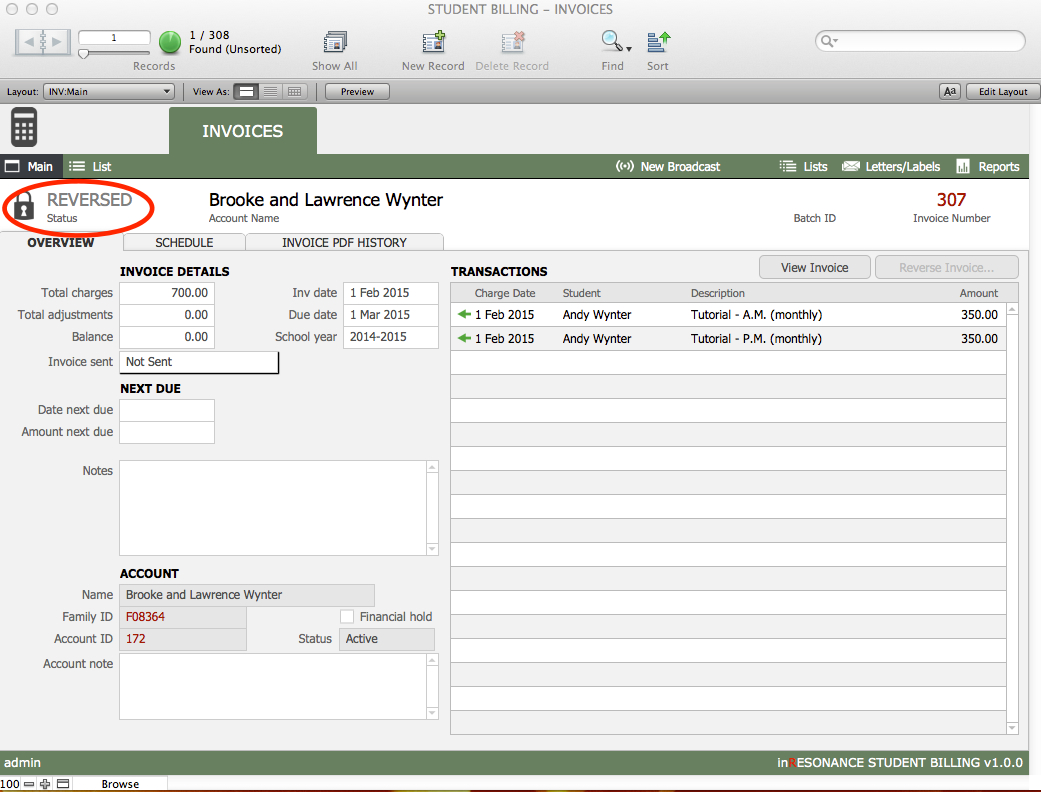
Once an invoice has been created, it is locked in a PDF format and cannot be edited or deleted. If you have created an invoice in error, you will have to reverse the invoice.
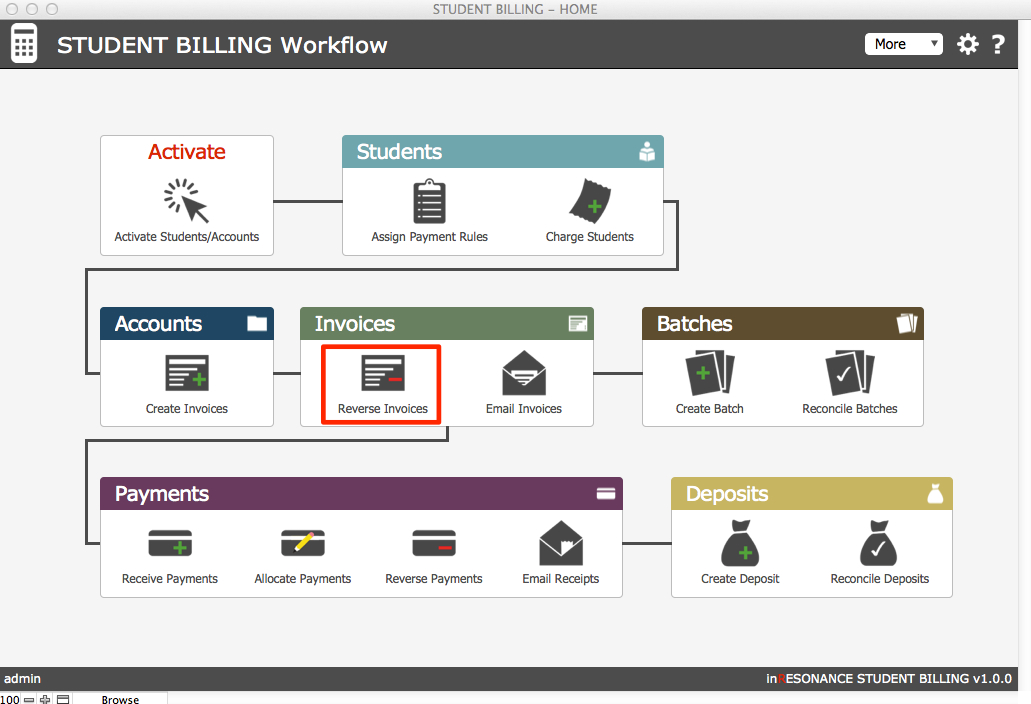
Reversing an Invoice
- From the Student Billing Workflow screen, click the task Reverse Invoices.
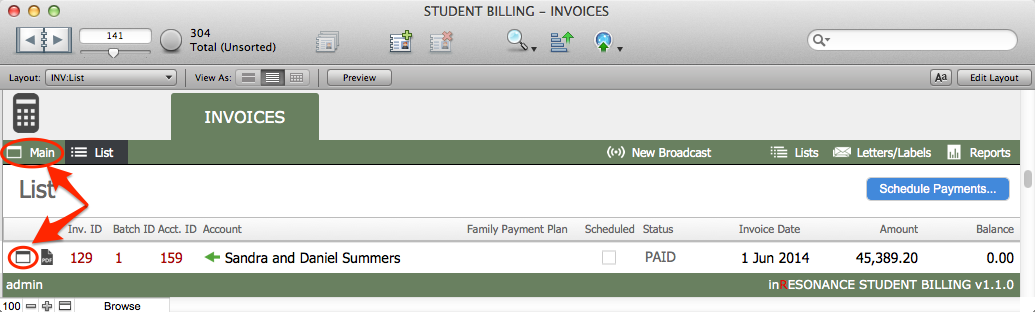
- From either the Main or List view, perform a find for the invoice you wish to reverse. You may reverse only one invoice at a time.
- If you are in List view, navigate into Main view by clicking either the Main view icon in the task bar, or the Main view icon at the left end of the record in the list.
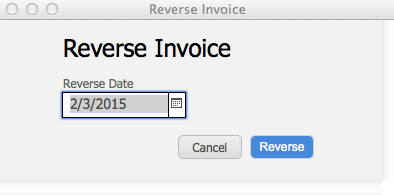
- Click the button Reverse Invoice…

- A dialog box will open where you will enter the Reverse Date and confirm that you want to reverse the invoice. If you wish to proceed, click Reverse.
- The invoice status will change to Reversed. Each charge that had been included on the now-reversed invoice appear in Transactions as Reversed Charges.
![]()