The Teacher Access Module (TAM 1) provides your faculty with a secure interface in which they can:
- Manage their account password
- View/print their graphic schedule
- View/print their class rosters
- View biographical information of all students, by their own class rosters and advisee list or by searching the student body
- Email students directly through TAM
- View/enter attendance, term-end grades and comments
- View/enter contact incidents

Setting Up TAM
Note that there are two levels of accounts in TAM: the administrator-level account with full privileges, and the teacher-level account, with access only to TAM but not KEYSTONE.
If an administrator is working in KEYSTONE and then logs into TAM while KEYSTONE is open, the administrator’s privileges from KEYSTONE will override the TAM permissions.
The TAM Admin should have a value entered into the IDTeacher field.
Adding Teachers to TAM
At the beginning of each school year, your list of faculty will change. You will want to add and also disable individual accounts for TAM.
Adding teachers to TAM begins with a found set from ksTEACHERS.
- From Central Nav, select Master Schedule > Teachers.

- In TEACHERS, perform a Find for the group you wish to add to TAM.

- Once you have your found set, return to Central Nav by clicking the Home icon.

- Select Teacher Access Module > User Setup.
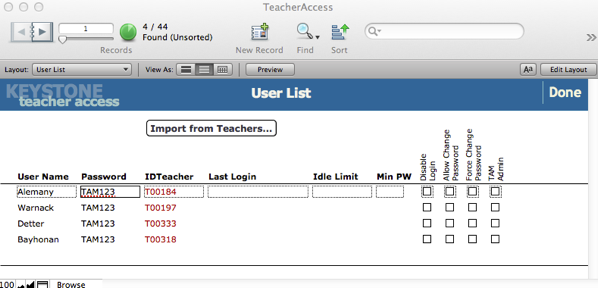
- This opens the TAM User List. Click Import from Teachers.
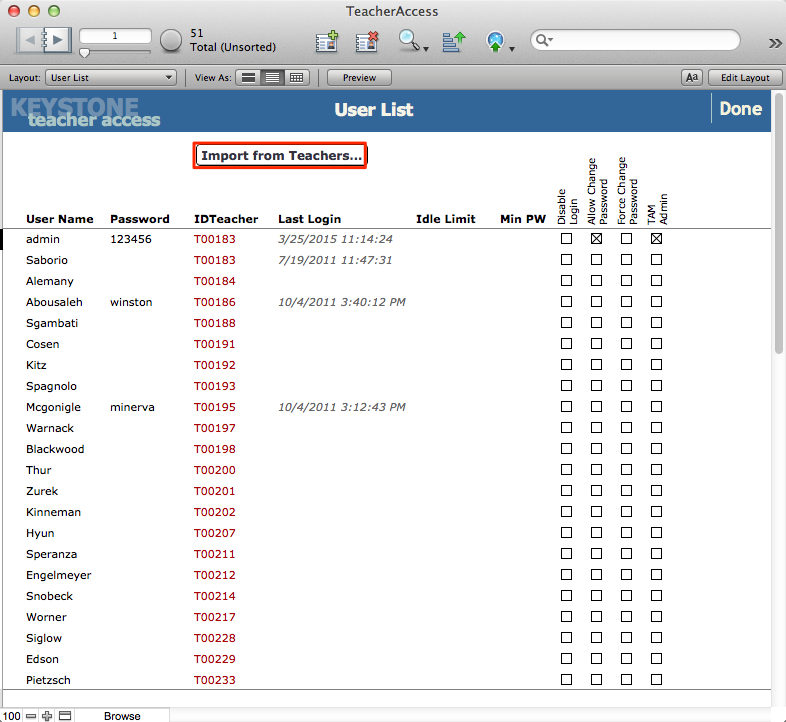
NOTE: This import does not require the Teacher checkbox to be checked.
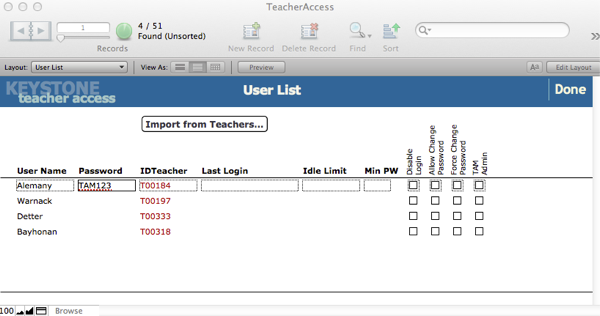
- A dialog will open asking you to confirm. Click OK.

Your found set will be displayed.
- Assign a password to each new teacher:
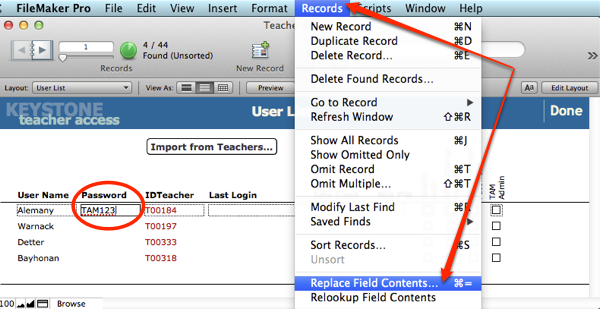
- Enter a generic password such as TAM123 into one record and leave your cursor in the field.
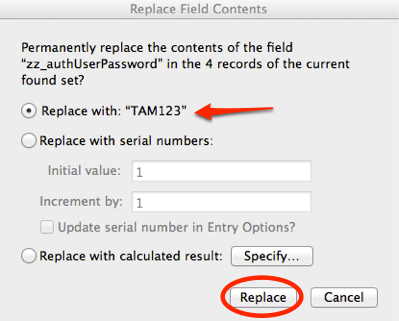
- From the FMP Records menu > Replace Field Contents to assign all new teachers the same password, which they will later change.
- You can set checkboxes for a group by using the same procedures (set one the way you want it, leave the cursor in the checkbox, then Records > Replace Field Contents).
Removing Access to TAM
- If a teacher leaves, you can disable their access to TAM in this interface by clicking in the checkbox Disable Login. There is no need to delete their record.
Changing the Term to Display in TAM
- The Attendance Marking Period will be changed as soon as the previous marking period ends.
- The Grading Marking Period does not get changed until the entry of marks and comments is complete.
This is so that attendance can be taken in the new MP while marks are being input for the previous MP.
The TAM administrator will change the Term settings by Division when appropriate. When you change the Term in TAM Preferences for Attendance and Grading new rosters will populate for attendance entry and for grade/comment entry.
- From Central Nav, select Teacher Access Module > Preferences.
- Click the Divisions tab.
- Set the Term for Attendance, or for Grading.
- Adjust the related marked checkboxes for each Division to reflect which fields in STUREG and SECTIONS should be locked/unlocked.
Attendance by the Front Office
Attendance incidents logged by the Front Office/Attendance officer will appear in teachers’ class rosters.
Troubleshooting TAM
Impersonating a Teacher’s Account for Troubleshooting Purposes
An administrator can log in to TAM as a teacher by copying the Teacher ID and pasting it into the admin’s own IDTeacher field.
- From Central Nav > Teacher Access Module, select User Setup.

- In the User List, copy the IDTeacher of the teacher you wish to assist.
- Paste the IDTeacher into the same field for the admin account.

- Log in to TAM as admin. You will see the teacher’s account.
If TAM does not show Classes and Advisees on the Dashboard
- Check to see if the Terms match.
To Add a Shadow Teacher (also Substitute Teacher) to TAM (KEYSTONE 4.3)
- In ksTEACHERS, add the Shadow Teacher to the Section.
- In TAM, click Import from Teachers.
- Set a password and checkboxes for the new account.
If a Term-end Comment is Highlighted in Pink
The comment page should be white. If it is pink, check the Marking Period.