Batch Entry
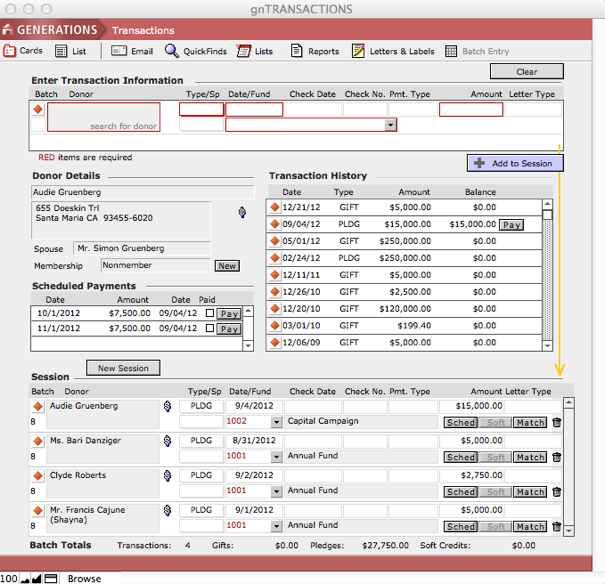
The Batch Entry screen allows for rapid entry of multiple transactions.

Most detailed transaction information can be entered from this screen. You can search for constituents, view their transaction history, schedule pledge payments, pay pledges, create matching transactions, soft credit transactions, and navigate to specific transactions from the Batch Entry screen.
Keep in mind when using the Batch Entry screen:
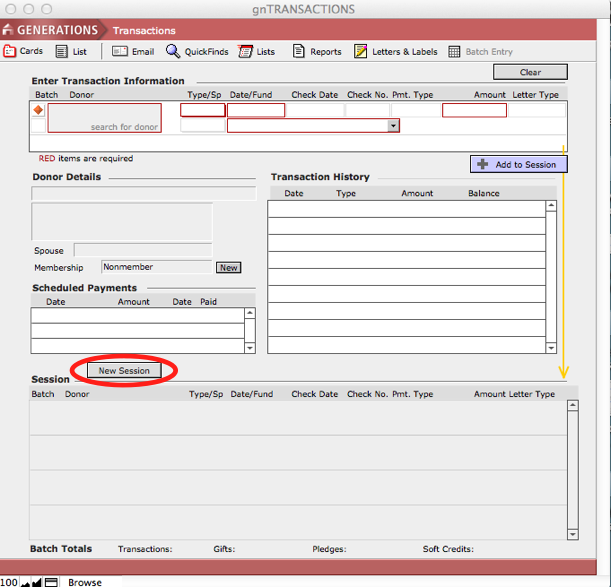
- When you create a new batch entry session, the screen will be cleared.
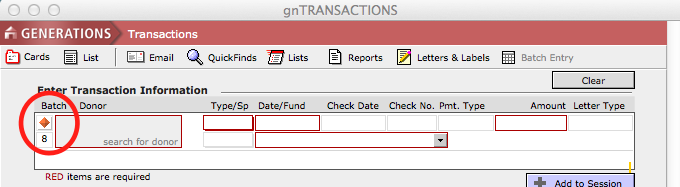
- We recommend that you create a batch number for the session. Batch numbers are not mandatory but are a handy way to reference a group of transactions.
- The session will remain open until the New Session button is pressed.
- It is important to know that sessions are local to the computer where the session was begun.
Entering Gifts (GIFT)
- Navigate to Giving > Batch Entry. Your previous session will be displayed.
- Click the Clear button to clear all data in the Enter Transactions Information window.
![]()
- Click the New Session button to begin a new batch session, if desired.
- Enter a Batch Number for the New Session.
- Click search for donor.
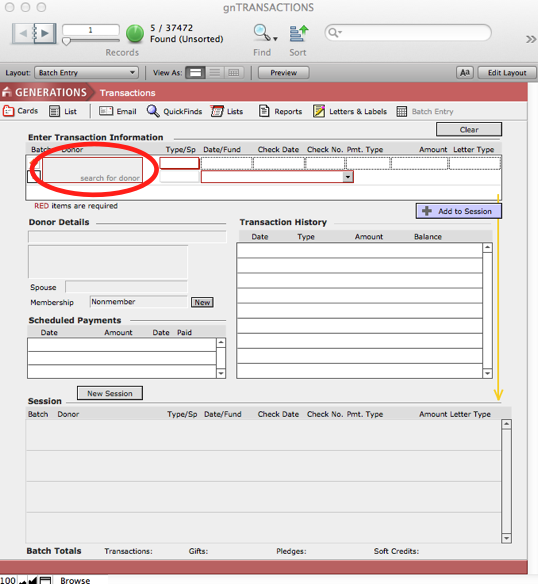
- A Constituent Search dialog box will pop up. Enter the name of the constituent whose gift/pledge you want to record.
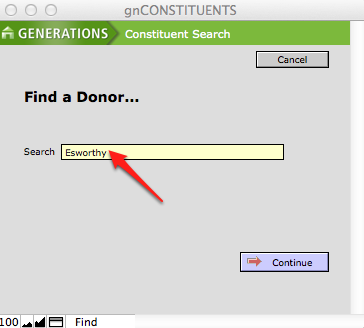
- Click Continue.
- Select the desired constituent by clicking the plus sign icon beside the name.
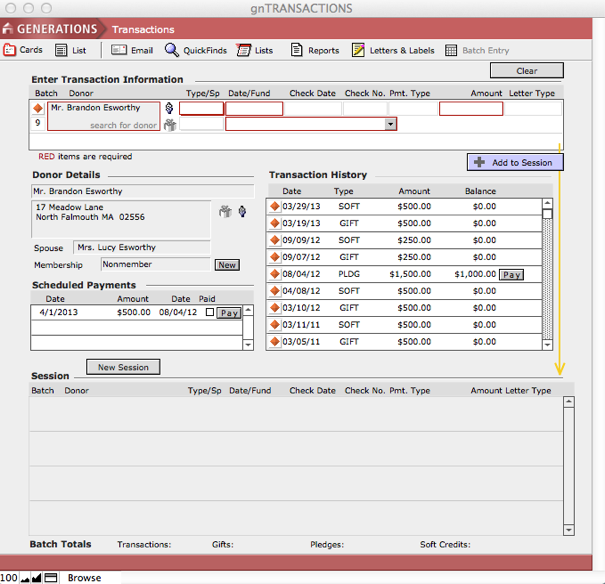
This will navigate you back to the Batch Entry screen. The desired constituent’s name will be loaded into the Enter Transaction Information window, details about the donor will appear in the Donor Details window and previous transactions, if any, will be loaded into the Transaction History window. If a payment schedule has been created for any previous pledges, it will appear in the Scheduled Payments window.
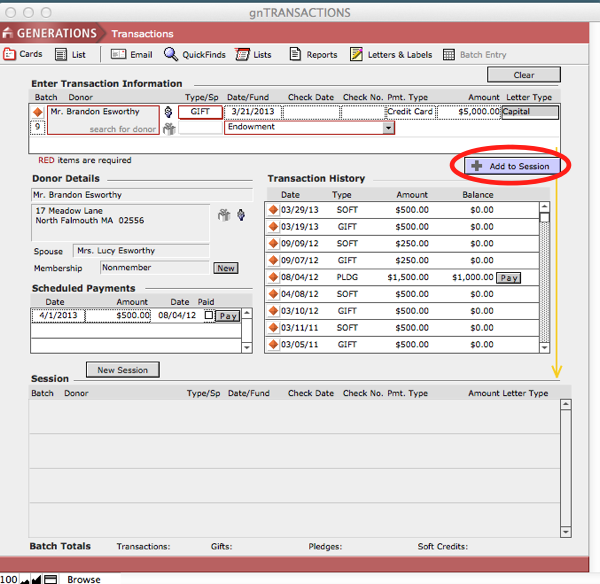
- Select GIFT from the Type pull down menu.
- Enter the date of the gift, date of the check/check number, or other type of payment and dollar amount of the gift.
- Select the desired fund from the Fund pull-down menu.
- Click the Add to Session button to enter the gift.
The gift information will be loaded into the Session window at the bottom of the screen and the transaction will be added to the Transaction History window arranged by date.
- To continue entering transactions, simply click on search for donor in the Enter Transaction Information area at the top of the screen, find the desired constituent and enter the gift information as detailed above.
Entering Pledges (PLDG)
Pledges are transactions that represent a promise of a future gift. Pledges are entered exactly as gifts except they are designated as PLDG and they have no check date or number associated with them at the time of entry. Payments are made at a later date and linked to the pledge transaction. Additionally, pledge payments can be scheduled.
- Using the method described in the previous section find the desired constituent from the Batch Entry screen.
- Select PLDG from the Type pull down menu.
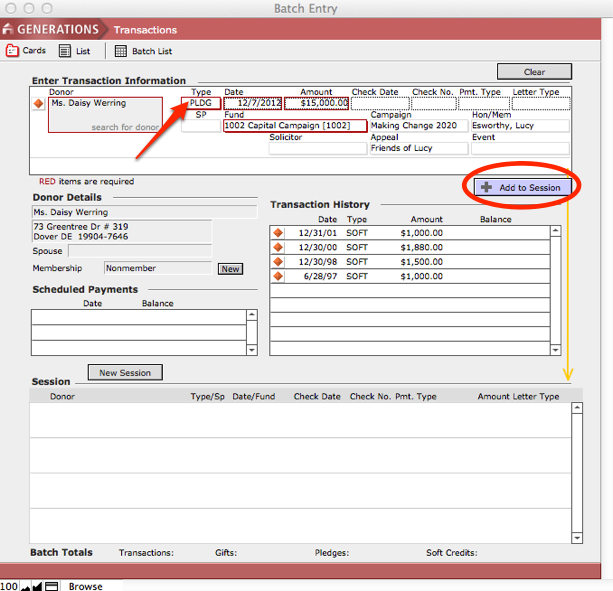
- Enter the date of the pledge and dollar amount of the pledge.
- Select the desired fund from the Fund pull down menu.
- Click the Add to Session button to enter the pledge.
The pledge information will be loaded into the Session window at the bottom of the screen. Notice that the transaction now has the Outstanding Pledge icon next to it. In the Transaction History window, the pledge will also have a Pay button for the future when payments against the pledge are made.
To continue entering transactions, simply click search for donor in the Enter Transactions Informationarea at the top of the screen and repeat the steps detailed above.
Scheduling Pledge Payments (Sched)
A payment schedule can be created for outstanding pledges at the time the original pledge was created or at a later date.
Creating a Payment Schedule Plan During Batch Entry
- Find the constituent for whom you wish to enter a pledge by clicking search for donor in the Enter Transaction Information window.
- Create a new transaction and indicate it as a PLDG and complete all necessary information.
- Click the Add to Session button.
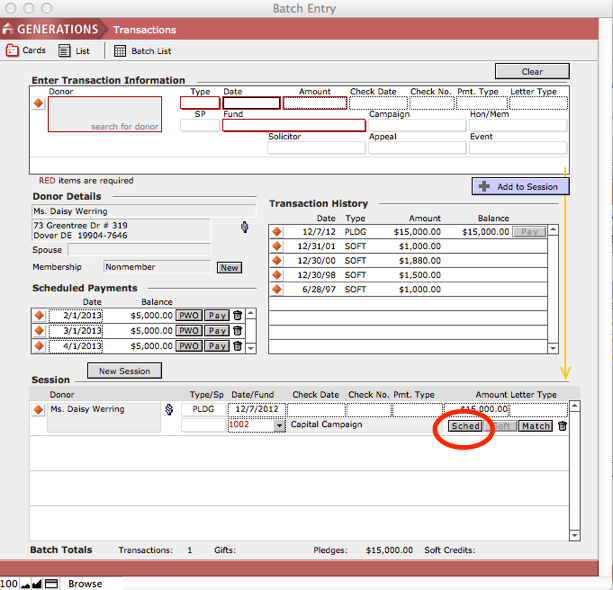
The new pledge will be loaded into the Transaction History and Session windows.
- Click on the Sched button below the dollar amount in the Session window.
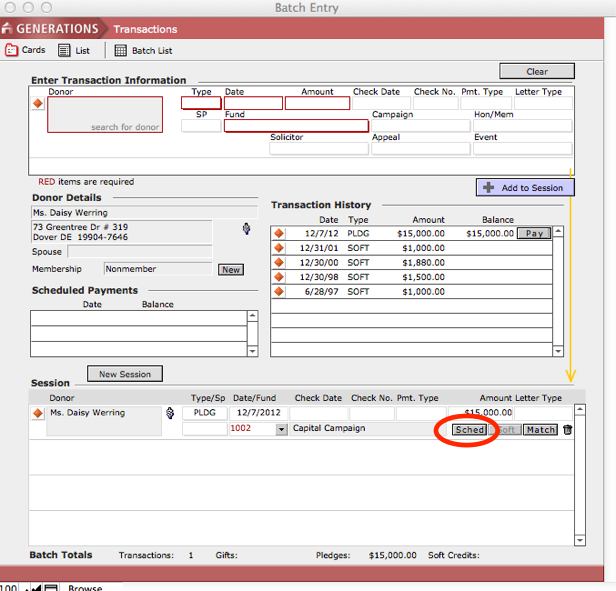
- The pledge payment schedule window will open, displaying the information you have entered so far.
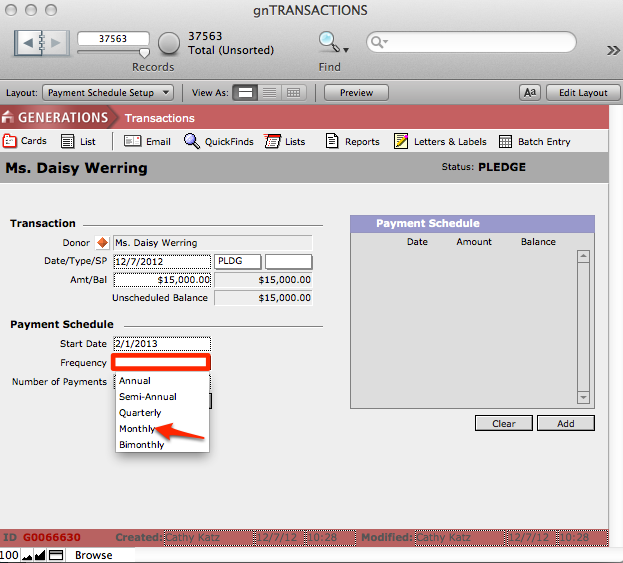
- Under Payment Schedule, enter a Start Date.
- Enter the Frequency of payments by selecting an option from the drop-down menu that appears when you click into the Frequency field.
NOTE: If you click into the Frequency field but no drop-down menu appears, click outside of the field (that is, remove the blinking cursor from the Frequency field) and then click into it once more. The menu will pop up.
- Enter the Number of Payments for the schedule.
- Click Schedule.
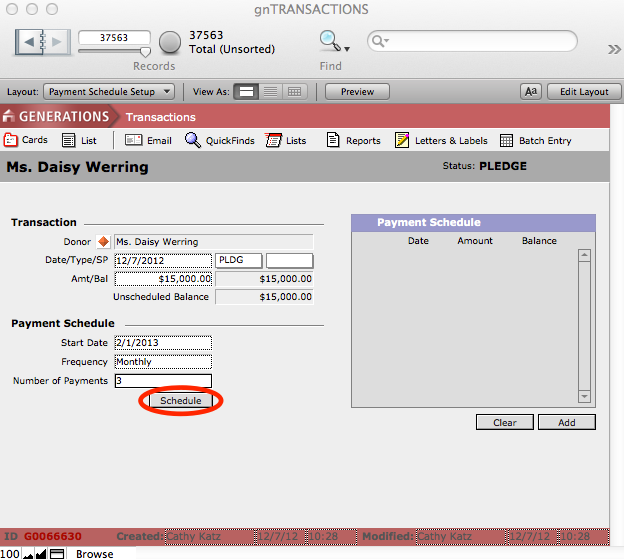
- See that GENERATIONS has created a payment schedule in the display on the right.
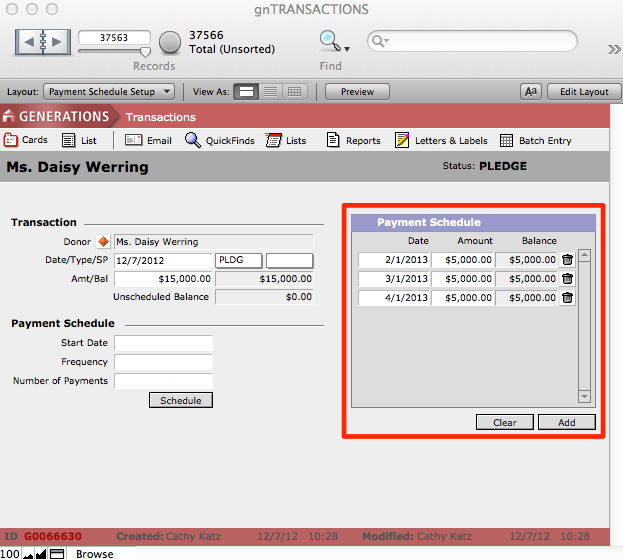
- You can edit the payment schedule. The Date and Amount fields can be edited. A line can be deleted by clicking the trash can icon associated with that line. There are also buttons to Clear the schedule to start over, as well as Add to add a payment to the schedule.
- Navigate back to Batch Entry by clicking the Batch Entry button in the task bar.

Once you are back at Batch Entry, notice that the Sched button is now active, indicating that this pledge has a schedule associated with it.
Creating a Payment Schedule for Existing Pledges
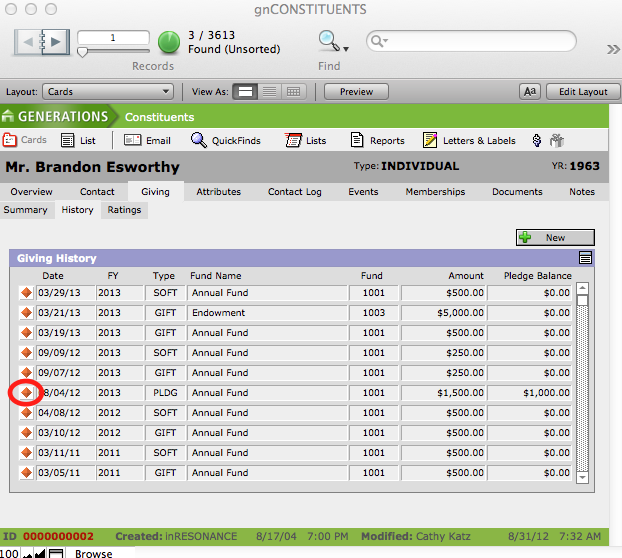
- Find the constituent for whom you wish to create a pledge payment schedule from Constituents.
- From the Giving > History screen in Constituents, click the orange diamond button next to the desired pledge to navigate to the Overview screen in Transactions for that transaction.
- Create a schedule of payments as detailed in previous section.
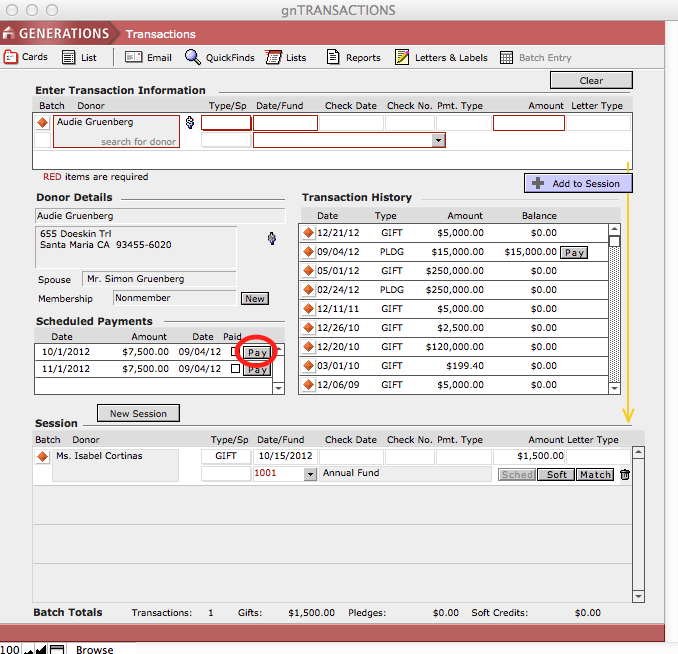
Recording Pledge Payments (Pay)
Recording a Pledge Payment That Does Not Have an Associated Payment Schedule
- Find the desired constituent for whom you’d like to record a pledge payment from the Batch Entry screen.
- Scroll through the list of the constituent’s transactions in the Transaction History window to locate the desired pledge.
All pledge transactions with a pledge balance will have a Pay button next to them.
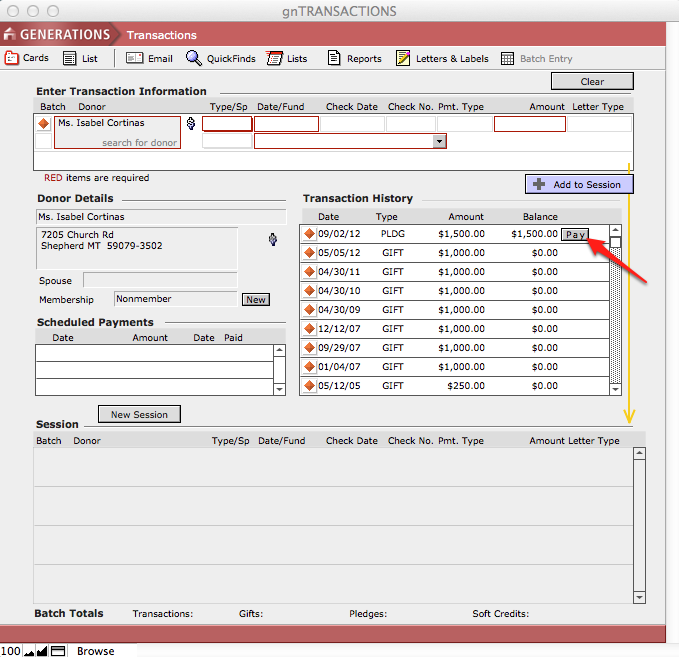
- Click the Pay button.
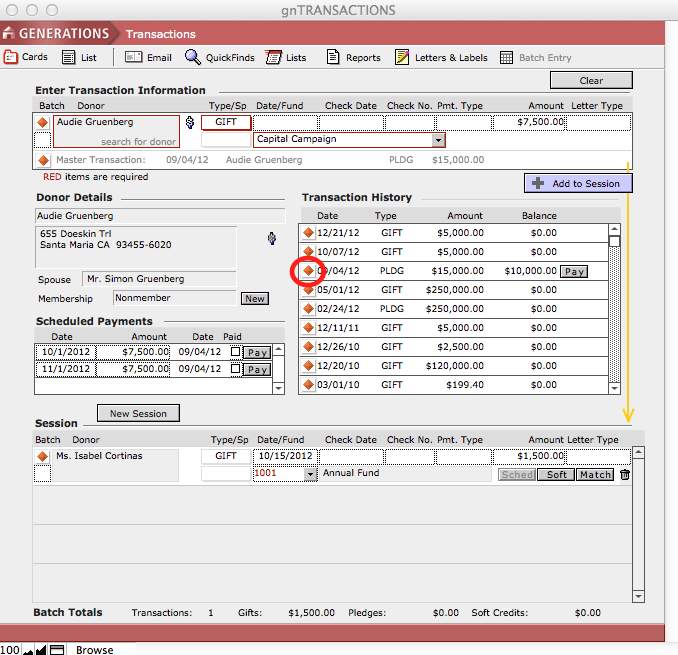
The pledge information will be loaded into the Enter Transaction Information window. The transaction Type is automatically designated as GIFT and the pledge balance amount will be displayed. The master transaction information will be displayed below the constituent’s name in the Enter Transaction Information window.
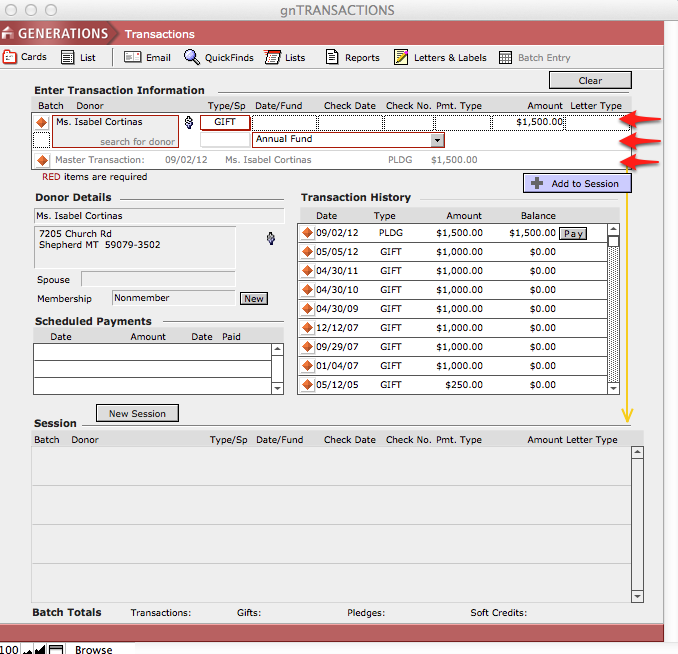
- Enter the payment date, payment type and details, and edit the amount if it differs from the pledge balance.
- Click the Add to Session button.
The pledge has now been paid (or partially paid) and will be listed in the Transaction History and Session windows. Additionally, the pledge transaction’s balance will be updated in the Transaction History window to reflect the recent payment.
Recording a Pledge Payment that has an Associated Payment Schedule
- Find the desired constituent for whom you’d like to record a scheduled pledge payment from Batch Entry.
The payment plan information will be displayed in the Scheduled Payment window.
- Click the Pay button beside the scheduled payment you wish to pay.
The pledge information will be loaded into the Enter Transaction Information window. The transaction Type is automatically designated as GIFT and the scheduled payment amount will be displayed. The master transaction information will be displayed below the constituent’s name in the Enter Transaction Information window.
- Enter the payment date, payment type and details, and edit the amount if it differs from the pledge payment.
If the amount of the payment differs from the scheduled payment amount, you may want to adjust the payment schedule accordingly.
- Navigate to the master pledge transaction to edit the schedule, by clicking on the orange diamond icon next to the pledge transaction.
- Return to the Batch Entry screen.
- Click the Add to Session button.
A pledge payment has now been entered and will be listed in the Session window at the bottom of the screen. Additionally, the pledge transaction’s balance has been updated in the Transaction History window.
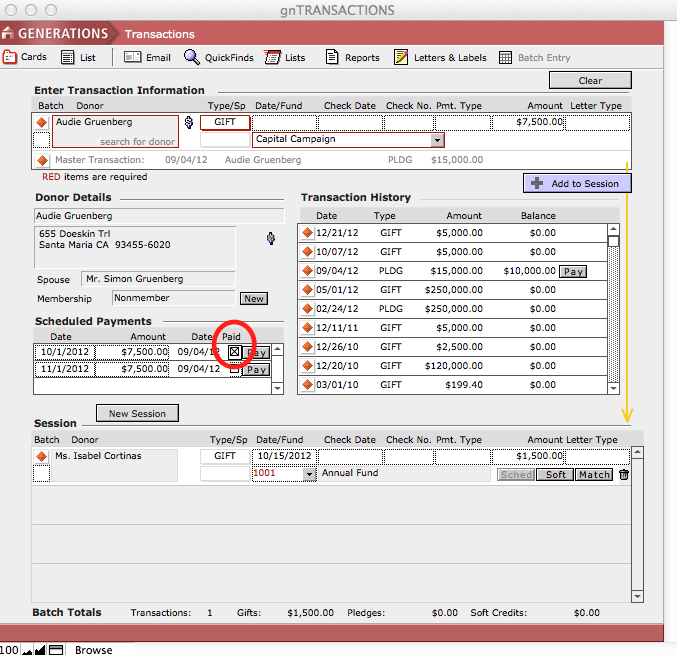
- To indicate that the scheduled payment has been made, click the Paid checkbox in the Scheduled Payment window. This checkbox does not automatically update when the pledge has been paid.
Entering a Single Gift or Pledge
You may use the Batch Entry screen in the Giving file to enter a single gift/pledge or multiple gifts/pledges.
You may also enter a single gift/pledge in the Constituents file.
To Enter a Gift or Pledge in a Constituent Record
- Using FMP’s Find mode, find the constituent for whom you wish to record a transaction in Constituents.
- Navigate to the constituent’s Giving > History screen.
- Click the New button above the Giving History window.
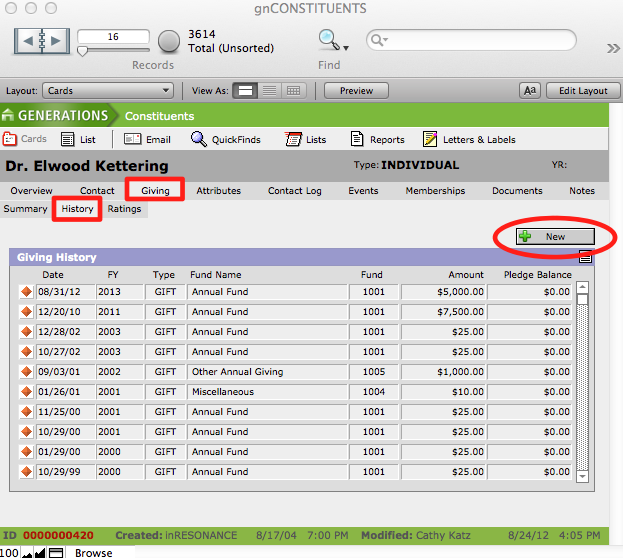
- This will navigate you to the Transaction Entry screen. The constituent’s name will be automatically displayed in the Donor field.
![]()
- Select the type of transaction from the Type pull down menu. Enter the transaction date, the check date and number, and the amount of the transaction.
- If appropriate, select whether the transaction is a GIK or STOCK from the SP (Special codes) pull-down menu.
- Link the transaction to a fund from the Fund pull down menu.
NOTE: All transactions must be linked to a fund and they must have a date, an amount, and a type.
- Click the Create button when finished.
This will navigate you back to the Constituents > Giving > History screen. The recently created transaction will appear at the top of the list.