Student Billing depends upon PORTAL or SANDBOX for data about students and families. Your core admissions solution not only has up-to-date contact information for currently enrolled students and their families, but also has data on who is enrolling next year, including returning students and new admits. This makes it possible to bill ahead for the next school year. For more information on charging tuition and fees for the next school year click here.
In Activate Students/Accounts, you can activate students and their related fee-payer accounts based on the student’s re-enrollment status (enrolled attending with a status of returning) and/or the student’s intention to enroll (new admits for the following academic year). Or you can deactivate accounts for anyone who has left the school (transferring/withdrawn/graduating) and has no outstanding Balance due.
A student/account must be Activated in order to charge students and invoice accounts, and to credit payments to an account. Note that Accounts belong to fee-paying adults (usually parents, grandparents, or in some cases a corporation or foundation). Later in the process, we will define the fee payers’ specific fiduciary responsibilities, but the task here is just to activate any and all students who will be charged, and the possible accounts for fee payers related to those students.
You can perform finds in this list for an individual student or any group of students, and you can filter the list for the most commonly used attributes.
NOTE: Student Billing recognizes fee payers because they are FAMILY records in PORTAL or SANDBOX that are related to a student. To add a fee payer to a student’s record, add it in FAMILIES.
Activating Students and Accounts
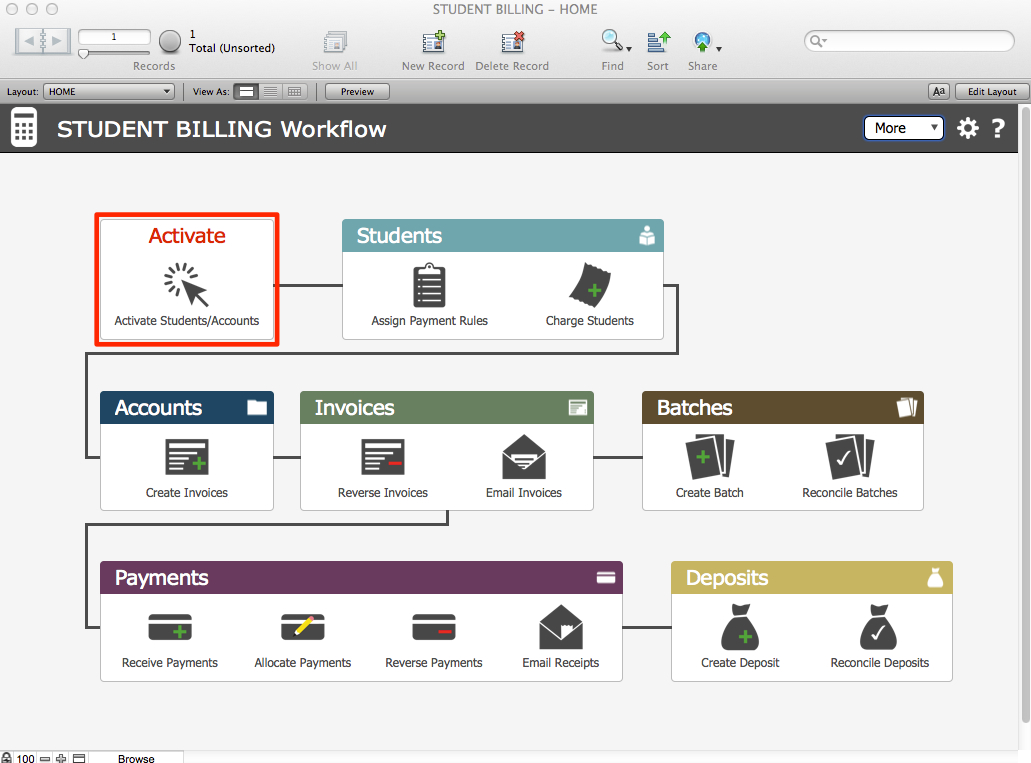
From the Student Billing Workflow screen,
- Click Activate Students/Accounts.
The Activate screen will by default present a list view of Enrolled Attending students. Note in the FileMaker status area the display of the number of records in the found set out of all possible Inquiry records in your core solution. In the case of this example, we see 143 records in the found set out of 7898 total inquiry records in PORTAL. Student Billing is assuming this is the found set you want to activate. You may, of course, perform a find for any individual or group.
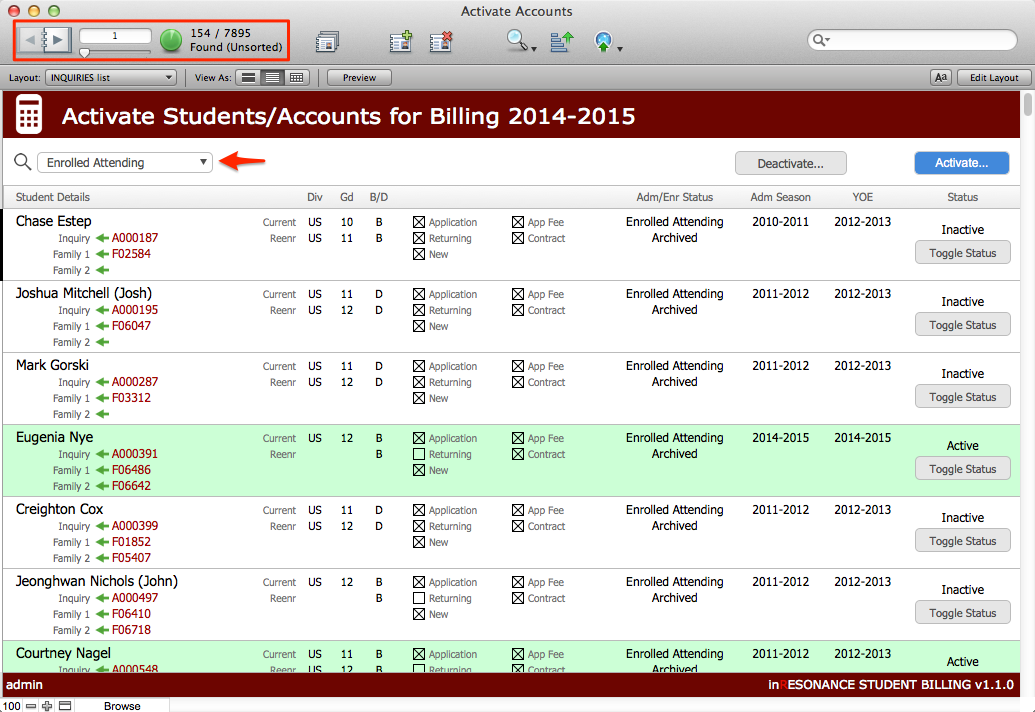
- Gather your found set.
- Click Activate. (or Deactivate)NOTE: It is a convention in iR solutions that any button located above a list of records will act on the entire found set of records.
- To activate/deactivate a single record, use the Toggle Status button within the row for that record.
Next step will be to assign payment rules to each student.