Creating a New Alert
The workflow for creating a new alert is:
- Build the conditions for your Query
- Configure the Email that will go out
- Schedule the Alert
- Open the WorkFlow Alerts file from your data set.
- Click the green New Alert button on the Main screen.

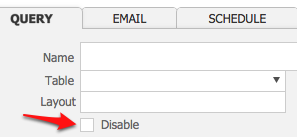
- On the Query tab, enter a name for your alert into the Name field. This is how it will appear in your list of alerts. You will be able to set the message name for the person receiving the alert on the Email tab.
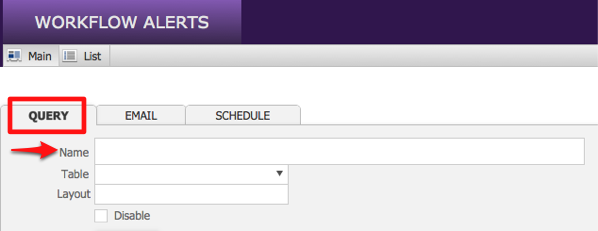
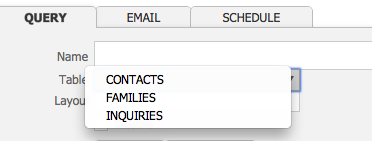
- Select CONTACTS, FAMILIES or INQUIRIES from the Table drop-down menu to designate which file in PORTAL will be the source of the information you are using to form your alert.
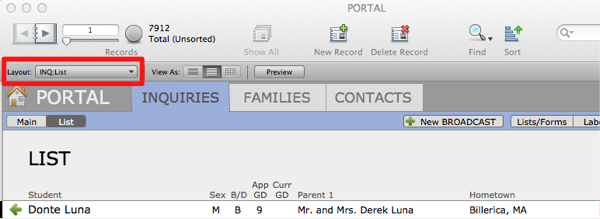
- Find the exact name of the source layout as it appears in PORTAL in the Layout menu on the Toolbar. Enter the name into the Layout field on the Query tab.
- When desired, click the Disable box to turn off an alert. This is a tool for managing your alerts and is not part of the setup procedures.
Setting the Alert Conditions
- On the Simple tab, click the green New Condition button.
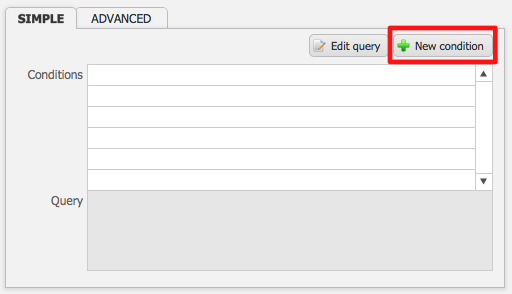
There will be 4 fields on the row for defining your condition:

• First: PORTAL field 1
• Second: value set
• Third: PORTAL field 2
• Fourth: Group
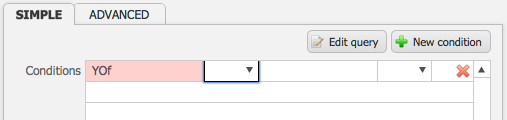
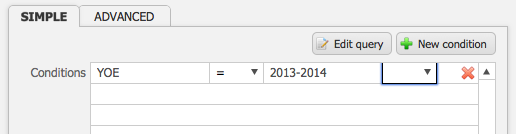
- Enter the name of the field in PORTAL that you wish to use into the first field box on the row. For example, “YOE” (Year of Entry). The field will turn pink if you enter a field name that does not exist.
- Choose a value from the drop-down menu. “=” is equal to, “!=” is not equal to, “>” is greater than, “>=” is greater than or equal to, “<” is less than and “<=” is less than or equal to.
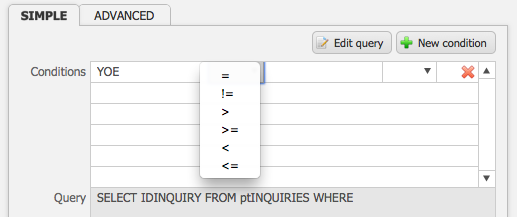
- Enter the second relational field name into the third box on the row.For example, if you want your YOE to be 2013-2014, your conditions would be “YOE, =, 2013-2014“. If you wanted your YOE to be all the years prior to 2013-2014, your conditions would be “YOE, <, 2013-2014“.
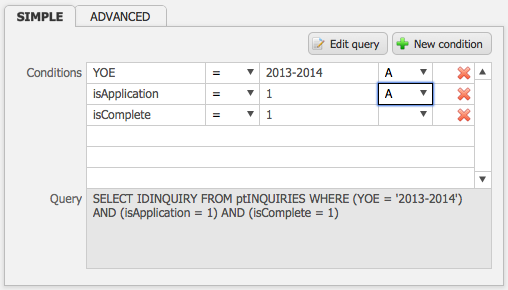
- Once you have assigned multiple conditions, you can utilize the drop-down menu in the fourth field of the Conditions row to group your conditions. You can assign A, B, C etc. to conditions or assign the same letter to multiple conditions. Assigning the same letter creates an “OR” statement, while assigning different letters creates an “AND” statement.
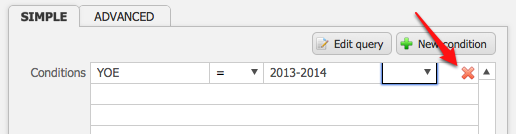
- Click the red X at the end of the row to delete a condition.
Notice that as you are creating conditions, the Query box is populating information.

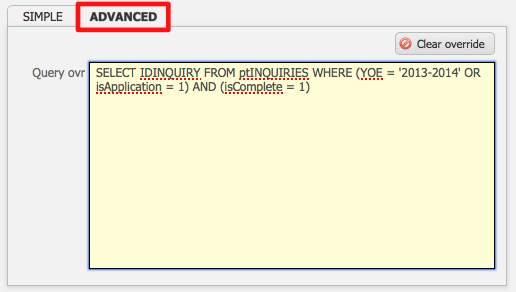
- Clicking Edit query navigates to the Advanced tab.
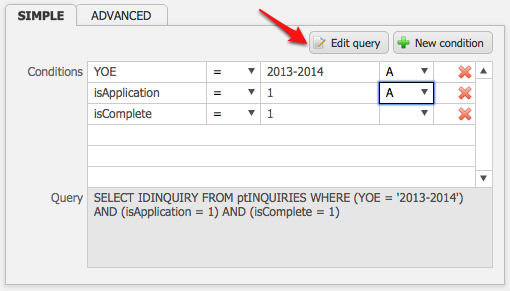
The Advanced tab displays the Query override option field. This is for advanced users only and should be left alone.
Recipient Setup
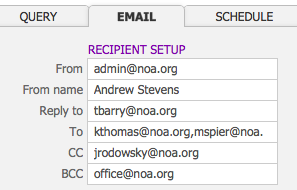
- Click the Email tab. Enter an email address to the From field. This email address will be what appears in the message within the receiver’s inbox.
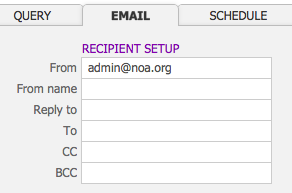
- Enter the name of the sender into the From name field. This could be an individual person or the name of your office.
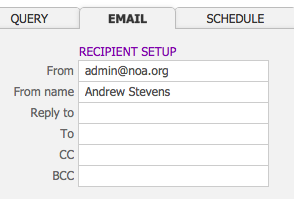
- Enter the email address that will receive any replies to the alert. This does not have to be the same as the From email address.
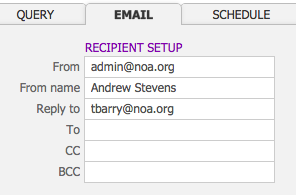
- Enter the list of recipients into the To field. Multiple recipients should be separated by a comma.
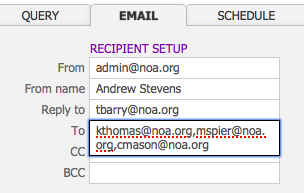
- If desired, add a CC recipient to the alert. A CC recipient would receive the alert and would be visible to the other recipients. This is often a way to include recipients who may not fit the list you have entered into the primary To field.
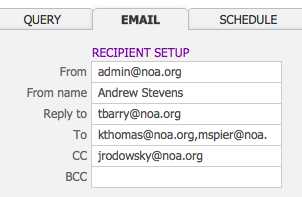
- If desired, add a BCC recipient to the alert. A BCC recipient would receive the alert but would not be visible to the other recipients on the alert email.
Entering Message Text
- Within the Message tab, enter the subject for your alert email into the Subject field.
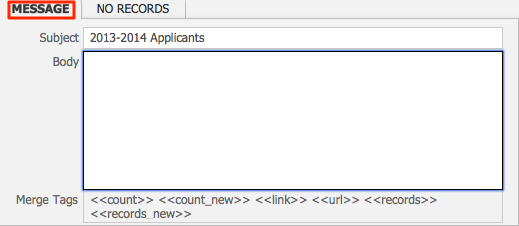
- Enter the text of your email into the Body field. To include figures pulled from PORTAL, enter from the merge fields list included below the Body box as needed.
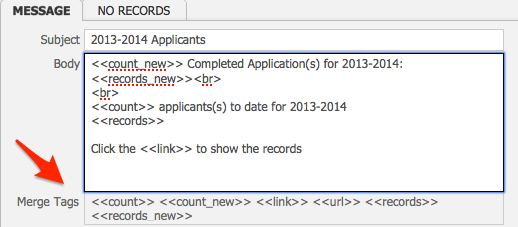
• <<count>> pulls the total number of records that match your conditions.
• <<count_new>> pulls the total number of new records that match your conditions since the last alert was sent.
• <<link>> includes a hyperlink within your email. The text for this link can be entered in the Link label field in the Behaviors box.
• <<url>> adds a website link.
• <<records>> pulls the list of records that match your conditions.
• <<records_new>> pulls the list of new records that match your conditions since the last alert was sent.
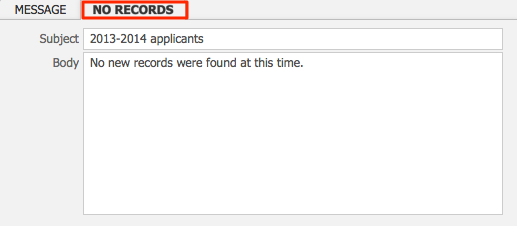
- In the No Records tab, enter a Subject and text Body for the alert that will be sent if there are no new records found in the time period specified by the alert.For example, if your alert checks for new information every hour and there are 3 hours in which no records appear in the system, then the No Records alert email will be sent out for each of those 3 hours.
Behaviors
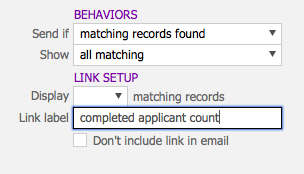
Within the Send if field, there are 3 options: “always“, “matching records found” and “new records found“.
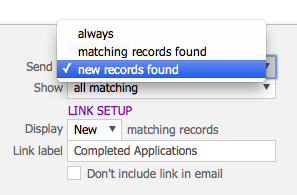
- Select “always” if you want an alert to be sent at every selected interval, regardless of changes.
- Select “matching records found” if you would like the alert to be sent displaying all the records found that match the specifications you have chosen.
- Select “new records found” if you would like the alert to send you only the new records that have been found since the last alert was sent.Keep in mind that if you select “new records found“, you will still receive the No Records alert at each requested alert interval if no new records are found.
- Within the Show field, there are 2 options: “all matching” and “this list“. Choose “all matching” if you wish to receive the current list of all records that meet the condition, or choose “this list” if you only wish to receive the list of records that were pulled during the query.

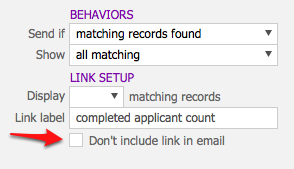
Link Setup
- Within the Display drop down menu, select “All” or “New” matching records, depending on what value set you would like your link to reflect.
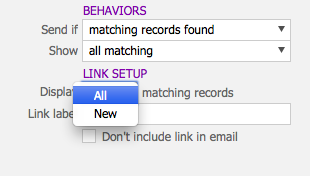
- Enter the text that will appear as your link into the Link label field.
- Click the “Don’t include link in email” checkbox if you do not wish to include a link in your alert email.
Schedule
- Click the Schedule tab to set the timing for your alert.
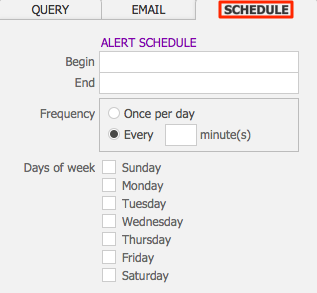
- Enter a time of day into the Begin field, using a XX:XX:XX AM/PM format, when you’d like the alerts to begin.
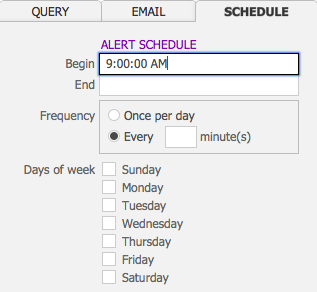
- Enter a time of day into the End field, using a XX:XX:XX AM/PM format, when you’d like the alert to end.
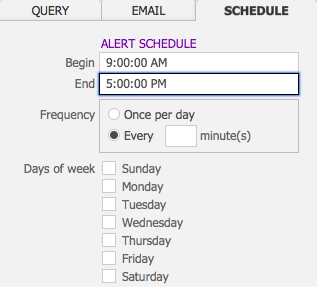
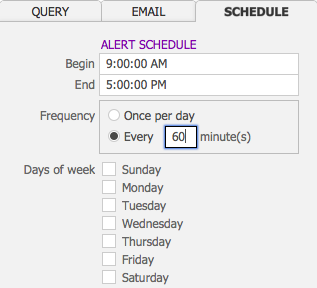
- Enter how often you’d like the alert to run into the Interval field, using minutes. For example, if you’d like the alert to run every hour, enter “60”. If you’d like it to run every 2 hours, enter “120”, etc.
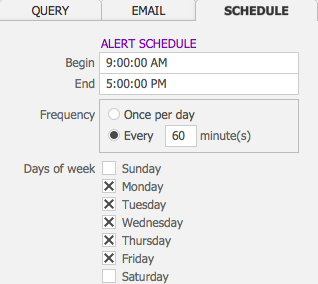
- Click the checkboxes next to the days during which you’d like the alert to run.
Summary
- Once you have completed the previous steps, the Summary box will populate with information about your alert.
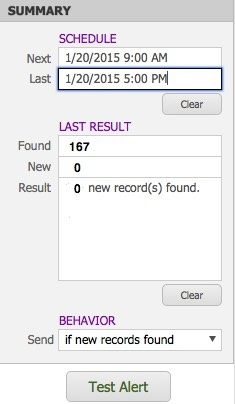
- The Next field displays when the alert will next run.
- The Last field displays the last time that the alert has run.
- Click the Clear button to delete these fields.
- In the Last Result fields, the Found field displays the total number of records found that match your desired conditions. The New field displays the number of new records since the last alert was run.
- Click the Clear button to delete these fields.
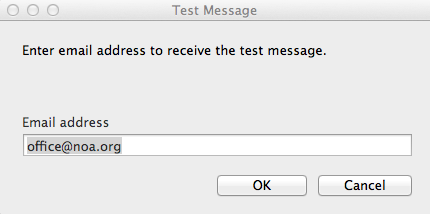
- Click the Test Alert button to send a test email. Enter an email address into the pop-up box that appears and click OK. A test email will be sent to that email address. A default test email address may be setup in Preferences.