There are four basic types of letters in GENERATIONS. If you are in the Constituents file, you will see different letters than you will see in the Transactions file, but the letters are based upon four different types of letters:
- Simple Letters—These letters incorporate merge fields in the address and salutation. The address and salutations are unique to each record but the body of each letter is the same for every recipient.
- Merge Letters—These letters incorporate simple merge fields in the body text as well as the address area. For example, the date and amount of the donor’s last gift, as well as the fund to which the gift was directed, may appear in the body of the letter.
- LetterBox Letters—These letters incorporate simple merge fields in the address area and the body text. Additionally, they can contain paragraphs that are unique to each record. There are eight existing Letterbox fields in GENERATIONS, however more can be created.
- Free Form Letter—This letter allows you to write a completely individualized letter to a constituent.
This chapter will detail how to create the first three letter types. For each type you will follow the steps of duplicating an existing letter, renaming it, attaching it to the Letters & Labels screen (or not) and then editing the letter.
It is important that you do not edit the existing sample letters but leave them as they are so that you and others can refer back to them as needed.
Simple Letters
To create a Simple Letter that is addressed to a constituent and contains merged address and salutation data:
- Navigate to Letters & Labels screen.
- Click the Example Letter button (or an existing letter that you wish to use as the basis for your new letter).
- Switch to Layout mode by selecting Layout from the FileMaker Pro View menu, or by changing the mode at the bottom of the window.
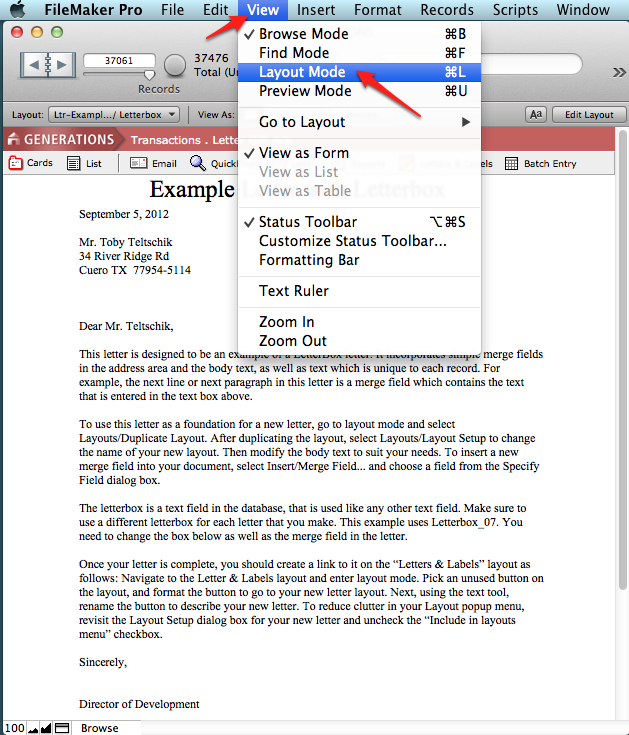
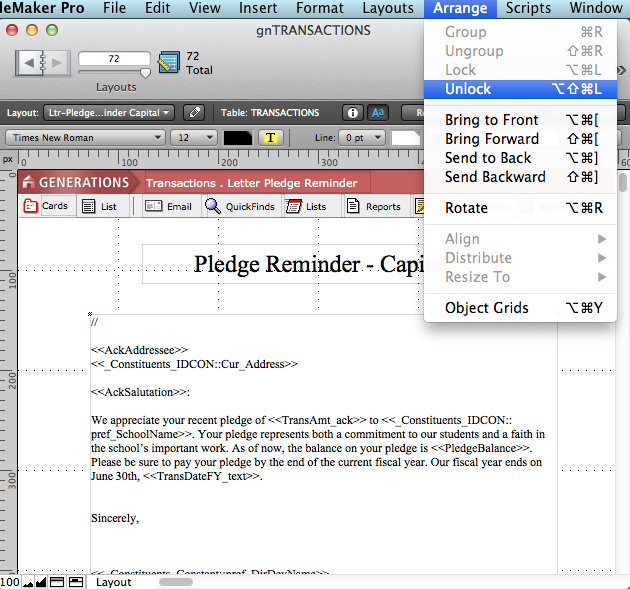
Merge fields can be identified (in Layout mode) in that they are enclosed by double chevrons, <<Field name>>. Notice the merge fields, <<NameFull>>, <<P1_address_full>>, <<Namefirst_final>>, and <<AdmDirName>>, have been inserted in the address area and the salutation.
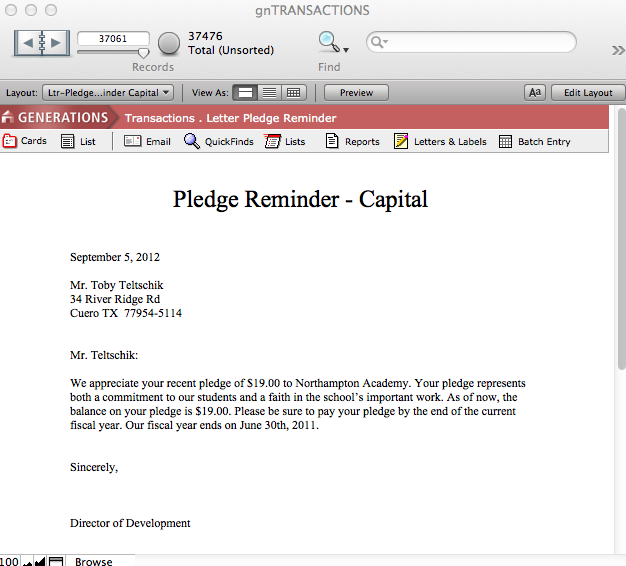
To see the power of this technique, switch back to Browse mode and use the Book in the Status Area to move to a new record. Notice that as you move through the records in the database, the address and salutation information, as well as the information brought into the merged fields, are different for each record yet the body of the letter is the same for every record.
Step 1: Duplicating a Layout
- Make sure you are on the letter layout that you wish to duplicate.
- Switch to Layout mode.
- Select Duplicate Layout from the FileMaker Pro Layouts menu. You may not notice anything new but the existing layout has been duplicated and renamed with the original name and the word copy appended to it.
![]()
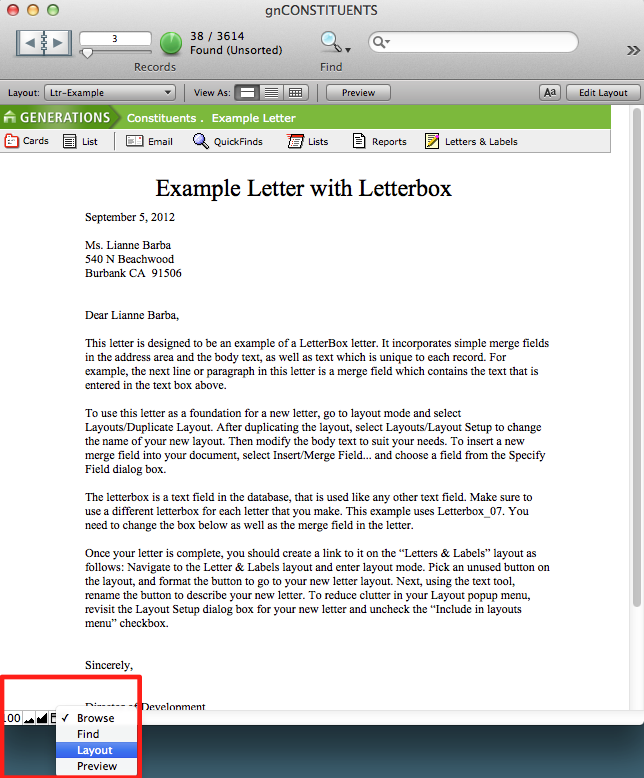
- To verify this, click on the Layout menu below the Book. A list of all the existing layouts in the file will appear.
![]()
![]()
- Scroll all the way to the bottom. You will see your new layout listed as the last layout with a checkmark next to the name to indicate that you are currently on that layout.
Step 2: Renaming a Layout
Now you need to give your layout a more meaningful name. Letters in GENERATIONS start with the prefix Ltr-. To be consistent, your letter layout should follow the same convention. The name of the layout should indicate the letter’s purpose.
- In Layout mode, select Layout Setup from the FileMaker Pro Layouts menu.
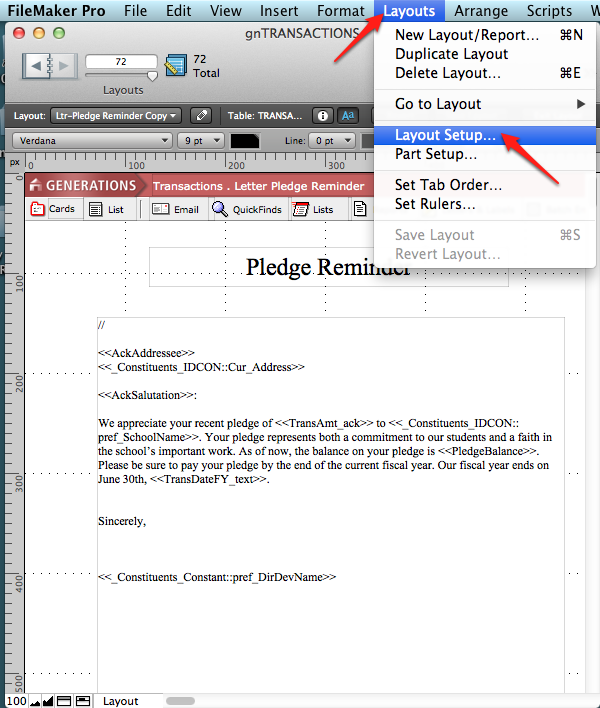
- Type a name in the Layout Name area. For example, Ltr-Welcome.
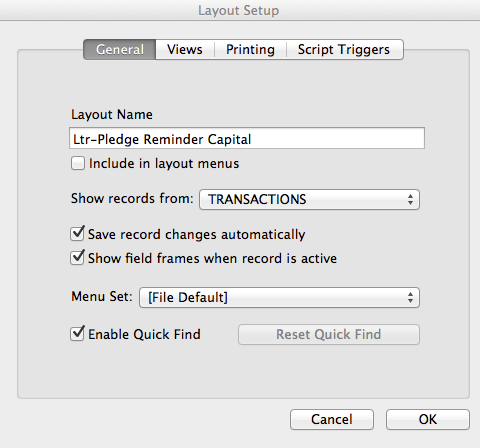
- Make sure that there is NOT a check in the Include in layouts menu checkbox. This will remove your letter from the Layout menu while in Browse mode. You can always navigate to your letter from the Layout menu while in Layout mode but you want to keep the Layout menu uncluttered in Browse mode.
- Click OK. You may get a message warning you that some margins are not set correctly. You can ignore this warning and click OK. Your letter now has a name. You can verify this by clicking on the Layout menu as you did before while in Layout mode. Your new letter will still be at the bottom of the list but it will now reflect the new name.
- Your new letter is ready to edit.
Switch to Browse mode and click on the Layout menu. Notice that your new letter does not display in the menu while in Browse mode. If you do not attach your letter to the Letters & Labels screen, you will have to switch to Layout mode to navigate to it.
Step 3: Connecting Your New Layout to the Letters & Labels Screen (optional)
Letters in GENERATIONS may be linked to the Letters & Labels screen. A letter that will be used frequently may belong on the Letters & Labels screen, but most letters should not be placed here. You can always navigate to all of your letters by entering Layout mode and clicking on the Layouts drop-down menu.
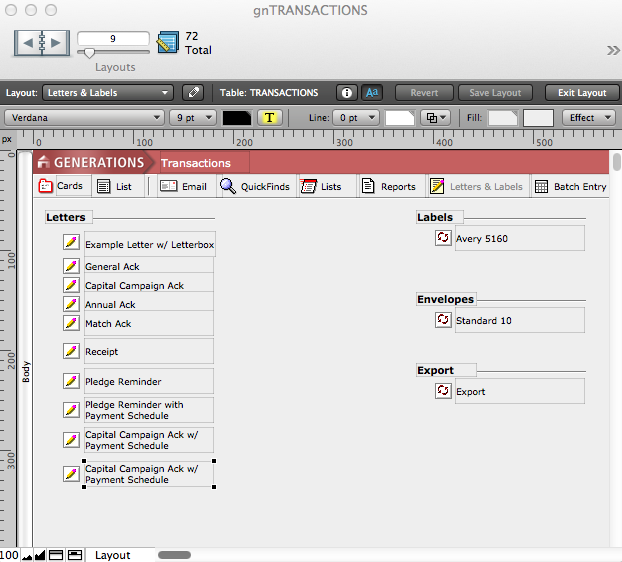
- In Browse mode, navigate to the Letters & Labels screen.
![]()
- Switch to Layout mode.
![]()
- Now you will duplicate a button and its label and edit it to point to your new layout. With the Pointer tool, click once on the bottom button and then shift+click to select its label as well.
- Four handles will appear around the button, and four handles will appear around its label. If the button/label is locked—meaning the object cannot be edited or deleted—the handles will appear gray. If the button/label is unlocked, the handles will appear black. If you click anywhere else on the screen, the button will be de-selected.
- Make sure your button is selected and choose Unlock from the FileMaker Pro Arrange menu. The handles will turn black when they become unlocked. If your button is already unlocked, Unlock will not be an option you can choose.
- Copy. Paste. A copy of the button and its label will appear, slightly offset from the original. Drag the new button and its label to a new position. Click off to the side to deselect. Now you will adjust the button settings and edit the label.
- With the Pointer tool, double-click on the button. The Button Setup dialog box will appear.
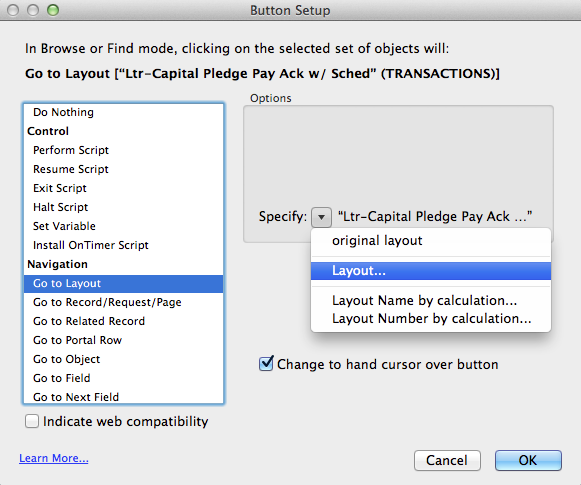
- Select Go to Layout under Navigation in the window on the left side of the dialog box.
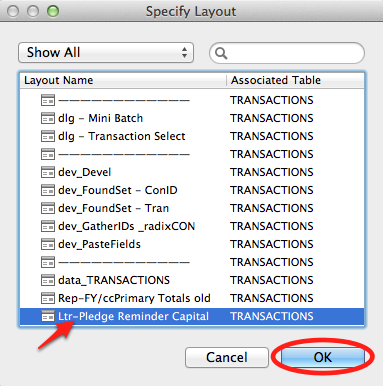
- Click the Specify pull-down menu in the Options area on the right side of the dialog box. A list of all the layouts in the file will appear. In the next step, you will tell FileMaker Pro where the button should navigate the user when pressed.
- Select your new layout from the list. It will be at the bottom.
- Make sure that the Change to hand cursor over button checkbox has a checkmark in it. If it doesn’t, click in the checkbox. When the user moves his or her cursor over the button, it will indicate that it is indeed a button as the cursor changes to a hand icon.
- Click OK. You will be returned to the Letters & Labels screen. Now you need to rename the button to reflect the letter’s purpose.
- Still in Layout mode, select the Text tool from the Tool Pallet. Your Pointer becomes a cursor.
- Double-click on your button’s label. The name of the button will be highlighted. If not, double-click again on the name.
- Type the name of your layout. The name should reflect the letter’s purpose. For example, if your layout is named Ltr_welcome, name your button Welcome.

- Switch back to Browse mode.
- Click on your button. It will navigate you to your letter. Your letter is ready to edit.
Step 4: Editing the Layout
Now that you have a new letter layout, you can edit the letter.
- In Browse mode, navigate back to your letter, either by the new button you have created on the Letters & labels screen, or by entering Layout mode and using the Layouts pull-down menu.
- Enter Layout mode.
- Using the Pointer tool, point to the body of your letter and click once to select it. Handles will appear around the block of text. Unlock it if necessary.
- Using the Text tool, click into your letter and edit the body text as needed.
- Click out of the changes to commit.
Merge Letters
You can use almost any field in GENERATIONS as a merge field in your letters. This means each letter for each individual in your found set, will display data from that individual’s record. So the core of the letter will be the same for eavery constituent, but the details in each letter will pertain to the addressee.
In order to create letters with merged data in the body, you need to know which fields to use. As you compose your letter, identify the fields you want to incorporate as merge fields.
Inserting Merge Fields
Once you have successfully duplicated and renamed a sample letter to creat your new letter, you are ready to edit the letter and insert new merge fields.
- Using the Text tool in Layout mode, edit the body of your letter. You may have to Unlock the Text Object first.
- Place your cursor where you want your merge field to be located in the body of the letter.
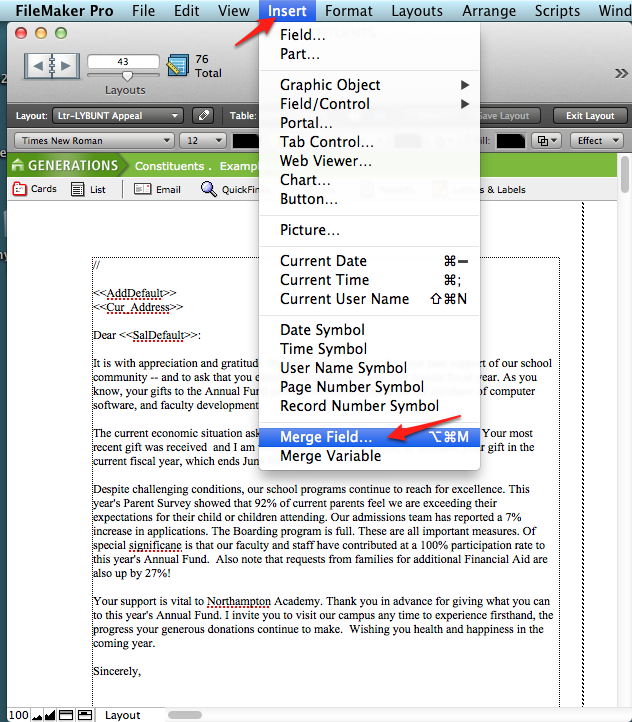
- Select Merge Field from the FileMaker Pro Insert menu at the top of your screen.
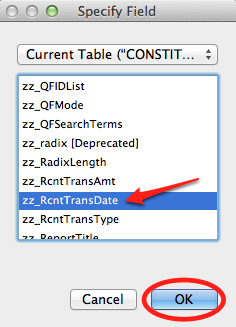
- The Specify Field dialog box will appear with a list of all fields in the file.
- Choose the desired field from the Specify Field dialog box.
- You can also type the name of a merge field with enclosed chevrons instead of selecting Insert Merge field. Be careful not to insert any extra characters or spaces within the chevrons. Create space with the space bar before and after the field as you would with any word.
- The merge field will appear in your letter where you placed your cursor.
- Delete any merged fields that you don’t want.
- Switch to Browse mode and flip through the records one at a time, using the Book in the status area, to verify that your letters are formatted correctly. If letters are missing merged data or data display is incorrect, you will need to determine if the error is due to an incorrect merge field, or errors with the data in the constituent record.
Letterbox Letters
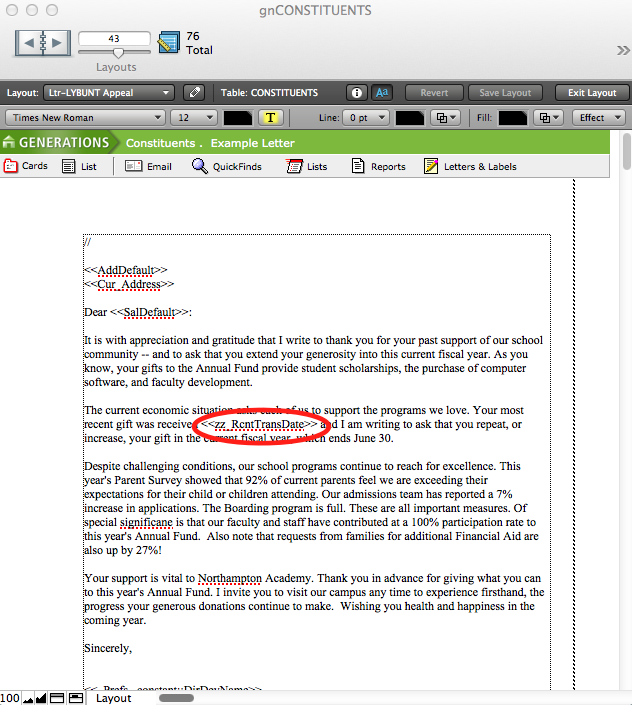
In a Letterbox Letter, a merge field is provided to you below the layout, into which you can enter text to personalize an individual letter; your text will appear at the appropriate location in the letter due to a companion field that exists in the layout. If no personalization is required, the letterbox merge field in the letter will not appear.
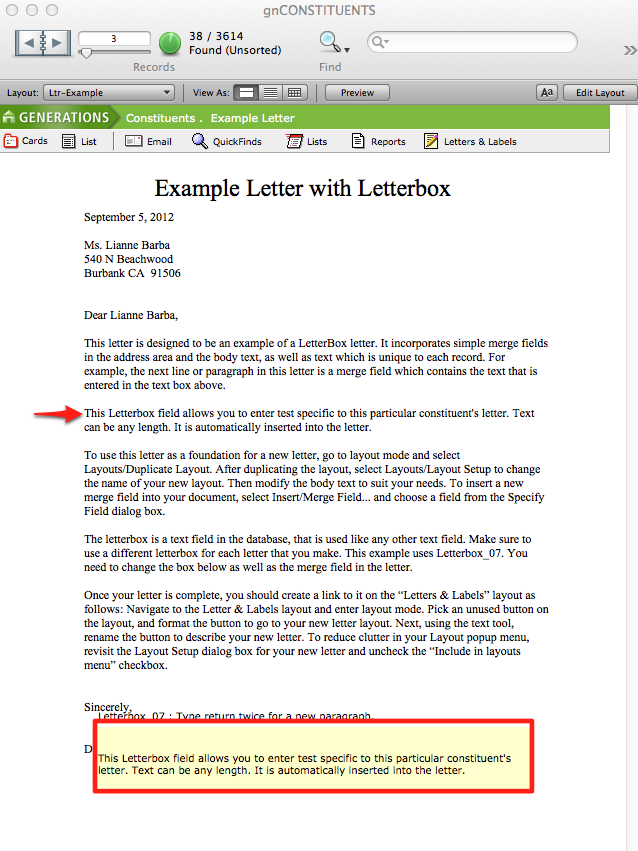
In Browse mode, type text in the Letterbox field at the bottom of the screen. When you tab out of the field, your new text appears in the body of the letter where the merged field is placed. As with any field, the text in the Letterbox is specific to each record. Different text can be typed in different records, and some records can contain no Letterbox text at all. The standard Letterbox field at the bottom of the layout where you enter your text is set to not print so it does not show in your print-outs.
There are eight Letterbox fields in GENERATIONS. These fields are named Letterbox_0x with x being numbers 1 though 8. This enables you to have eight different letters with associated Letterbox fields. You can always create more fields if you need them in the future. The sample letter uses Letterbox_08 so that you are not able to use that field in another letter.
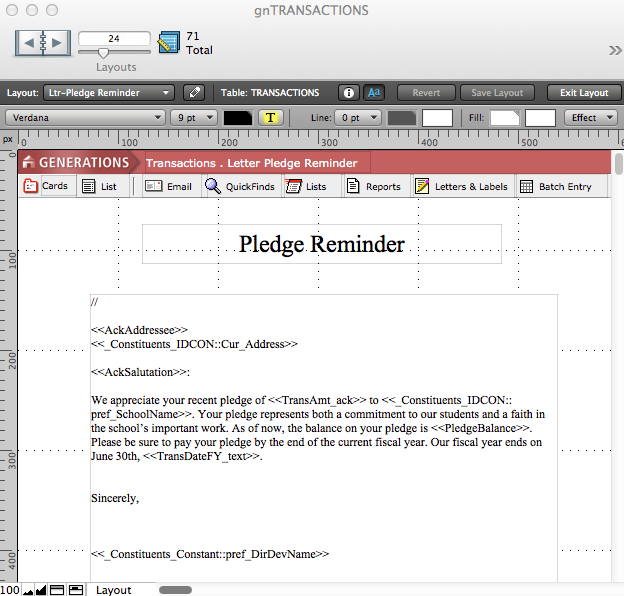
In Layout mode, you will notice that the merged field <<Letterbox_07>> is inserted into the body of the letter directly below the first paragraph. In addition, that same field is placed at the bottom of the letter but formatted as a standard field and set to not print. (Refer to the section on Non-printingObjectsfor more details.)
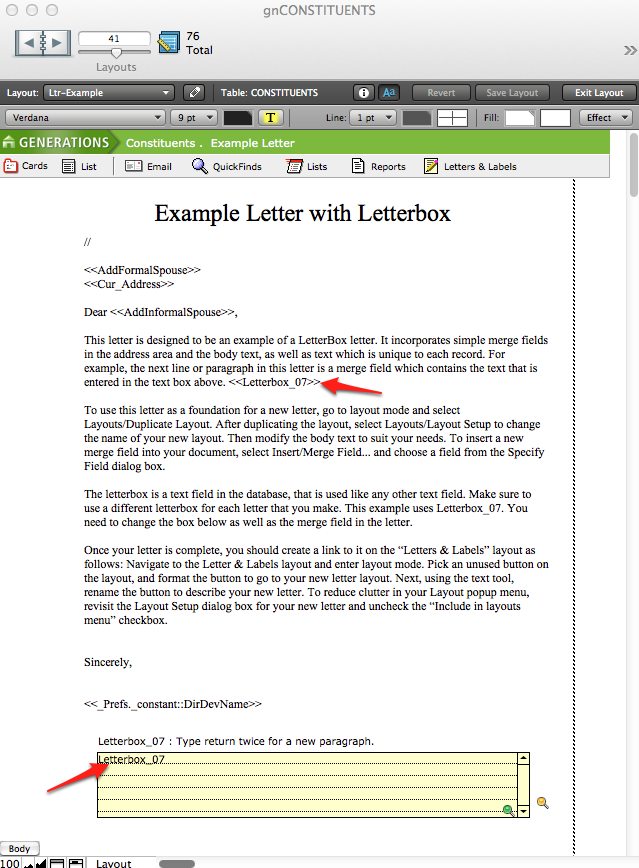
Notice also that there is no blank line between the first paragraph and the Letterbox field. This is intentional so that paragraph spacing is correct, whether or not there is text in the field.
To see the power of this technique, switch back to Browse mode. In any record, click into the yellow Letterbox field at the bottom of the screen. Press return twice to insert a blank line and type some text. Tab out of the field. The text you typed will appear in the letter body where the merged field is placed.
Move to a new record. Notice that the new record does not contain the additional paragraph. Move to the next record and type something different from what you typed in the first record. Tab out and notice that the paragraph now appears in this record and this record only. Moreover, you have not lost the paragraph typed into the first record.
Working with Letterboxes
Once you have successfully duplicated and renamed the sample Letterbox letter, you are ready to edit the letter and insert a new Letterbox field.
- Using the Text tool, edit the merged Letterbox_07 field in the body of the letter. Type into the field name and change the _07 to _01. Remember not to delete the chevrons or the hyphen or to add spaces. You may have to unlock the field Text Object first. Recall that there are eight Letterbox fields in GENERATIONS. Letterbox_07 is used for the sample letter and cannot be used for any other letter.
- Double-click on the yellow Letterbox_07 field at the bottom of the screen. You may have to unlock the field first. Because this field is formatted as a standard field, the Specify Field dialog box will appear, and a list of all the fields in the file will appear.
- Select Letterbox_01 from the list and click OK. The Letterbox_07 field will now be Letterbox_01. (The merged field and the placed field must be the same field—they are just formatted differently.)
- Double-click on the text label Letterbox_07. Change the O7 to O1 so that you know which Letterbox is being used on this layout.
- Edit the body of the letter, as needed, and insert and/or delete any other merged fields.
- Switch to Browse mode and try your letter.
- Switch to Preview mode to see that paragraph spacing is correct in records with the Letterbox text as well as those without.
Letter Parts
In FileMaker Pro, layouts are divided into Parts. When creating layouts, you decide what Parts the layout will contain. All layouts need to have at least one Part. Complicated layouts may have many parts. Some typical Parts are Header, Footer, and Body. You may want to refer to your FileMaker Pro User Guide for a complete discussion of Parts and how to use them.
It is not necessary to use Header and Footer Parts in letters. Instead, because you can place Text Objects anywhere on the letter, Text Objects near the top and/or bottom will replicate a word processing header and/or footer and appear in every record. For this reason, letters in GENERATIONS contain only a Body Part.