You can email a group of Invoices, Statements, and/or Receipts—each as a personalized attachment to an individual email message—without exporting, by using BROADCASTER 3.
Of course, you must create the invoices, statements, and/or receipts first, before you attach them to a broadcast.
It is important to gather your found set and launch the broadcast from the proper domain:
- To email invoices (with or without statements), gather your found set in the Invoices domain.
- To email receipts, gather your found set in the Payments domain.
NOTE: This is only a basic description of the process of sending your invoices in BROADCASTER. For more detailed instructions, see the documentation chapter on Using BROADCASTER 3.
Emailing Invoices
- From the Student Billing Workflow screen, click Email Invoices.

- This navigates you into Invoices List, where you can perform a find for the group of invoices you wish to email out (by Invoice Date, for example, or by Status).
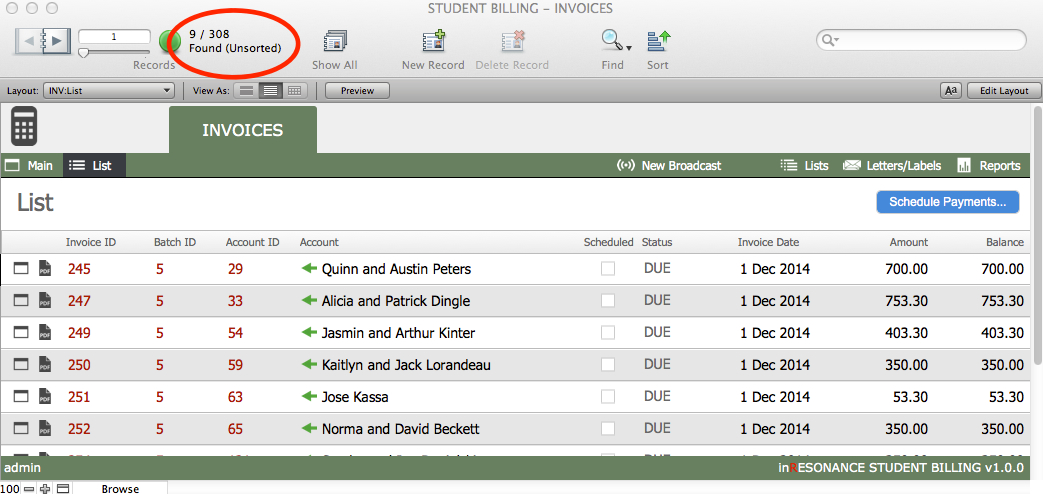
- Review the number of records in your found set (as displayed in the FMP status area), and scroll to ensure that you have the proper list.
- Omit any records you do not want to include in your email broadcast by first clicking on the record you want to omit to select it, then using the FMP Records menu > Omit Record command (the black bar on the left indicates which record is selected). Note that Omit Record simply removes the record from this particular list at this time, it does not delete the record altogether.

- When your list is correct, click New Broadcast in the task bar.

- This will navigate you into BROADCASTER. A dialog box will pop up where you can confirm that you want to prepare a broadcast for the found set of records. Click OK.

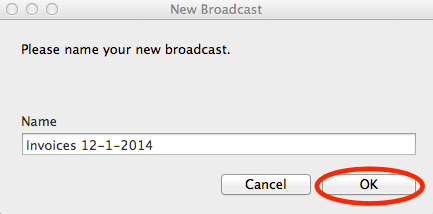
- A second dialog window will open, prompting you to name your broadcast. Enter the broadcast Name and click OK.
- This takes you to the Broadcast Assistant for your new broadcast. Select a Template for your broadcast (perhaps “Monthly Invoices”) from the list of templates on the left.

- Review the Recipients List by clicking the Edit button next to your recipients fields above the template display window.

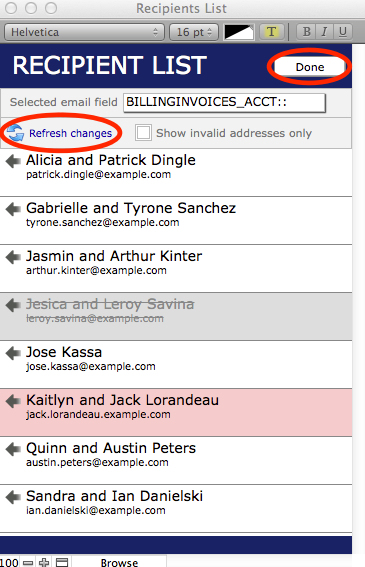
- In the Recipients List, you can see records with invalid emails (highlighted in pink) and either:
- De-activate the participant by clicking the recipient name in the list (the recipient will be highlighted in gray and appear to be crossed out); click again to undo; or
- Click on the arrow next to the recipient name to navigate to the PORTAL or SANDBOX record, where you can edit the email address.
- Refresh changes when you have finished making changes to the Recipient List.
- Click Done to exit the Recipient List and return to creating your broadcast.
- Click Continue to reach the Compose Message window.

- Here you can enter/edit:
- The email address fields that you want to be used for “To” “CC” and “BCC”NOTE: The blue text indicates these are links. Click “To” email to select from a list of the email address fields you commonly use. Contact [email protected] for assistance in adding designated email addresses here.
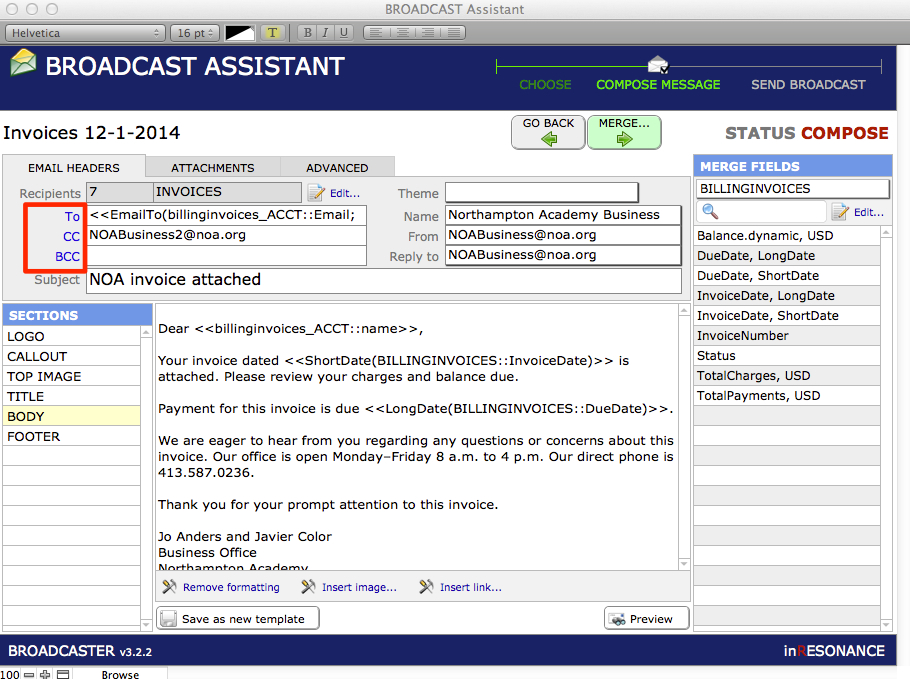
- Whatever you enter as Name will appear in the recipient’s email inbox as the source of the email.
- Subject line (if you are re-using a template from a different broadcast, check the subject line!)
- The email address fields that you want to be used for “To” “CC” and “BCC”NOTE: The blue text indicates these are links. Click “To” email to select from a list of the email address fields you commonly use. Contact [email protected] for assistance in adding designated email addresses here.
- Review Sections of the message. In the Body section, your message will be set up to display merge fields.
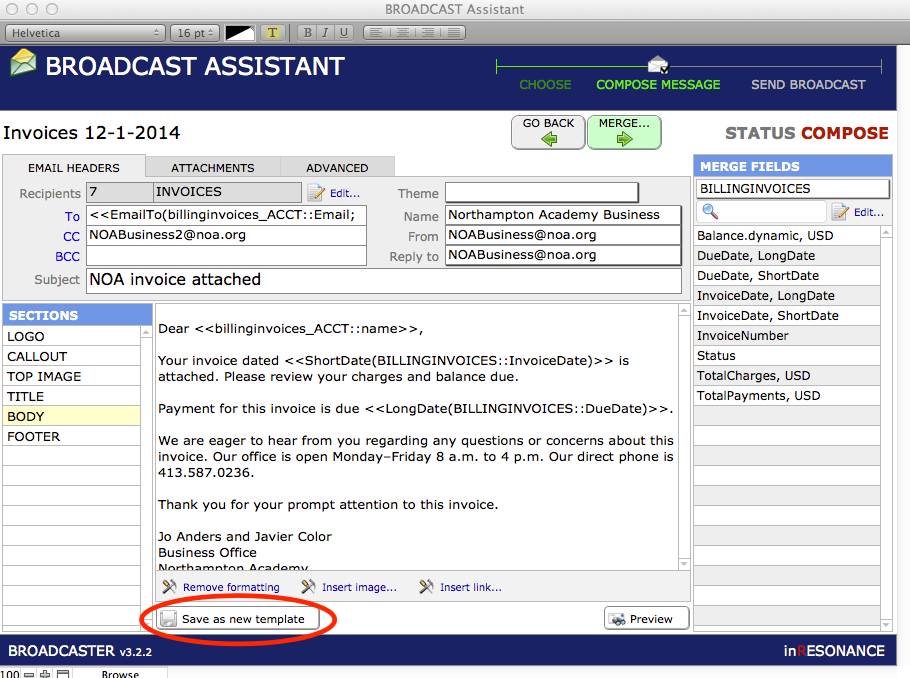
- If you make changes that you will want to use again moving forward, Save as new template. This will add your new version to the list of templates for future broadcasts.
Adding Record-specific PDF Attachments (Invoices, Statements, Receipts)
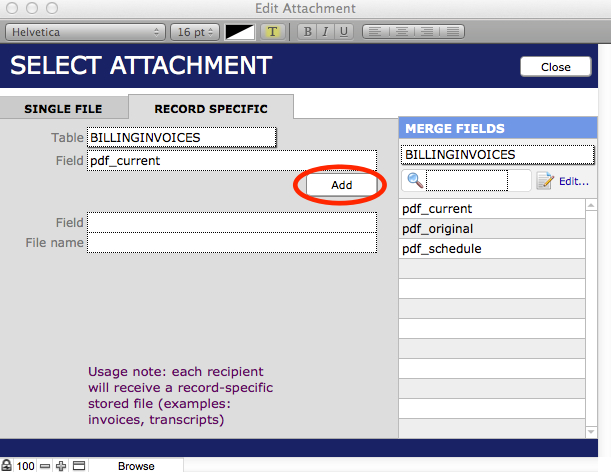
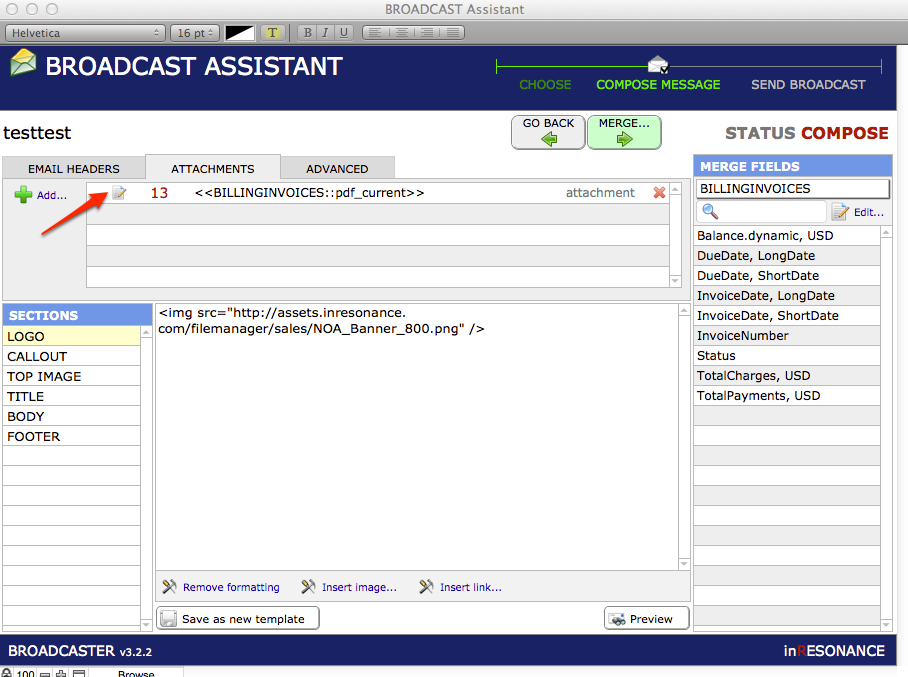
- Still in the Compose Message window, navigate to Attachments tab.
- Click Add.

A window will open in which you can select the kind of attachment you wish to append:
- Single File – This is one PDF file that will be added to every message (e.g. a PDF document explaining the business office privacy policy).
- Record Specific – A record-specific PDF would be a document that is different for every record (e.g. an invoice, statement, or receipt).
- Navigate to the Record Specific tab.
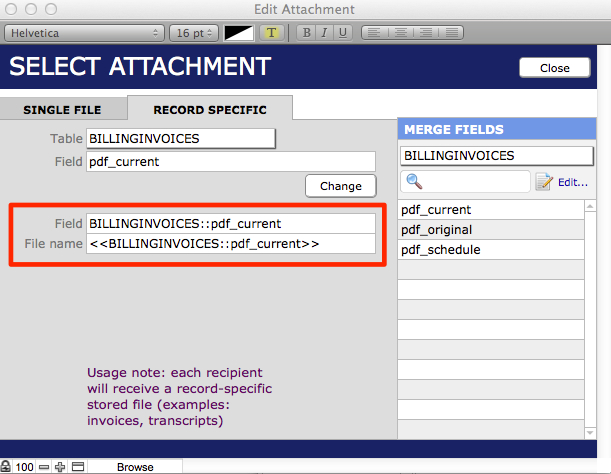
- Select the source Table from the drop-down menu.
- Place your cursor into Field and then click on the desired field in the list of Merge Fields on the right; the selected PDF will be added to Field.
- Invoices are in the BILLINGINVOICES table.
- Select pdf_current. If an invoice is scheduled, the payment schedule will be in the PDF as page 2. (The file pdf_original is the invoice before it was scheduled. pdf_current is the invoice you generated most recently for any account.)
- Statements are in the table billinginvoices_ACCT.
- Select pdf_statement.
- Click Add. The Field and File name will fill in.
- Click Close.
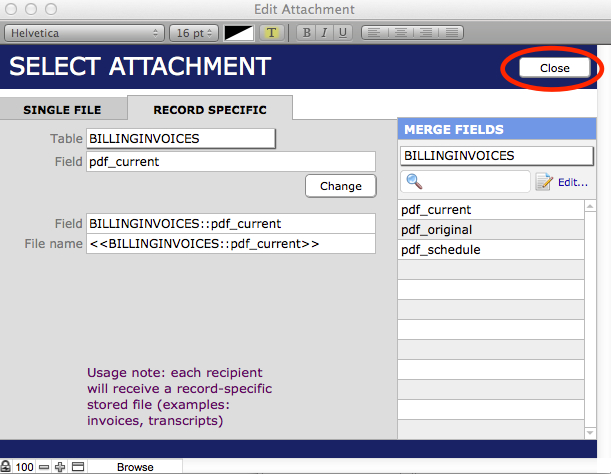
Your record-specific attachment has been added to the broadcast.
To add a second record-specific attachment (e.g. statements), repeat steps 16-20, this time selecting the statement from the billinginvoices_ACCT table.

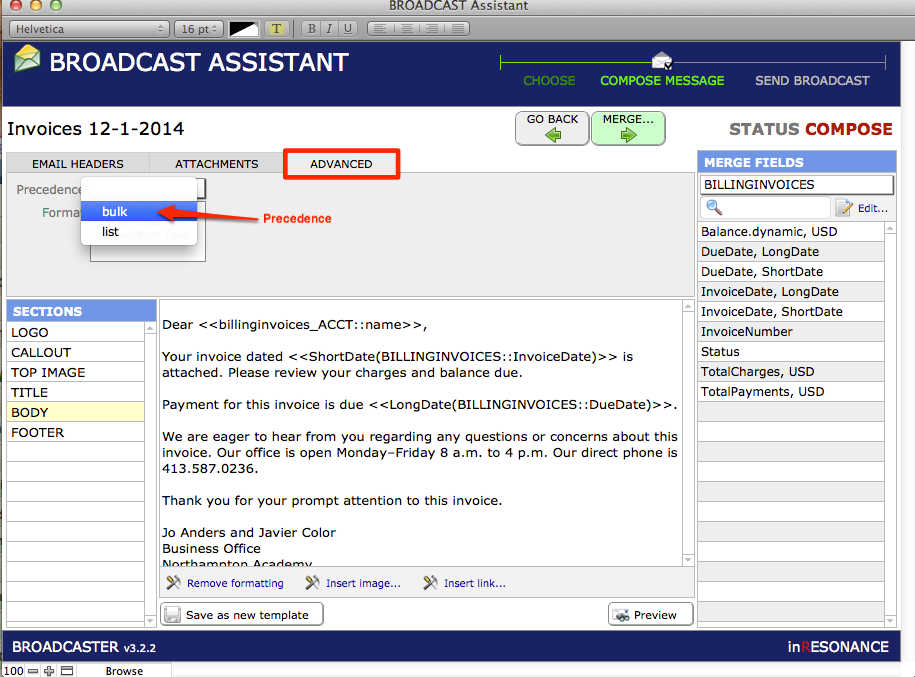
Settings To Prevent Being Bocked As Spam
- Click the Advanced tab. Use the drop-down menu to set the Precedence as bulk. This should help browsers see your message as not-spam.
- Merge your broadcast. This will create individual messages, each with its personalized invoice. A dialog will ask you to confirm that you are ready to Merge your broadcast.
- Test one by sending it to your own email address. Best practices suggest you send a test email to a colleague as well.
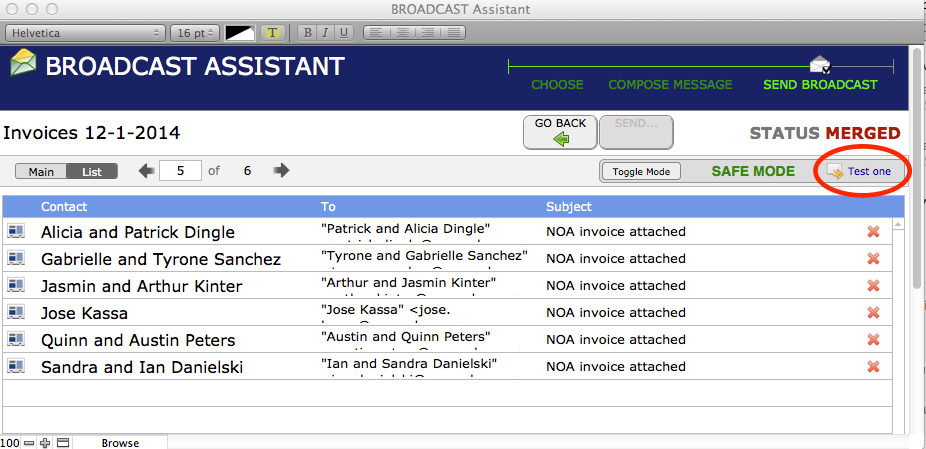
- When your broadcast is as you want it, Toggle Mode to Live Mode and Send.

- You will be able to track the success of your broadcast in the Broadcast Monitor.
Emailing Receipts
- From the Student Billing Workflow diagram, click Email Receipts.

- This navigates you into the Payments List, where you can perform a Find for the group of receipts you wish to email out (by a payment date range, for example).
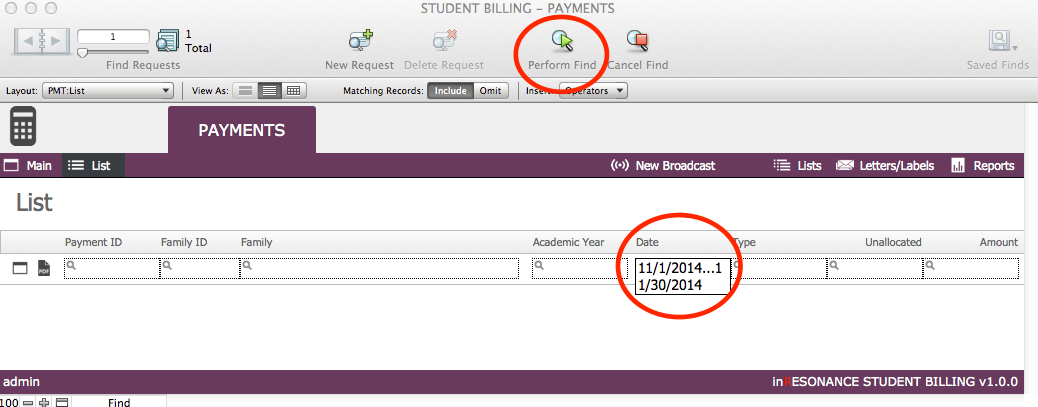
- Review the number of records in your found set (as displayed in the top left FMP status area), and scroll to ensure that you have the proper list.
- Omit any records you do not want to include in your email broadcast by using the FMP Records menu > Omit Record command for any selected record in the list (the black bar on the left indicates which record is selected; click on a record to select it). Note that Omit Record simply removes the record from this particular list at this time, it does not delete the record altogether.
- When your list is as you want it to be, click New Broadcast.

- Follow the instructions, above, for emailing invoices, beginning at #6. The differences will be:
- Select a template for Receipts.
- Select a record-specific Receipt PDF attachment.
As always, please direct any questions to [email protected].