Processing inquiries and applications after they have been retrieved will update the related records in PORTAL. Processing forms should become part of your daily workflow. You will process forms one at a time.
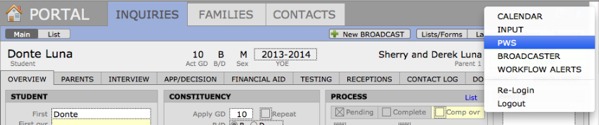
- Navigate to PWS by clicking the More menu in PORTAL.

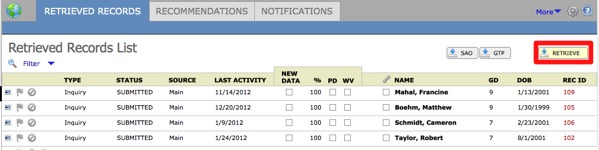
- Click Retrieve if you have not done so already.
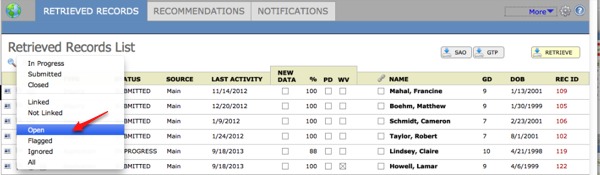
- Select Open from the Filter drop-down menu.

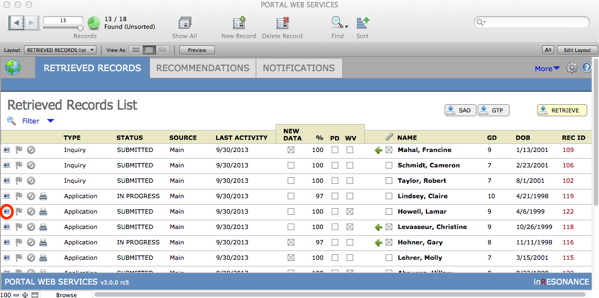
- Click on the Main detail card icon at the left end of a record in the list to process that form.
This takes you to the Link to PORTAL screen, where PWS will help you determine if the child/family match any existing records in PORTAL:
- An existing family inquiring/applying for a sibling, not yet in PORTAL
- An existing family and this child, already in PORTAL, is re-inquiring during a different Admission Season than before
- An existing family and this child, already in PORTAL, is updating a current record during the same Admission Season
- A new family with a new inquiry
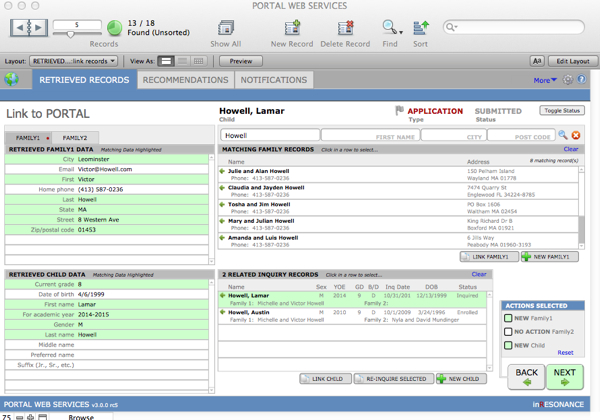
The left side of the Link to PORTAL screen displays the information submitted on the inquiry/application form, for Families (above) and Child (below).
There are two tabs: Family1 and Family2. You will always see Family1 data. If there is also Family2 data, you will see a red dot on the Family2 tab; the red dot indicates that you have Family2 data to consider.
The right side of the Link to PORTAL screen displays possible Matching Families (above) and Matching Inquiry Records (below).
There are search fields at the top right of this screen that could help you narrow down a long list of potential matches, including:
- Last Name
- First Name
- City
- Postal Code
NOTE: If a child and family have different last names, be aware that you may need to delete text from the search fields, or change it, to find appropriate possible matching records.
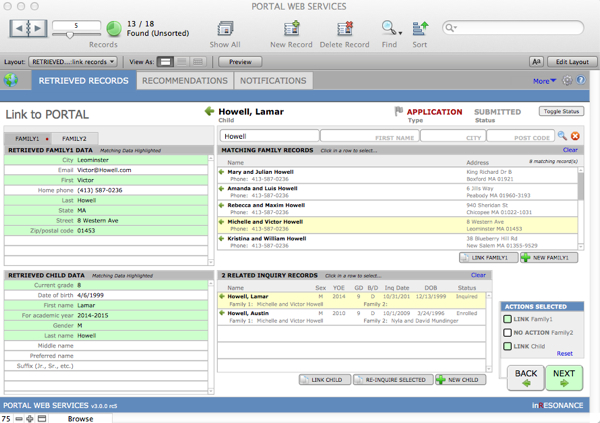
- Review the Retrieved Family1 Data on the left to see if they correspond to an existing family in the Matching Family Records list on the right.
- If you see a Matching Family in the Matching Family Records list, click the line and click Link Family1. Note that this changes the Actions Selected to Link Family1.
- If you do not see a Matching Family, click +New Family1.

- Review the Retrieved Child Data on the left to see if it corresponds to an existing child in the Related Inquiry Record list on the right:
- If the student is the same and the YOE matches, click on the matching inquiry record on the right and click Link Child.
- If the student is the same but the YOE does not match, click Re-inquire Selected.
- If no inquiries match, then click New Child.
- Review the Actions Selected to ensure that you have chosen the correct actions and press Next. Clicking Next will create new records and/or update existing records in PORTAL, and advance you to the Copy Data to PORTAL screen.
Copy All Data to PORTAL Creates the Link between PWS and PORTAL
Copy All Data to PORTAL is the step in the process that creates the link between the PWS record and the PORTAL inquiry record for the child. Click the checkbox for Show me data that doesn’t match to make it easy to evaluate which data to move into PORTAL. The PWS record must be linked to the PORTAL inquiry record in order to notify the applicant through their web account as process items arrive, to retrieve online recommendations, and to publish your decision letter.

- If you are creating new records for the family and child, you may press Copy All Data to push all available data into PORTAL. Click Done.
NOTE: Three tabs appear here, separate tabs for Child, Family1, and Family2. Process every tab before clicking Done.
- If you are updating information, compare the data in Retrieved data and PORTAL data. Push data as appropriate: Copy All Data, or you can use the small toggle arrow to turn off any line you do not wish to copy over before clicking Copy All Data. The data on the left (from PWS) will overwrite the data on the right (in PORTAL).

GOOD NEWS: If there is data in PORTAL (on the right side), and no data coming in from the inquiry or application (left side), when you copy data, your PORTAL data will remain intact. The update will not replace data with nothing.
IMPORTANT: Do NOT check the process status checkboxes in PORTAL for these apps—this action is automated. PWS will automatically check off the application process status item and add a date when the application is Submitted and you process it through PWS.
Swap Parents
Your convention may be to show the Father as Pa, but the Mother may have been the one to fill out the submitted form. You can see the discrepancy when you compare Retrieved data to PORTAL data. To ensure that you do not copy one parent’s data into the other parent’s record, you can click Swap Parents.
This will swap Pa and Pb in PWS for ease of matching family data.
Title Case
If the new data is not capitalized, press the toggle switch on the row. This will capitalize the first letters of each entry. Toggle again to revert.

Family 2
- Repeat this process for Family2. If Family2 data already exists for this record, a red dot will appear next to the Family2 tab.
- Click Done. If the record is an incomplete application, a dialog box will appear saying that the record could not be closed. Click OK.
- If the record was completed it will now be marked Closed and will be highlighted in blue.
Re-processing An Application
If you need to re-process a Closed application:
- Find the application in the Retrieved Records List.
- Click the Main detail card icon to the left of the record row to enter the Link to PORTAL screen.
- Click the Toggle Status button in the top right to change the status from Closed to Submitted, then the Back button on the bottom right.
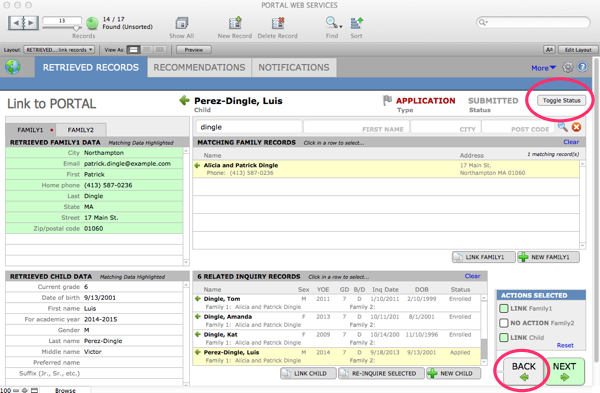
- The record is now open again and you can process it correctly.
Processing Partially-completed Applications
When you click Retrieve, the Retrieved Records List will display all inquiries and applications, including partially-completed applications. Processing a partially completed application will only check the Inquiry checkbox in PORTAL. There are several benefits to processing applications as soon as they appear:
- Linking the PWS record to an inquiry record in PORTAL will allow you to notify the applicant through their web account as action items (process status items) arrive.
- A PORTAL inquiry record must exist before you retrieve an online recommendation for that inquiry. If you retrieve a recommendation without first processing the PWS application, the recommendation will have no record to attach to.
- After processing partially-completed applications and thereby creating the related PORTAL inquiry records, you can begin communicating with those inquiries using BROADCASTER.
- Even if the family does not complete the application, you may want to have a PORTAL inquiry record if you wish for it to be counted in your performance statistic reports for the Admission Season.
Once you have processed an application the first time, the link to PORTAL is established. It is up to you whether you keep processing it as the family adds information incrementally, or wait until the finished application has been submitted.
Note that the status of an online application will remain In Process until such time as the applicant Submits the application (which means the application fee has been paid or a waiver code has been entered).
Add Checkbox Customizations to PORTAL for Partially-completed Online Apps and Paper Applications
NOTE: This section pertains to PORTAL versions earlier than v4.5
You can retrieve data from partially-complete online applications into PORTAL, but the record status will not change to Applied until the online application has been Submitted. We suggest you add an “isAppProgress” checkbox in PORTAL that you can check to indicate an online application is in progress.
If you need help adding checkboxes, contact [email protected].
Viewing Completed Applications in PORTAL
Once an online application has been submitted and processed, you can view the HTML view from the Apps/Decision tab, Notifications area in PORTAL.

With PWS 3, it is possible that completed application PDFs can be shared outside of your solution.
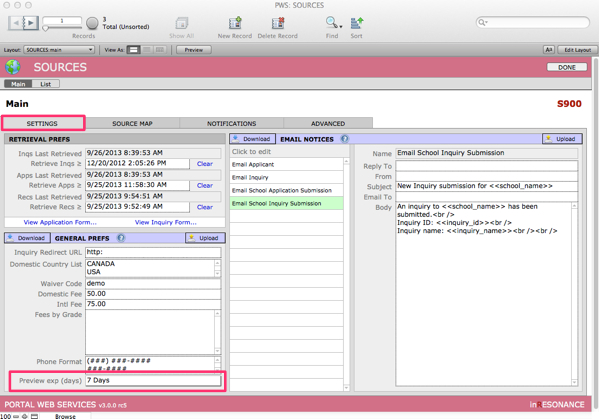
If desired, the school can set a limited period of time during which users can view a PDF of an application without authenticating. The link to the PDF can be shared. The time limit during which authentication is not required is set in PWS > More > Sources > Settings tab, General Prefs area, using the drop-down menu Preview exp (days) field.
Printing Applications
There are two places where you can click to print an application that has been submitted online:
- In PORTAL > Apps/Decision tab, Notifications area, click View app to open the HTML view of the application and print. This is viewable when you have processed a partially-completed application.
- In PORTAL > Documents tab, click View to open PDF in your PDF viewer and print via that application. This is only available once you have processed a submitted application.
- In the PWS Retrieved Records List, click on the printer icon at the left end of the row associated with that application. Note that you cannot print an app of type OtherApp, as no PDF of it exists in PWS.