In most cases, the only fees that will be put on a payment schedule are tuitions. If a fee is to be schedulable, it is so marked in Student Billing Preferences. No matter what fees are included on an invoice, when you schedule the invoice, only the fees that are designated as schedulable will be scheduled.
Fees must be invoiced before a schedule can be applied.
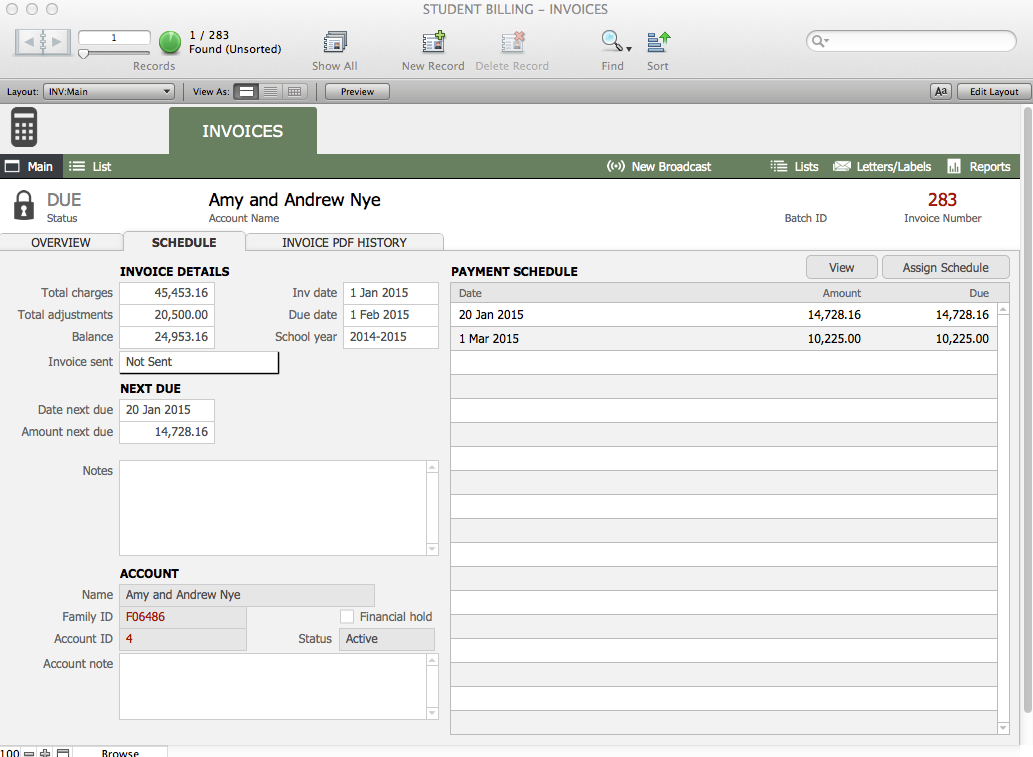
The original invoice will show the full tuition amount. The amount due at any given time will reflect the payment schedule.
Scheduling an Invoice
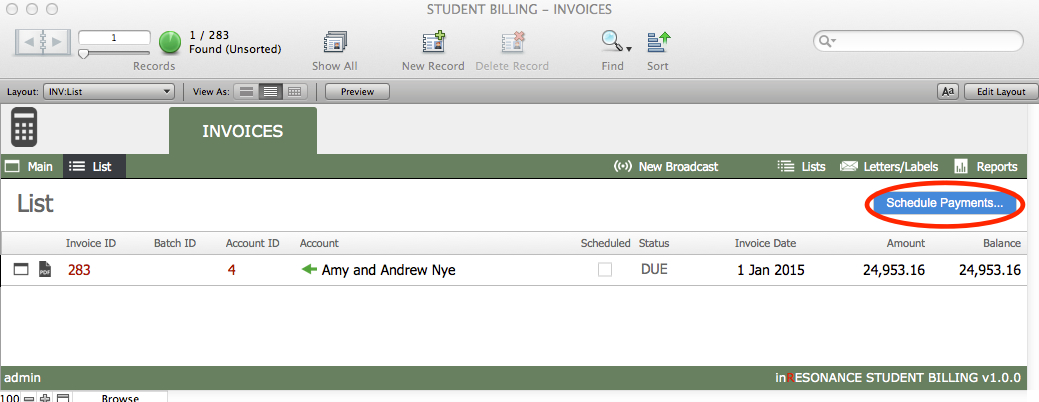
- From the Student Billing Workflow screen, click on the Invoices color bar to enter the Invoices domain. If you have just created invoices, you will already be in this domain.

- Perform a find for one or more invoice to be scheduled. You may schedule a found set of invoices that are all following the same schedule.
- Click Schedule Payments...
- A window will open where you can select the payment schedule you will assign to this found set of invoices.
- Select the desired payment schedule, which will be highlighted in yellow. Only one schedule can be selected for an invoice.
- Click Schedule.

The Schedule for this invoice will appear in the invoice record in the account.
Unschedule, Reschedule or change an Invoice Payment Schedule
In the event you receive a check you would like to apply to a scheduled Invoice, you need to do the following procedure to cancel the first schedule. It is essential that you publish twice to achieve this goal or the family will still have a payment deducted from their account.
Change a payment schedule for an invoice:
- Find the invoice whose schedule needs to be changed.
- In the Main view of the Invoice, click Assign Schedule, select Remove.
- Click the Go to Related Accounts in BillPay button.
- Publish.
- Go back to the Main view of the Invoice, click Assign Schedule, select the new schedule for the Invoice.
- You might have to create a new schedule for the time period you’d like to assign.
- If so, go to Prefs, Payment Schedules tab and create a new schedule. Close window.
- Go back to the Main view of the Invoice, click Assign Schedule, select the new schedule for the Invoice.
- Click the Go to Related Accounts in BillPay button.
- Publish.