Once the Calendar has been set up with your preferences, you are able to use it many different ways.
Views
The Views, located along the top of the Calendar page, enable you to work in the Calendar in different views according to your task.
The most popular Views to utilize are Schedule and Month View.
Schedule View is helpful to be able to see the entire day’s schedule with the Resources listed across the top and the events shown in the appropriate time blocks. It is a quick way to see the daily schedule on one page—see where the booked events are and where there are open events.
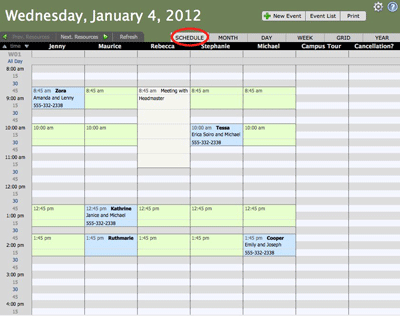
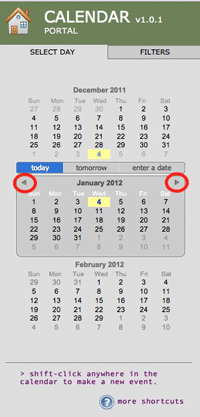
Today’s Schedule View will automatically be shown as the default. To find another date in schedule view, select from the Calendar on the left.

You may click to view Today, Tomorrow or Enter a Date to navigate to a certain date.

Month View is helpful to see the whole month at a glance. It allows you to see what days have more interviews than others. To get more detailed information, you can then click on the day or change over to another view.

You can navigate to another month by clicking Next Month on the top or by selecting the month located on the Calendar on the left.
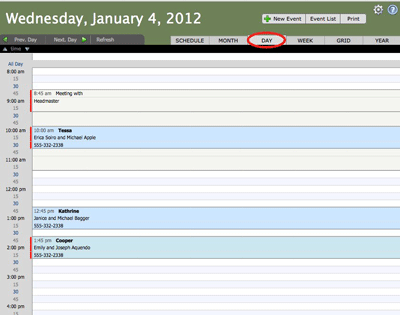
You can also use Day View. This is similar to Schedule View, but instead of having the Resources listed on top to show their particular schedule, this shows the entire office’s schedule together.
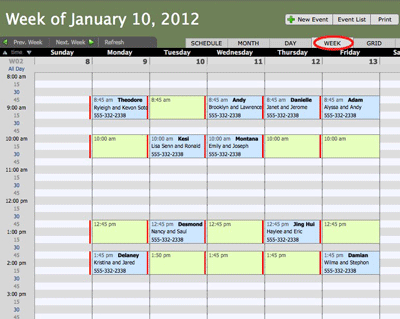
Week View
and Year View

To Print, select Print at the top of the Calendar. You can then select Save as Excel, Save as PDF or Print.

Uses
One way to get the most out of Calendar is to make use of the Filters. See Setting Up Calendar. The filters can change the way your Calendar View appears. Filter options can be unique to each user.
Here is how the Schedule View of a day in the Calendar will appear with the filter to display only Interview.

This is the same day in the Calendar, but the filter is checked to display both Open Interviews and Interviews.
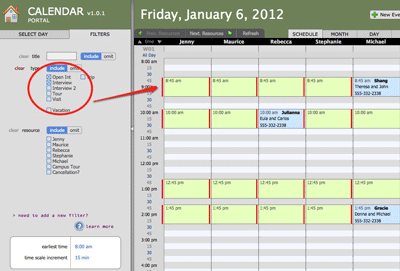
The Red Bar that sometimes appears to the left of the time block means that this particular event time has more than one event scheduled in it.
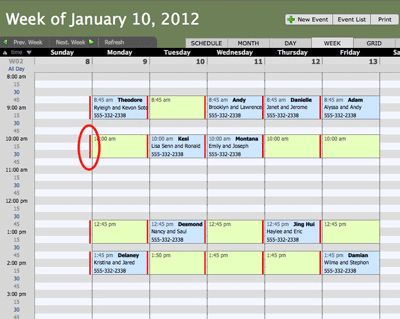
Having more than one event in a time block is not necessarily a bad thing, example: during this week from 8:30-9:30 there are four Open Interview “events”.
Adding Events
To add events, navigate to the date you wish to add the event. Depending on what view you are in, your screen will look different.
If you have set up Open Interview times, click on an Open Interview.
An Event Detail will open.
To find the applicant, enter the last name in “Name begins with…” A matching list of students will appear in alphabetical order by last name.
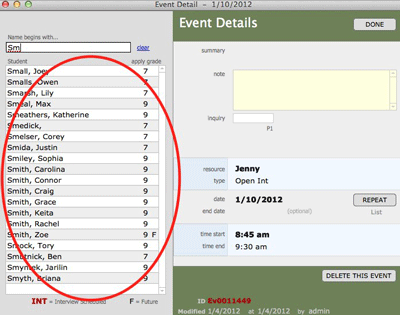
If you enter a name in “Name begins with…” and nothing comes up, the student has not yet been entered into PORTAL.

Once you have selected a student, select a Resource by using the drop down menu.
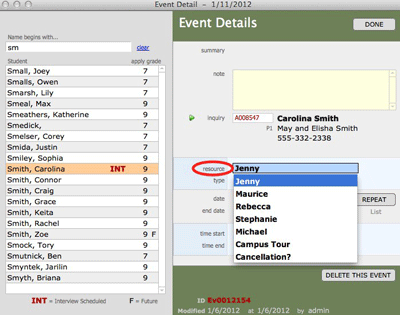
Select the Type of event. You will most likely have to change the Open Interview to an Interview, Tour or Visit.

Select the Time Start and Time End.

Add a Note.

If you have not created Open Interview times, you can add a new event by clicking New Event on the top of the page.

This event detail will be blank and you will need to complete the event information.
Select the Date by entering it, or by clicking on the date-picker calendar.

If the student you have selected already has an interview scheduled, a dialog box will open and ask you if it is “Ok to double book?” Most likely you will want to select “Cancel” and check that you have selected the correct student, and investigate if the interview has already been scheduled.

Helpful Tips
- The Calendar screen can be modified for smaller computer screens. To hide the left Navigation screen click the small, left facing arrow.

To show the Navigation screen, click the small, right-facing arrow.

- When setting up Resources, it is a good idea to create a heading for Campus Tour and Cancellation.Use the Campus Tour column to add information about when an applicant will be going on tour, and use the Cancellation column to record applicants who wish to be put on a “waitlist” for available appointments. If an applicant cancels an appointment, you will be able to see if there is someone waiting for that event time.