Before using the Calendar, you must set up calendar preferences.
Click on the More > Calendar button above the Task Bar.

By default, today’s Schedule View will open. You may choose to use other Views, and can select these in the View tabs. The most common views you will be using will be the Schedule and Month views.

Resources
The Resources are headings under which appointments can be scheduled. Resources can be the names of admission officers or other items such as campus tours. To modify these Resources, navigate in the Calendar to the Filemaker Menu > File > Manage > Value Lists.
Select Resources and click the Edit button.
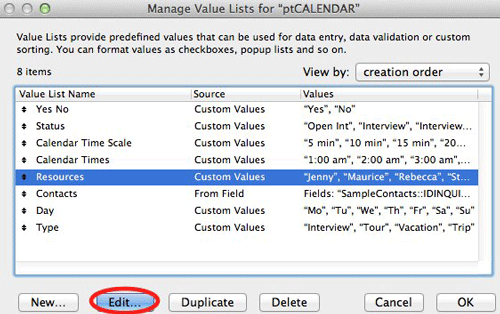
Enter the Resources you wish to use in the Use custom values box. The Resources will appear on the Calendar screen in the order in which you list them in the box.

Events
Daily interview slots should be set up by creating Open Interview events. We suggest you create these Open Interviews to ensure the interviews are scheduled at the same time every day in accordance to your school’s daily schedule and it will make it easier to use once you are turning the Open Interviews into Interviews.
Select Event List in the Task Bar.

A list of all events will appear. To create and modify interview times and lengths click Default Event List.

To modify the Open Interview times, click in the Start Time and End Time boxes.

To prepopulate the Calendar with these set Open Interviews, set the dates in which you wish to input this Event List. Enter the date range start and date range end and click Create Events.

Create the events for the entire year (or semesters at a time). It is recommended that you create all events and then go back to delete events for days you will not be open (for Holidays or Vacations).
The Calender will now display Open Interview blocks on all dates that you selected.

This view shows the Calendar day starting at 8 am and the time in 15-minute increments. These preferences can be modified by selecting Filters.

Event Status Colors
The event status colors can be modified.
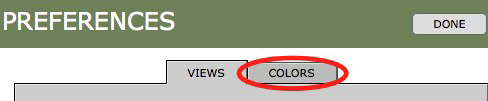
1. Click the gear above the task bar.

2. Select the Colors tab.
3. Select the Status you want on the left and select the color. You can select from Simple, Bright or Other colors.

4. Modify how you wish to view your calendar.
