The CONTACTS table contains information about schools and individuals who have an association with children during the admissions process. Generally these are previous schools, consultants and alums. Various and multiple contacts can be associated with an inquiry. All of these are managed in the CONTACTS file but can be linked to inquiries from within the INQUIRIES file and during the input process. To make these associations useful to you, you will need to populate the CONTACTS file.
Accessing CONTACTS
To access CONTACTS, click the CONTACTS tab at the top of your screen.
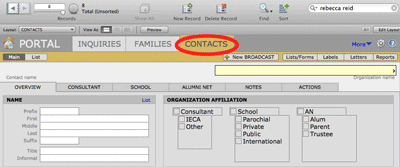
Each contact has a record in the CONTACTS table. Records can be individuals, such as consultants, or organizations, such as feeder schools. From any particular record you can view all inquiries that are linked to a particular contact by navigating to the appropriate Affiliation tab.
Individuals or organizations designated as Consultant will have all linked records listed on the Consultant tab. Organizations designated as School will have all linked inquiries listed on the School tab. Likewise, all individuals designated as AN will have all linked inquiries listed on the Alumni Net tab.
Populating CONTACTS
- Navigate to CONTACTS.
- From the FileMaker Pro Records menu, select New Record. A new record will be created.
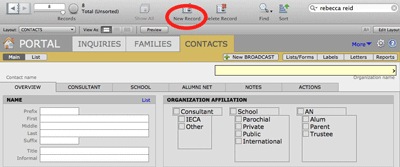
- Enter information about the contact.
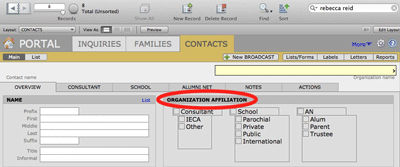
- Be sure to select the appropriate ORGANIZATION AFFILIATION. This is important or else the record will not display from the Inquiry record.
- Continue to create new records and complete information as necessary.
Linking INQUIRIES and CONTACTS
Linking a School
-
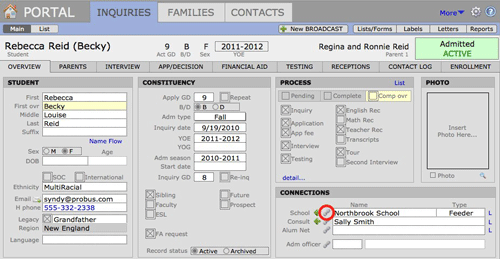
Navigate to INQUIRIES > OVERVIEW and find the desired inquiry record.
-
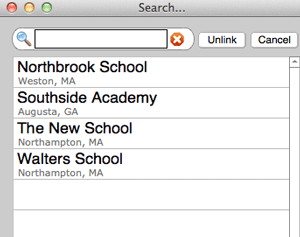
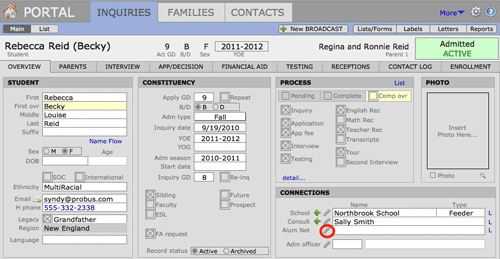
Click the gray link icon next to the School field inside the CONNECTIONS area. A Search window will appear.
-
Type the desired name of the school. Records that are marked as type School in the CONTACTS file will be displayed in the window.
-
Select a school from the list by clicking on it. Notice that the School Name and type are automatically entered into the CONNECTIONS area.
- If the school does not exist in the list, you can either navigate to the CONTACTS table and create a new record and then link it using the procedure outlined above. Or you can click into the School field and type the name. School Type can be manually entered by clicking into the Type field and selecting from the drop down list. NOTE: This does not create a record in the CONTACTS table.
Linking a Consultant
- Navigate to INQUIRIES > OVERVIEW and find the desired inquiry record.
- Click on the gray link icon next to the Consult field inside the CONNECTIONS area. A Search window will appear.

- Type in the desired Consultant name. Records that are marked as type Consultant in the CONTACTS file will be displayed in the window.
- Select a Consultant from the list by clicking on it. Notice that the Consult Name is automatically entered into the CONNECTIONS area.
- If the Consultant does not exist in the list, click into the Consult Name field and type the name. In this case, the ID Consult should be left blank.
Linking an Alumni Network
- Navigate to INQUIRIES> OVERVIEW and find the desired inquiry record.
- Click the gray link icon next to the Alum Net field. A Search window will appear.
- Type in the desired AN. Records that are marked as type AN in the CONTACTS file will be displayed in the window.
- Select an AN from the list by clicking on it. Notice that the AN Name is automatically entered.
- If the AN does not exist in the list, click into the AN Name field and type the name. In this case, the AN ID should be left blank.
Unlinking a School, Consult or AN
- Find the Inquiry for whom you wish to unlink contact information.
- Click into the School, Consult or AN field and delete the information.
Unlinking a contact does not delete that record from the CONTACTS file if it exists. It only breaks the link between the inquiry and the contact.
Associating Inquiries with Admission Officers
Within PORTAL you are able to link your school’s Admission Officers with specific inquiry records.
Adding Admission Officers to PORTAL
To populate the Admission Officers data table you will need to be logged into the Admin account.
- From INQUIRIES click the gear icon to go to Preferences.
- In the Files tab, choose Data Viewer.
- Choose Data:AdmOfficers from the left-hand panel.
- Use the plus sign at the bottom left, or the New Record button to add officers.
We suggest that you do not delete records from this table. Doing so will delete important file history and will delete any Admission Officers that have been associated with inquiry records.
Linking an Admission Officer to an Inquiry
To link inquiries with a specific Admission Officer:
- Find the Inquiry record you want to link with a particular Admission Officer.
- Navigate to the OVERVIEW screen.
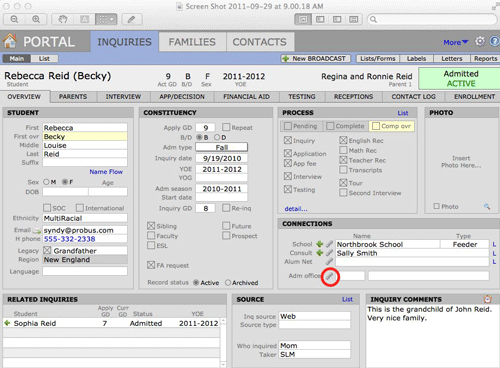
- Click the gray link icon next to Adm Officer in the CONNECTIONS area.
- A Search window will appear. Type the name of the officer in the Search area at the top of the screen.
- Choose the person from the list and click LINK.
- Their name will appear in the field Adm Officer field.
To remove an Admission Officer, delete their name from the field.
‹ How to Divorce Families in PORTAL Best Practices with Futures ›