Webinar: Online Decision Letters Made Easy
Assigning Decision Letters
After an admissions decision has been made you are able to assign a decision letter to an inquiry, or to a found set of inquiries, and then upload your decision to the web. You can assign decision letters in PWS as you make decisions; in PORTAL, you stipulate a specific date/time in the future for the simultaneous posting of decision letters to the web.
Note: It is important to ensure that you have made your admission decisions in PORTAL before attempting to assign letters. PWS decision letters have a type associated with them that correspond with Admission Actions. This prevents you from sending the wrong decision letters.
- Navigate to PWS: NOTIFICATIONS.
- Use the Filter, or perform a Find using the Adm Decision field, to gather the records to which you want to assign decision letters.
- See the column Assign Letters. Records highlighted in green indicate there is an admissions decision associated with the record; records highlighted in grey indicate a missing admissions decision.
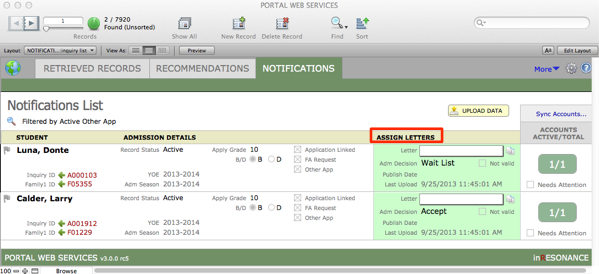
- Review the Letter field for each active record, and select from your drop-down menu of letters to assign the correct decision letter. If you have more than one kind of accept letter—for instance, regular Accept and also Accept with Financial Aid—you will want to be sure the letter selected is the correct letter for the circumstances. Assigning and reviewing letter assignments should be completed well before your publish date. For more information on decision letters, see the article Creating Decision Letters.Letters—however many versions of each you create—are of three types: Accept, Wait List, and Reject. If the type of letter you assign does not match the decision, PWS will highlight that record in pink.
- Click Upload Data to post the decision letters to the web. They will remain invisible to the applicants, queued up until your publish date/time.
The Applicant’s View of Process
As the Applicant completes their action items, they can monitor their application status.
- The applicant’s application status will be in “In Progress” to start in their applicant account.

- Once the applicant’s record is in “Complete” status in PORTAL and notifications have been uploaded in PWS, the status will move to the second status “APPLICATION COMPLETE: Application complete and under consideration.”

- Once an admission decision is given and a publish date and time are set in PORTAL and a letter is assigned in PWS, the status will then move to the third status “APPLICATION COMPLETE: decision available: DATE.”
- Once the publish date and time is in the past, the online decision letter will be available for viewing by the user and the status will then move to the forth and final status “DECISION AVAILABLE: available as of DATE.”

Assigning a Decision Letter to a Found Set
- In Notifications, perform a Find to create your found set, such as find for Admission Decision > Accept.
- Assign one Decision Letter from the drop-down menu to one record.
- Click the letter icon on the right in that same record.
![]()
- A pop-up box will appear asking if you would like to assign the same letter to the found set.

- Click OK.
If needed, iR can help you add appropriate fields to the layout to isolate searches to find the appropriate group of applicants.
Previewing a Decision Letter
- Click the single letter icon to the left of the Letter drop-down menu.

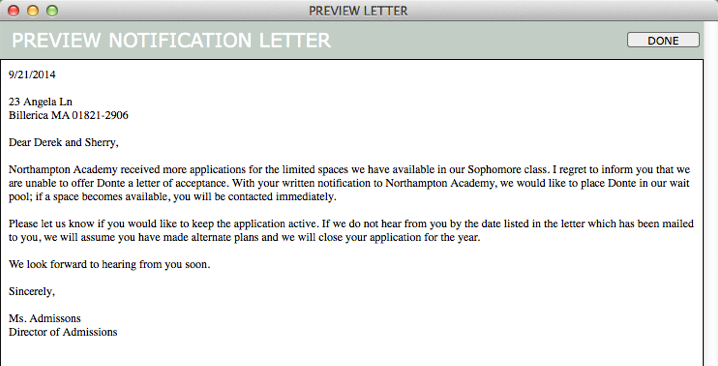
- Preview the assigned letter.
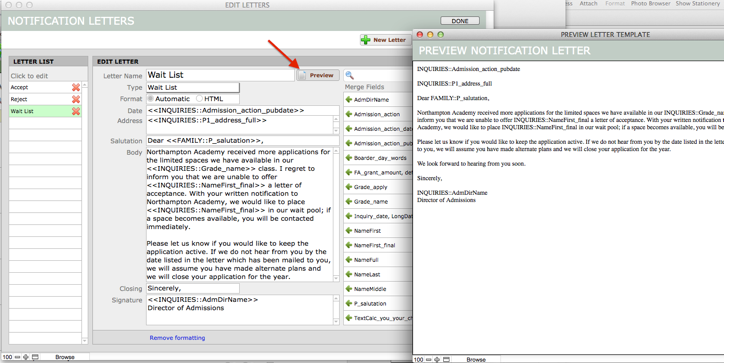
- Click Done to close.
When Reject has been changed to Deny in PORTAL
If in PORTAL, you have changed the Admission Decision from Reject to Deny, this will not automatically match with PWS. You will need to make a corresponding change in PWS. To change the PWS data to match PORTAL:
- In PWS > More > Letters.
- From the FileMaker menu > File > Manage > Value Lists.
- Scroll down to the value list called Letter Type and click to select.
- Click Edit, then replace “Reject” with “Deny” in the custom values list.
- Click OK to close Edit Value List.
- Click OK to close Manage Value Lists for PWS.
- Change Letter Name to Deny.
- Click Done.
Setting the Publish Date for Decision Letters
You can set the Publish Date/Time in PORTAL long before you have made your decisions.
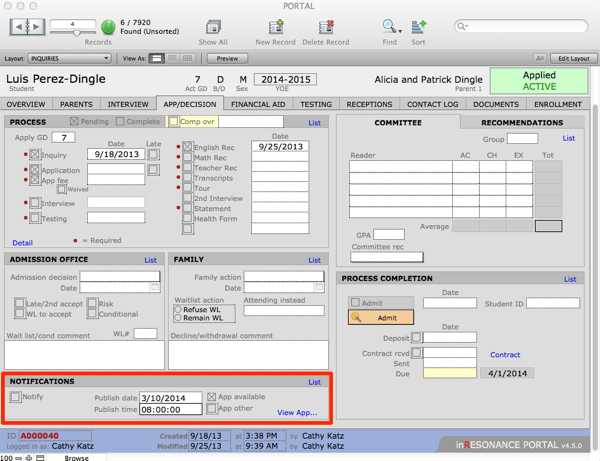
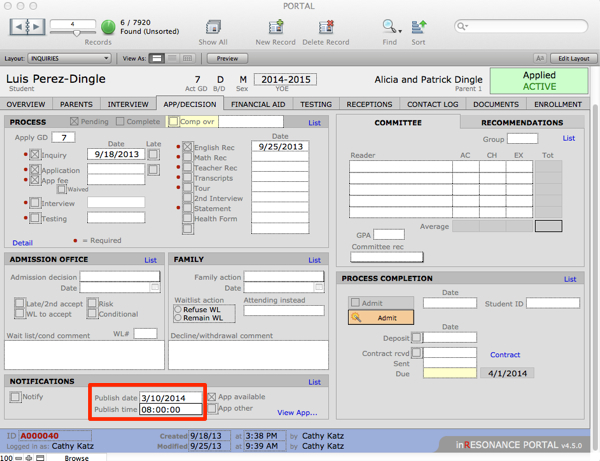
The date for publishing decision letters online in PWS is set in PORTAL, on the Apps/Decision tab in the Notifications area.
You can set the publish date for a found set of records; in this example, we will set the publish date for all Active records.
- In PORTAL > Overview tab, Find Active records.
This gives you a found set of all active records. Active records should be those you are considering for this YOE and for next YOE. These are the records to which we will assign the same Publish Date for online decision letters.
Enter the Publish Date and Publish Time in one of the records in the found set. You can make global changes to only one field at a time.
- With your cursor inside the Publish Date field, go to FMP Records menu > Replace Field Contents.
- With your cursor in the Publish Time field, go to FMP Records menu > Replace Field Contents.
NOTE: The Notify checkbox has no function assigned; it does not affect PWS in any way.
Previous versions of PORTAL: Changing the Publish Date to a Timestamp Format
NOTE: In PT4.5, the Publish date field and the Publish time field are separate. In earlier versions, the Publish Date field may or may not be a timestamp that includes the date and also the time. If you are not certain which version of the field you have, contact [email protected] to make sure your Publish date is formatted properly and will work as expected when the time comes to publish your online decision letters.
In earlier versions of PORTAL, the Publish Date field, by default, is a DATE field and will send your letter out on a specific date at midnight in your time zone. To set a time of day different than Midnight, you will need to change the format of this Publish Date to a Timestamp.
If you want your decisions to be published to PWS at a particular moment on a particular day in your own time zone, you need to change the format of the Publish Date field on the Apps/Decision tab of PORTAL to a Timestamp format.
- Find the exact field name of the Publish Date field:
- In PORTAL, put your cursor into the field whose exact name you want to learn.
- Go to Scripts menu > Show Current Field Name.
- Edit the field Type. Using the FMP menu, go to File > Manage > Database.
- Scroll the list of field names to select the name of the field (in this PORTAL set, the name is Admission_action_pubdate).
- Change the field Type from Date to Timestamp.
- Click Change. Then click OK.
- Since the Timestamp data will be more characters than the Date data was, make the display field wider. Still in Layout mode on the App/Decision screen, grab the bottom right handle of the field and drag it to the right.
- Lock the field (with the field selected, click Arrange menu > Lock). Exit Layout mode.
Now enter your Publish Date as a Timestamp. Enter your Timestamp in the format HH/MM/SS (hours, minutes, seconds) with AM or PM in your timezone.