In the Central Accounts Manager, you can:
- Create/Edit Account Creation and Account Reminder email messages for each web service.
- Create a test account that will allow you to impersonate an actual account, to assist you in troubleshooting problems for an account.
- Create one staff account for general staff access to the FAM bulletin board and directory.
- Add a new account.
- Add/Delete a role to an existing account. A role (student, family, staff) must be assigned within an account for each web service to which the account should have access.
- Disable an account. Turn off access to an account and all of its roles.
- Reset an account. This will return an account to a pre-activated state and generate an Account Creation Notification email in order for the account holder to follow a link and activate the account.
- Notify an account. That is, an email appropriate to the account status (Account Creation Notification or Account Reminder Notification) will be generated.
Navigating to the Central Accounts Manager
- From inside your web service FileMaker file, navigate to More > Accounts.
This is what the path looks like in FAM:
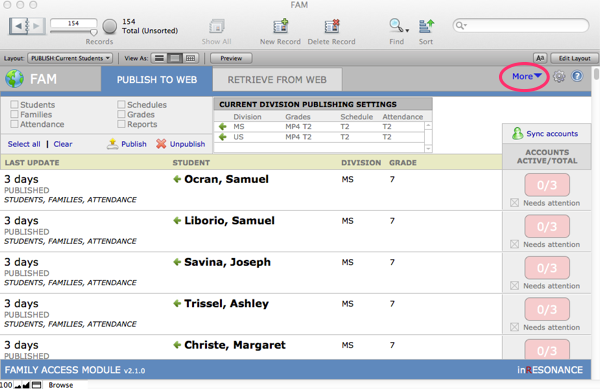
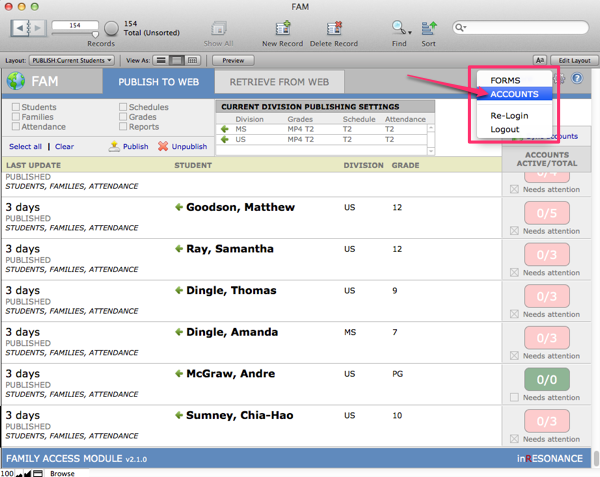
This lands you in iRCOMMON > Central Accounts Manager.
- Refresh Accounts. This will refresh the FileMaker list to reflect all accounts associated with all of the installed web services modules, and the status of the account.
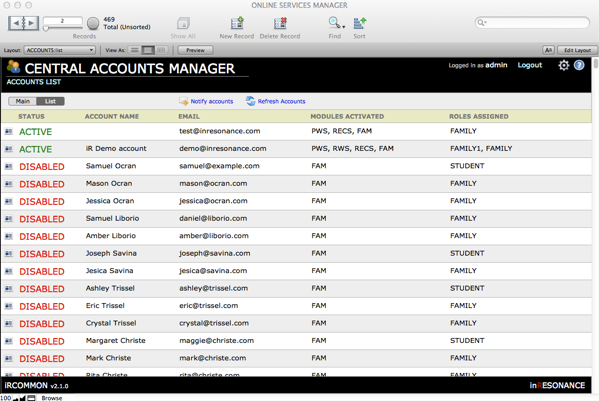
List View, Central Accounts Manager
Notice the task bar across the top of the List view of the Central Accounts Manager. There are buttons that will act upon the entire found set, including:
- Notify accounts – Note that iRCommon sends a notification email according to the status of the account:
- Account Creation Notification email if the account holder has never activated the account.
- Account Reminder Notification email if the account holder has activated the account.
- Refresh accounts – This will refresh the list to reflect all accounts associated with all of the installed web services modules.

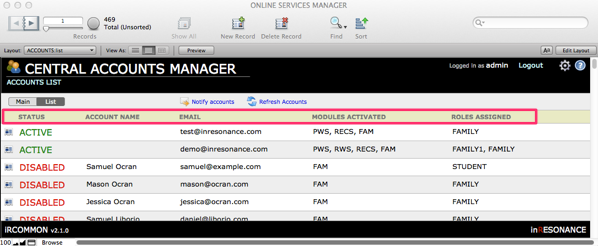
In the List view of the Central Accounts Manager, the following information is displayed for each account:
- Card icon – Will navigate you into the Main view for that particular account.
- Account status – Will be one of the following –
- ACTIVE – The account holder has successfully clicked the link in the Account Creation notification email and has activated the account.
- NOTIFIED – The Account Creation Notification email has been sent, but the account holder has not activated the account.
- DISABLED – The account holder cannot enter the account.
- Account Name – The name of the account holder.
- Email – The email address associated with the account.
- Modules Activated – A list of the modules to which this account holder will have access.
- Roles Assigned – Displays whether this is a student, family, or staff account.
Main View, Central Accounts Manager
Navigate to the Main detail view of an account by clicking on the Main button in the task bar, or by clicking on the card icon for a particular record. Once in Main view, you can flip through individual records by using the Book in the FMP status area.
![]()
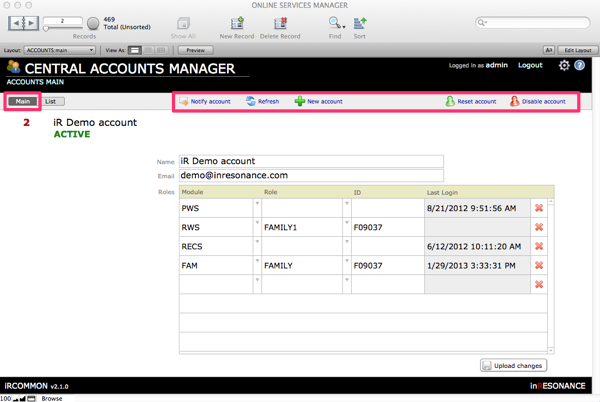
The Main view shows the detail of a single account.
Notice the buttons available in the task bar above the Main detail screen. These act on just this particular account:
- Notify account – This will send out the appropriate email (Account Creation Notification or Account Reminder Notification) with login instructions.
- Refresh – This will refresh the display.
- +New account – This will add a new account record.
- Reset account – This will reset the account and generate an Account Creation Notification email so the account holder can login as if for the first time.
- Disable account – This will disable the entire account and all the roles within the account.
The Main view is an editable display of all pertinent information for an individual account, including:
- Account ID (not editable)
- Account Name
- Account Status (not editable)
Next is a display of Roles. Each row in this table describes a particular role for the account. There will always be a blank row at the bottom; this blank row is where you would manually add a new role for the account.
- Module – Each web services module installed at the school will appear as its own line, including:
- Module name
- Role assigned to this account for this module
- ID associated with this role (in this example, the Family ID)
- Last Login for a particular module (timestamp)
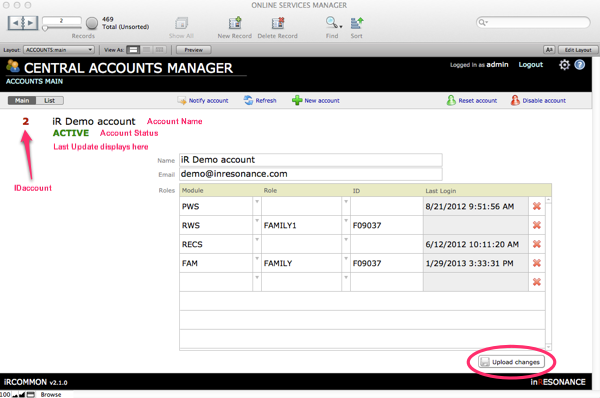
NOTE: When you change any data in this screen, remember to Upload changes.