Recording Interview Information
Information about interviews is recorded on the Interview screen in INQUIRIES. The screen may be customized to reflect the specific needs of your office.
- Navigate to INQUIRIES > Interview.
- Find the child for whom you wish to record interview information.
- Place a check in the Int (Interview) checkbox once the interview has been completed. This same checkbox also appears on the App/Decision and the Overview screens.

- To record the Interview Date, Interview Time, Interviewer click on the green arrow under INTERVIEW/TOUR.

- An Event Detail will open along with the calendar. Find the child for whom you wish to record interview information.
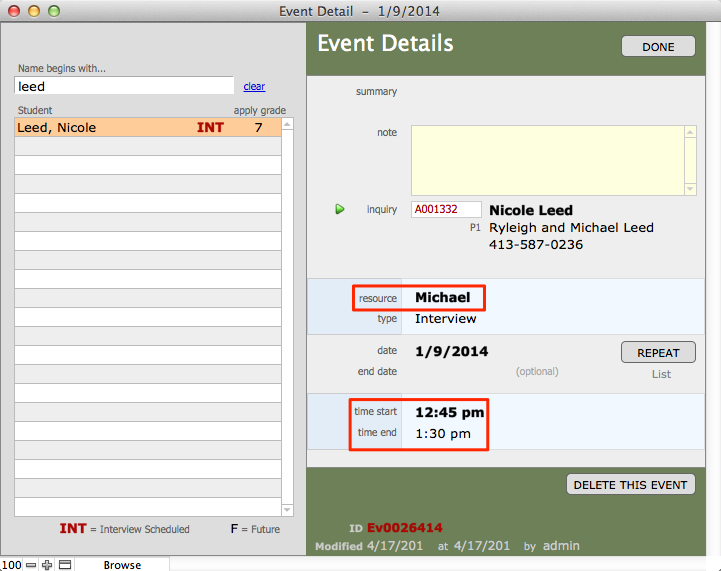
- Click the drop down menu next to the Resource field to select the Interviewer.
- Enter the time start and time finish if necessary. Click Done.
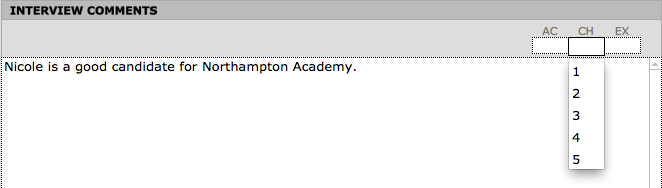
- Record Interests (Interview), and Other Schools being considered. Clicking into the field will bring up a drop-down menu of options to choose from and you may enter additional data manually.
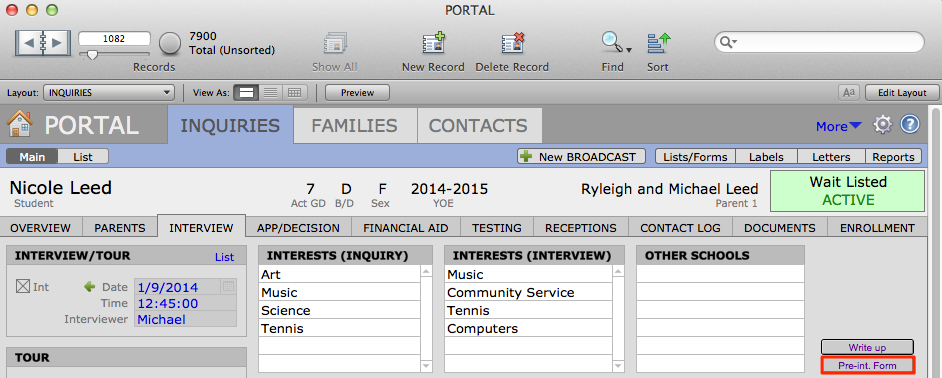
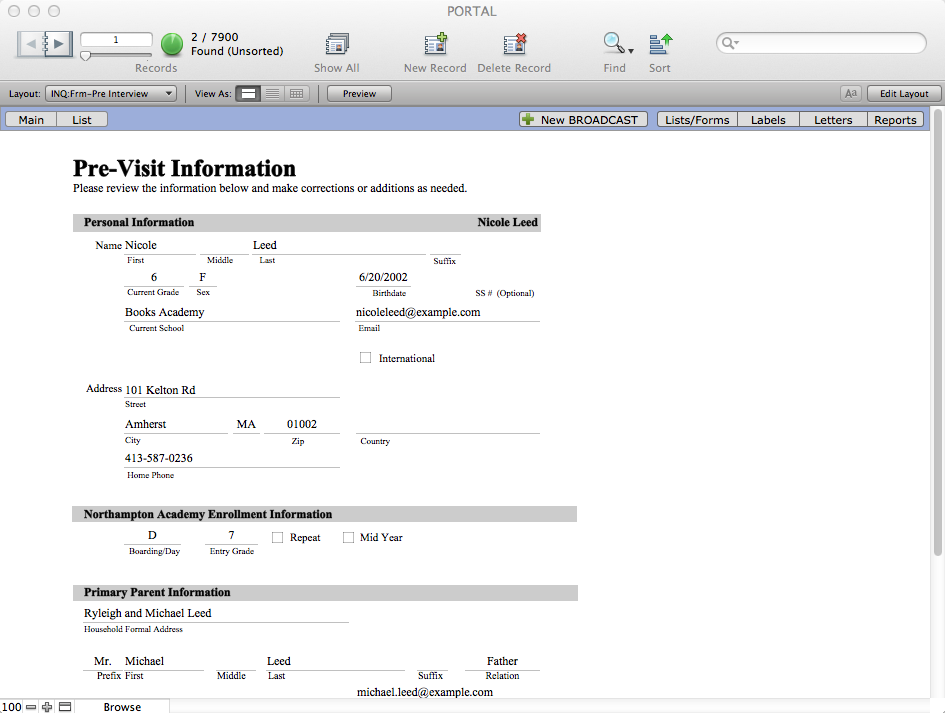
- Click the Pre-int. Form button to access the Pre-Visit Form. This form can be sent to the family prior to the interview so a parent can review and correct household information for the school records. This form can be customized and can be used to enter or edit data into PORTAL.
- Click the Write up button to open the Interview Write-Up Form. This form can be a guide for the interviewer during the interview process. Comments entered in the Comments field will update in the Observations area on the Interview screen. This form can also be customized and can be used to enter or edit other data that appear on the Interview screen.
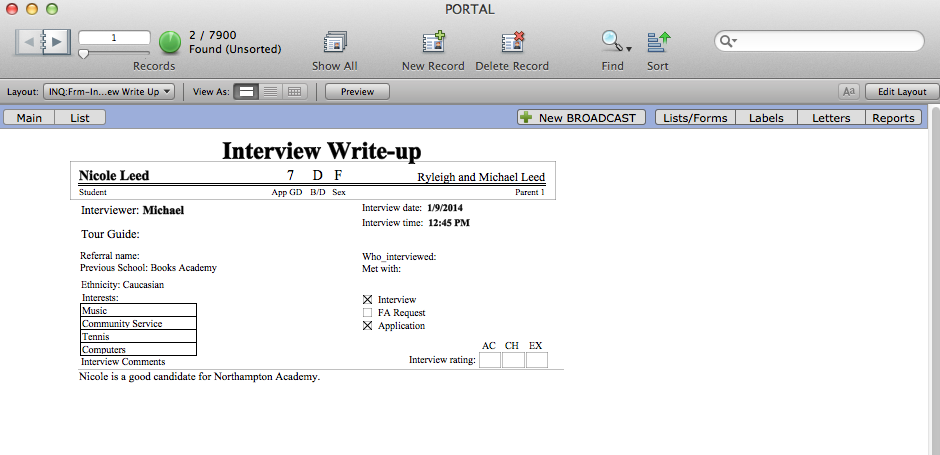
- You can assign values on a scale of 1-5 in the areas of academics (AC), character (CH) and extracurricular activities (EX), if your system has been customized, these values may be different.
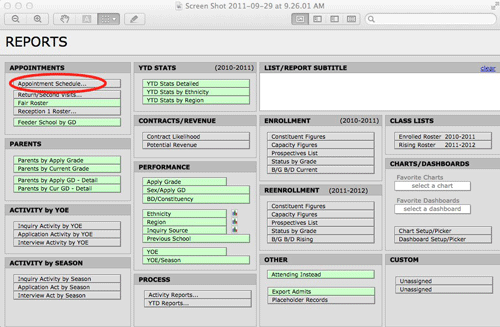
Appointment Report
The Appointment Schedule Report prompts for an Interview Date or Date Range. Based on the found set this report shows the Interviewer and basic applicant information.
- From the INQUIRIES file click on the Reports button in the Task Bar.
- In the List/Report Subtitle area type your subtitle if desired.
- Click the Appointment Schedule button in the Appointments area.
- Enter an Interview Date (dd/mm/yyyy) or Date Range (example: dd/mm/yyyy…dd/mm/yyyy)
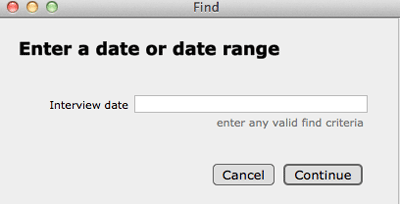
- Click the Continue button.
- If there are no records found for the date you will receive a message to that effect. Click the OK button to enter another date or click Cancel.
- The report will be generated and presented to you in Preview mode.
- If you wish to print the report click File > Page Setup to make any necessary changes to the page layout. Click File > Print from the FileMaker menu.
Return and Second Visits
The Return/Second Visits report prompts for a Second Visit Date or Date Range. Based on the found set, this report shows the Second Visit Date, Applicant Name, Entry Grade, Second Visit Host, Second Visit Classes and Comments, Interviewer, Previous School and Address.
- From the INQUIRIES file click on the Reports button in the Task Bar.
- In the List/Report Subtitle area type your subtitle if desired.
- Click the Return/Second Visits button in the Appointments area.

- Enter a Second Visit Date or Date Range.
- Click the Continue button.
- If there are no records found for the date you will receive a message to that effect. Click the OK button to enter another date or click Cancel.
- The report will be generated and presented to you in Preview mode.
- If you wish to print the report click File > Page Setup to make any necessary changes to the page layout. Click File > Print from the FileMaker menu.