As an applicant moves through the Admissions process, you will record the various actions that have been taken, the decisions that have been made, and the items that have been completed. Normally there are items that the Admission Office requires for a child’s application to be considered complete and ready for consideration. Any item that the Admission Office requires can be marked as required in the solution preferences upon installation. However, these global required items can be overridden on a record-per-record basis if necessary. Refer to PORTAL CONCEPTS for a complete description of how PORTAL processes inquiry records.
Processing Paperwork
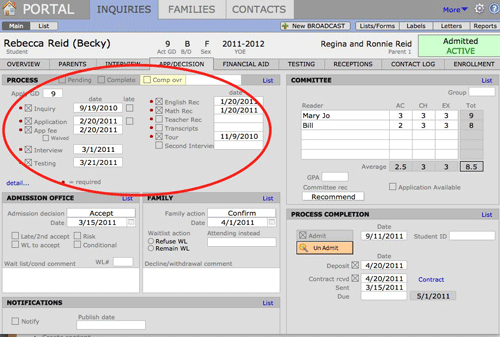
The Process checkboxes on the App/Decision screen is where you record paperwork and/or actions that have been completed along with their completion dates. These checkboxes can also be checked on the Overview screen and certain information can be recorded on the respective Interview and/or Testing screens.
Entering Process Information
- Navigate to the INQUIRIES > App/Decision screen.
- Find the child for whom you wish to record process items.
- Place a check in the appropriate Checkbox. The current date will be automatically populated into the corresponding Date field, however a different date can be entered manually.
Overriding the Complete Status
A child’s record may be recorded as Complete at any time, regardless of what has been received.
- From the child’s record in INQUIRIES, navigate to the App/Decision screen.
- In the Process section, click the yellow Comp ovr (complete override) checkbox.
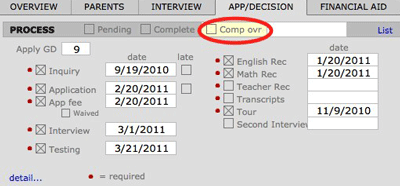
The AE Status changes to Completed, and the Complete checkbox is marked.
Adjusting Individual Process Status Requirements
If necessary, you can adjust what is required for an individual child or a Found Set to be considered complete or for a new Admissions Season.
- Find the child’s record in INQUIRIES and navigate to the App/Decision screen.
- In the bottom left corner of the Process status area, click the Detail button.
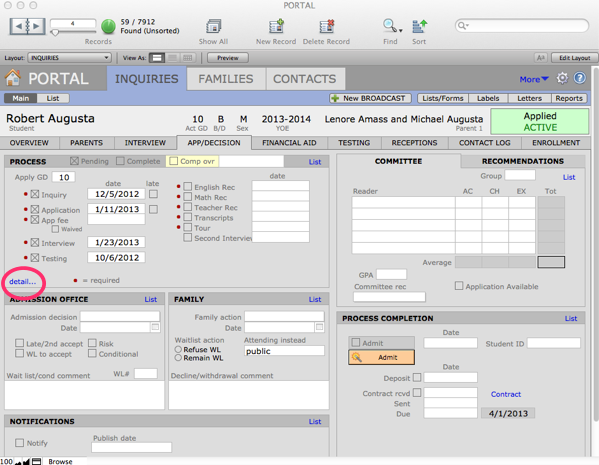
- This navigates you to the Process Status Detail screen for this particular record.
- Use the Override radio buttons to change the required items for this record.
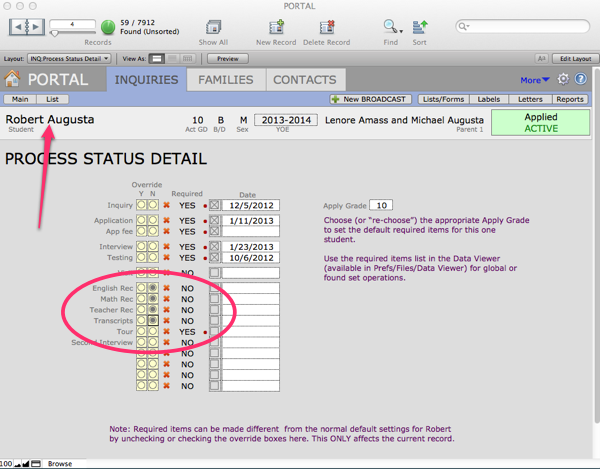
- When finished, click on Main to return to the Main card view for this record. The required fields will have been changed.
- Go to PWS > Sources > NOTIFICATIONS and refresh in your changes, adjust the items and click Upload to move the new requirements to the Actions Items webpage.

The AE Status for this inquiry changes to Completed when all required items are marked as received.
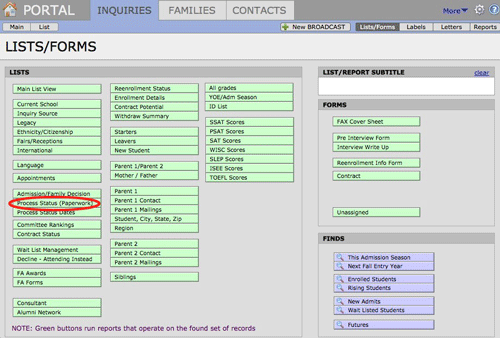
Printing a Process Status List
A Process Status list may be printed for any found set of inquiry records.
- Find the children for whom you wish to print a report.
- Click the Lists/Forms button in the gray Task Bar.
- Enter a Report Subtitle, if desired.
- Click the Process Status (Paperwork) button.
- Sort the records, if desired.
- Select Print from the FileMaker Pro File menu.

This layout may also be used to edit records. You may enter data into the application process item checkboxes.
‹ Best Practices with Futures Tracking Interviews, Visits, and Tours ›