Two important considerations
- Do not perform EOY procedures if you are still in an active forms season.
- Do not archive forms unless you have processed them. Retrieving forms brings in only the form header; Processing forms brings the data and PDFs into the system.
End of year procedures comprise two workflows:
- Empty the SFO system.
- Prepare for the new forms season.
Emptying the SFO system must be done all at one sitting and in the order specified:
- Unassign forms.
- Deactivate enrollees.
- Archive completed and processed forms.
- Purge MYSQL data.
- Update the form year (academic year) in Preferences.
- Remove data and access to accounts for enrollees who are no longer active.
- Disable all forms from the previous year.
Preparing for the new forms season can be done well ahead of your target launch date:
- Duplicate forms. Please note that if you are using the Check Only feature for Payment Forms, be sure to check this option for all of your duplicated forms. This setting will not carry over automatically during form duplication.
- Review and update forms.
- Activate enrollees for the upcoming year.
- Assign forms.
- Enable access for accounts.
- Notify accounts.
SFO End of Year Procedures
Unassign forms
- On the Enrollees tab, click Show All in the FileMaker task bar.
-
Click Unassign Forms to remove all forms from the found set of all enrollees.

The Forms Picker will open.
- Click Select All to select all of the forms assigned to the current found set.
- Click Unassign.
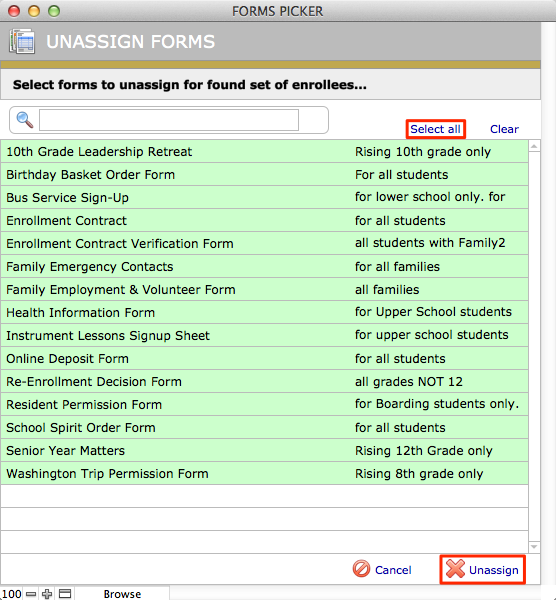
SFO will start unassigning the forms from all of the enrollees. This will take some time.
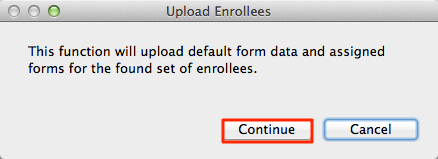
- Click Upload Data to refresh the data in the SQL database.
- A dialog box will open asking you to confirm. Click Continue.
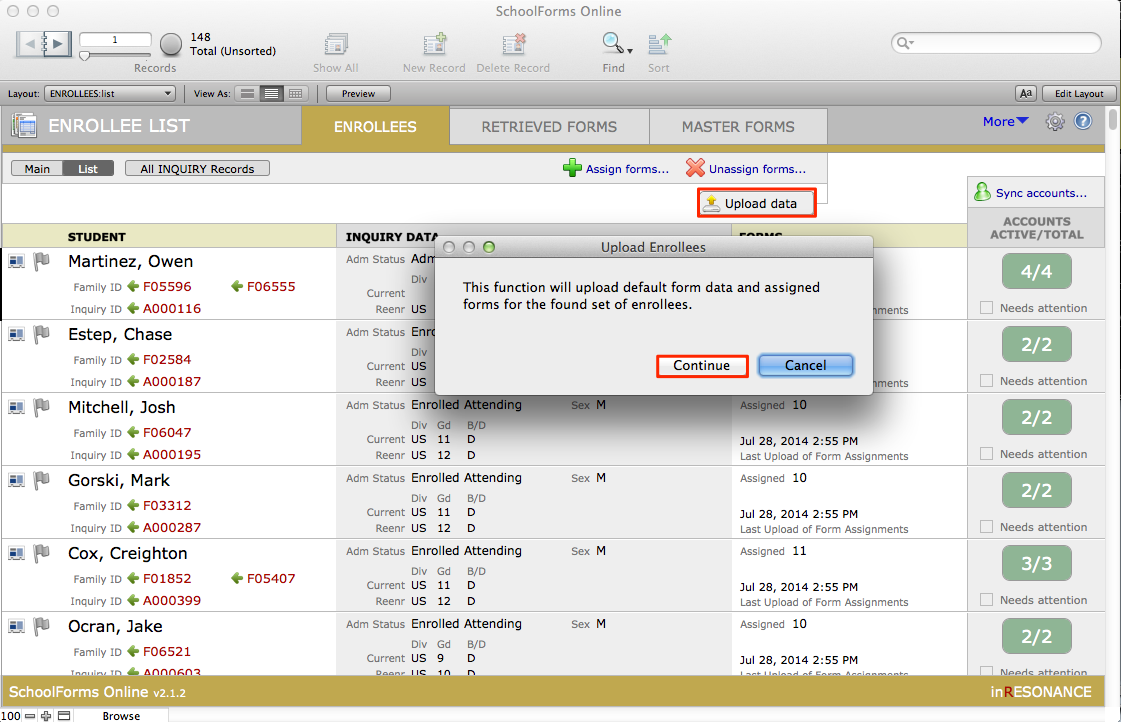
Uploading the data will take some time. When you are finished the form assignments on the web will be removed.
Deactivate enrollees
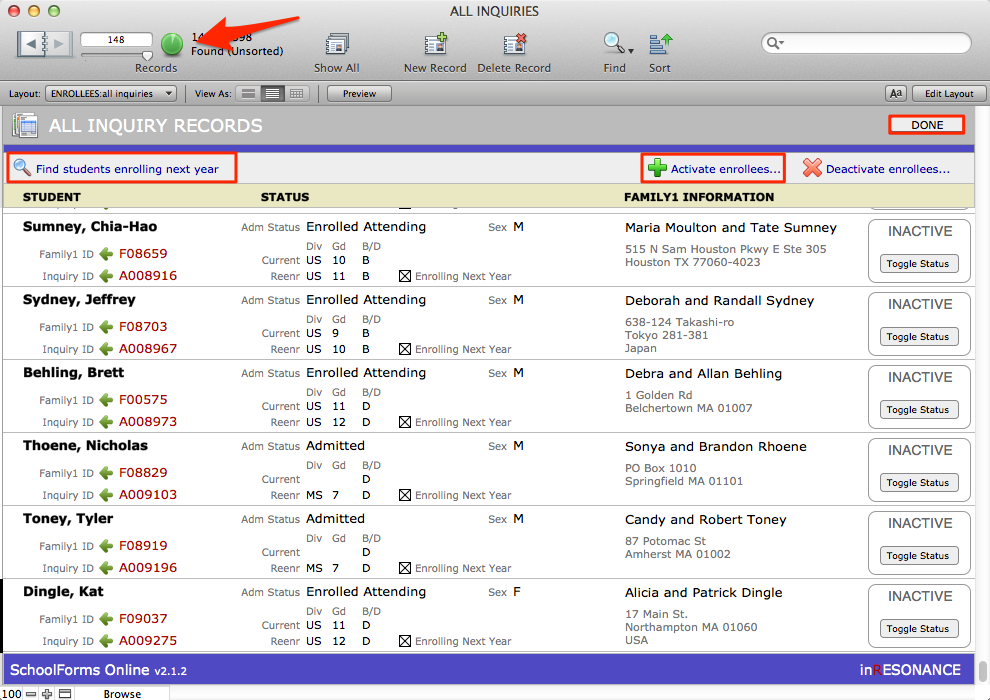
- On the Enrollee List click All Inquiry Records. The All Inquiries window will open.
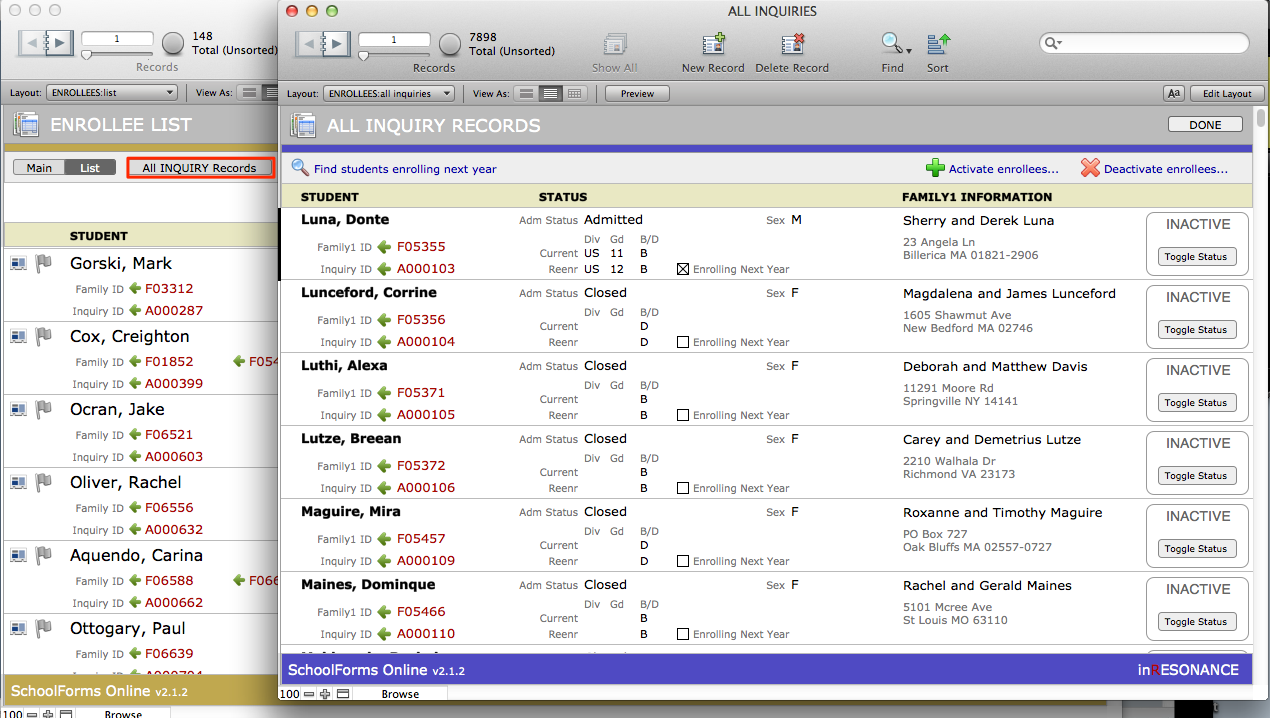
- In the All Inquiries window perform a find for Active records.
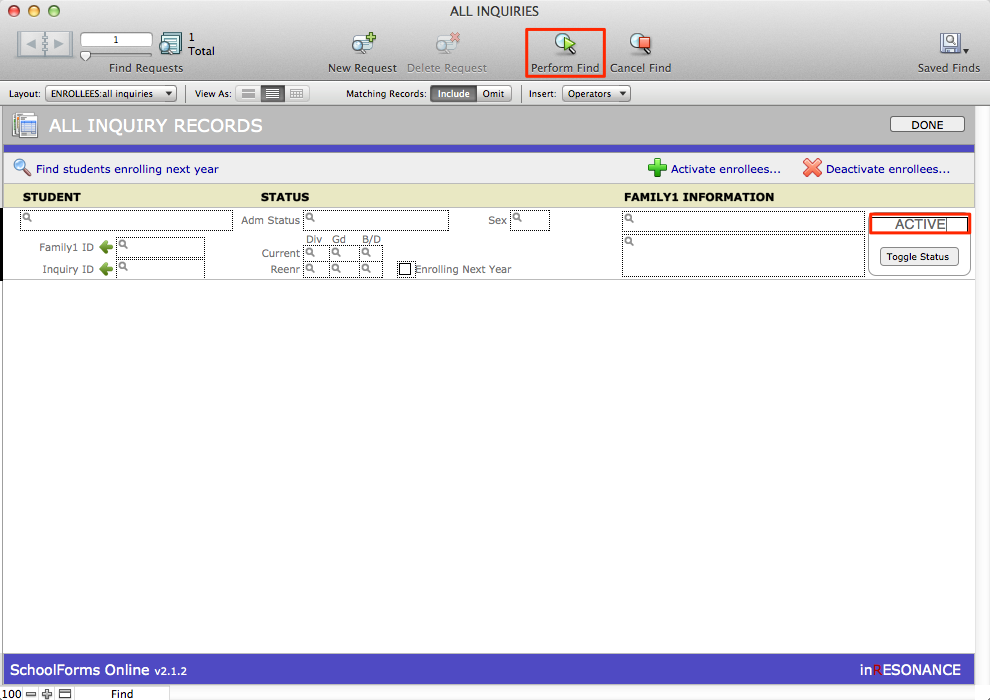
- In the task bar above the found set list, click Deactivate enrollees. This will deactivate all enrollees in the found set.
- A dialog box will open asking if you would like to deactivate the enrollees. click Continue.
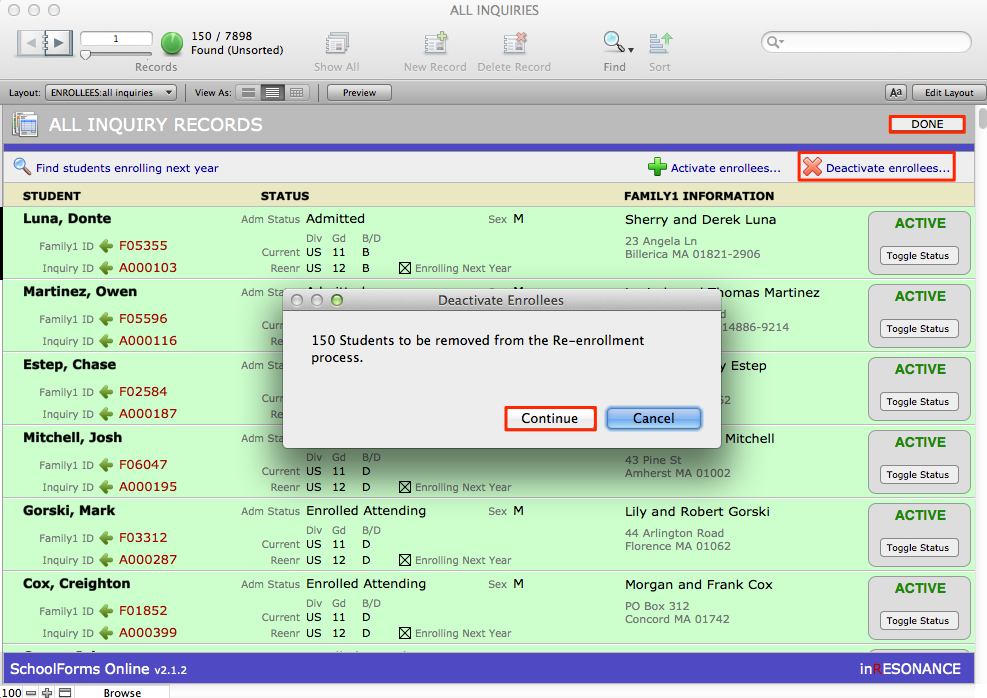
- Click Done.
Archive completed and processed forms
Archiving is the process of moving the submitted forms on the SQL server to a backup folder. Archiving does not remove the Retrieved Forms in SFOAdmin.
It is critical that all forms are retrieved and processed before they are archived. If you archive before you have properly retrieved and processed, the forms will be difficult to retrieve, and may require many support hours.
- Click the gear icon in the SFO task bar at the top right of the window to enter Preferences.
- Navigate to the Advanced tab.
- Archive your forms by date (or by academic year, or by serial number, whichever is most useful).
- Click Archive Forms.
- A dialog box will open asking if you want to archive the submitted forms. Click Archive.
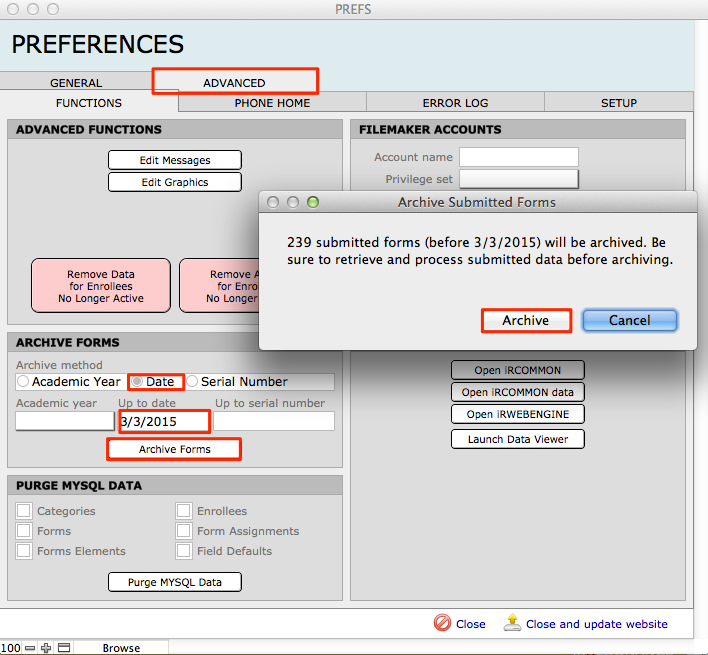
Archiving forms may take some time.
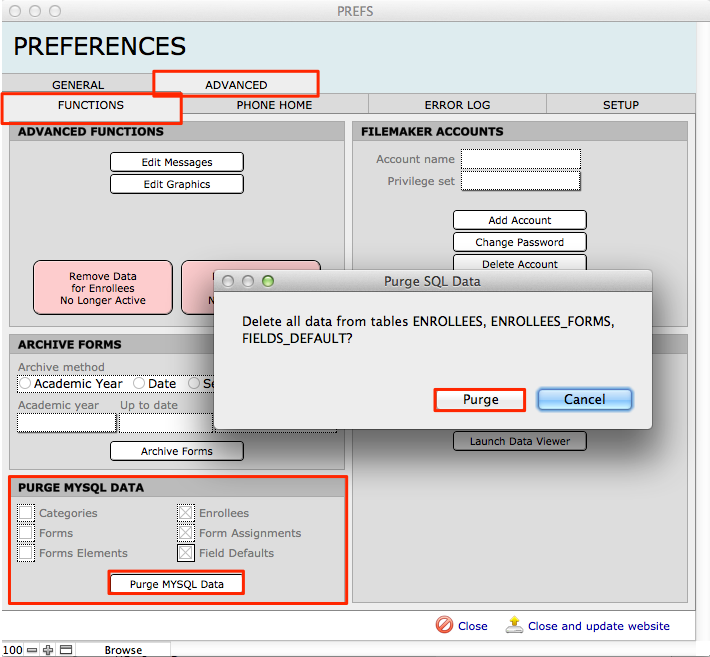
Purge MYSQL data
- Navigate to Preferences > Advanced tab > Functions subtab.
- In the section labeled Purge MYSQL Data, click the checkboxes that say Enrollees, Form Assignments and Field Defaults.
NOTE: In most cases, there is no need to purge Categories, Forms, or Form Elements.
- Click Purge MYSQL Data.
- A dialog box will open asking if you want to delete all of the data from those tables. Click Purge.
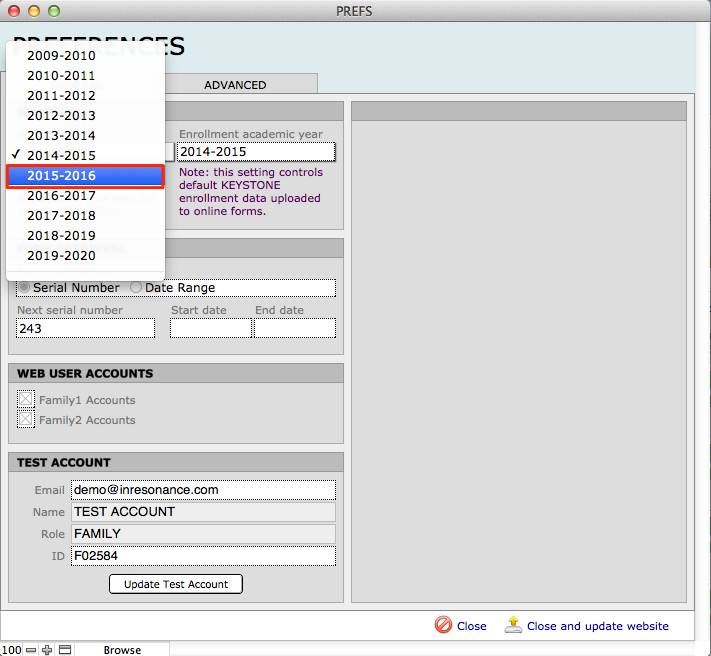
Update the form year (academic year) in preferences
- Navigate to Preferences > General tab.
- Update the Academic Year field.
- Update the Enrollment Academic Year field (this field exists in SFO Preferences only when connected to KEYSTONE).
Remove data and access to accounts for enrollees who are no longer active
- Navigate to Preferences > Advanced tab > Functions subtab.
- Click the pink button labeled Remove Data for Enrollees No Longer Active.
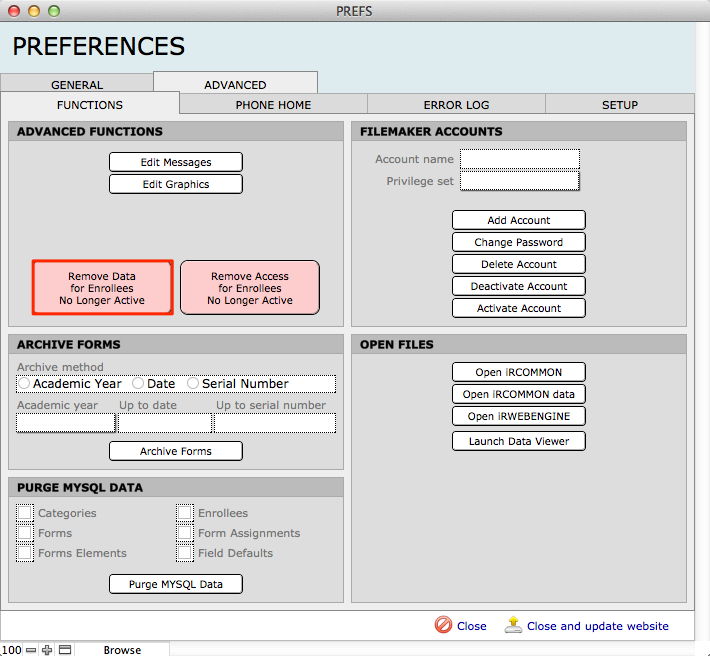
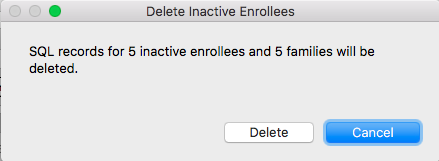
- A dialog box will open asking you to Delete Inactive Enrollees. You will probably have one or more inactive enrollees and families that will need to be deleted. Click on the Delete button.
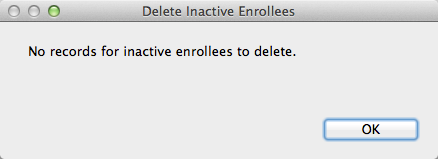
If you don’t have any Inactive Enrollees, your dialog box will show that there are “No records for inactive enrollees to delete.” Click OK to continue.
- Click the pink button Remove Access for Enrollees No Longer Active.
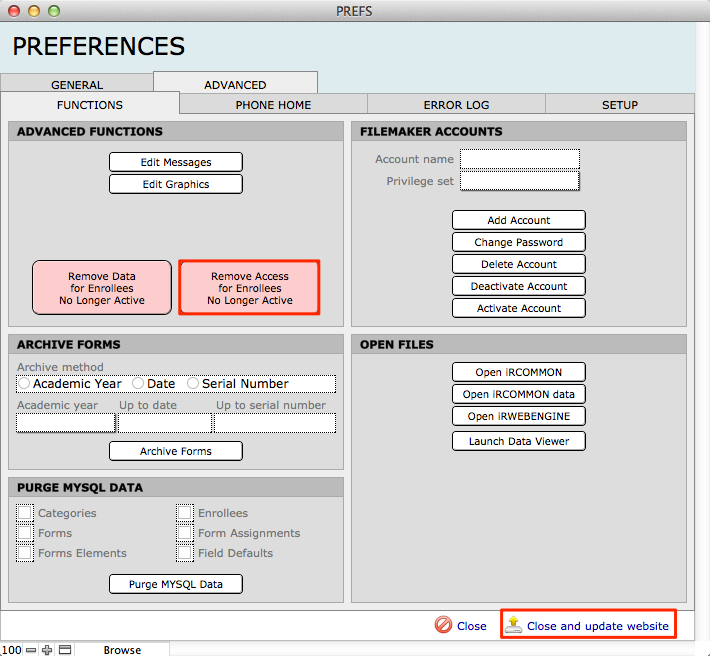
- A dialog box will open asking if you want to remove access. Click Delete.
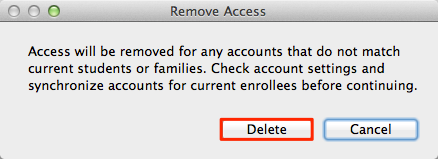
- Click Close and update website.
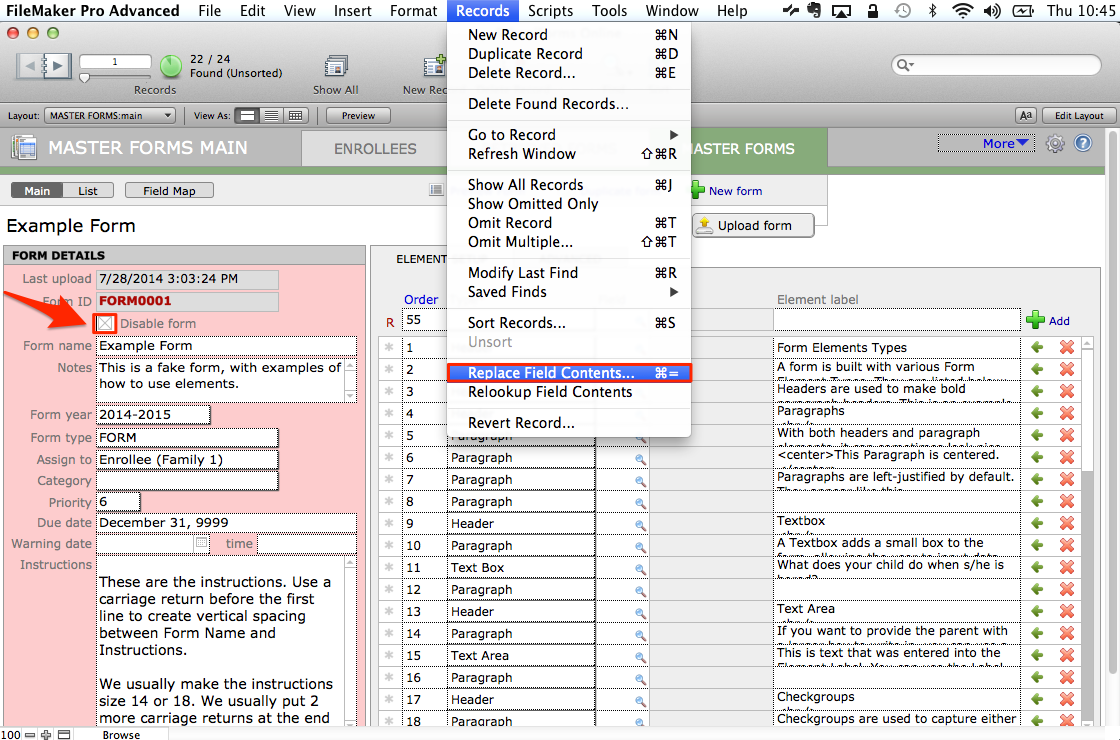
Disable all forms from the previous year
- Navigate to the Master Forms tab.
- Enter the Main view.
- Perform a find for the current form year. This will give you a found set of all the forms you are going to disable.
- Click the checkbox that says Disable Form.
- In the FMP Records menu, select Replace Field Contents.
-
A dialog box will open asking you to confirm that you want to check the “Disable forms” checkbox in every record of the found set (all of last year’s forms).
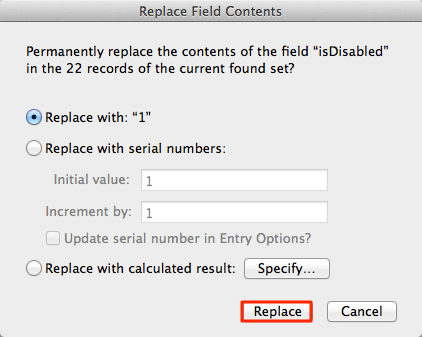
- Click Replace.
Preparing for the next form year
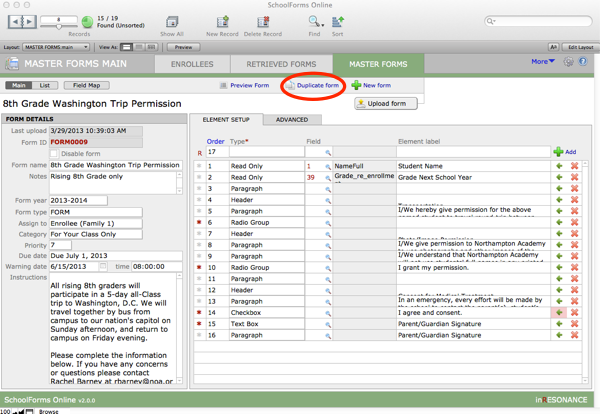
Duplicate forms
Rather than create all forms from scratch every year, duplicate the disabled forms you wish to use again and then update each for the next year. Work through the found set of disabled forms, one at a time.
NOTE: When duplicating forms, Advanced Form Settings will not be duplicated. If you are using these settings, you must configure the settings for each duplicated form.
- Enter the Main view of a form you wish to use for the next year.
- Click Duplicate Form.
- A dialog box will open asking you to confirm that you want to duplicate this form. Click Duplicate.
- Check the form year. This should reflect the next academic year as set in Preferences.
-
Work through your found set to duplicate each disabled form that you will use for the next form year.
NOTE: If you are using the Check Only feature for Payment Forms, be
sure to check this option for all of your duplicated forms. This setting
will not carry over automatically during duplication.
Update forms
- Perform a find for the next form year.
- Working in main view, adjust each form, using the Preview form button to review your work as you go. You must Upload the form before previewing.
- Review, update, and upload every form for the new form year.
Activate enrollees for the upcoming year
- From the Enrollee List, click All INQUIRY Records.
- Click the button Find Students Enrolling Next Year.
- Activate the found set by clicking Activate enrollees.
- Click Done.
The Enrollees List will be populated. If you do not see any Enrollee records in the Enrollees screen, click the green found set pie chart icon in the FileMaker status area or Show All button to view all of the active enrollee records.
Assign forms
Working with found sets, assign forms to appropriate groups of enrollees.
- Perform a find for a particular group of enrollees to whom you wish to assign a form or group of forms.
- Click Assign Forms.
- In the Forms Picker window, select the forms that you wish to assign to this found set. Click Assign.
- Click Upload Data.
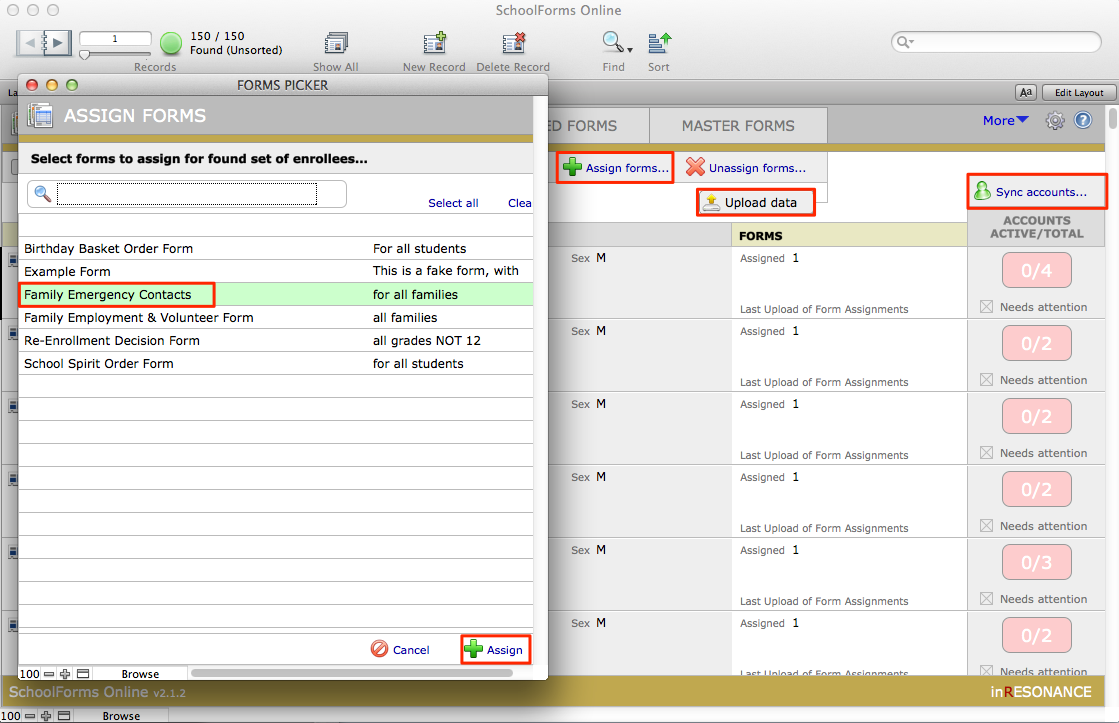
- A dialog box will open asking if you would like to continue uploading form data for the found set. Click Continue.
- Repeat until you have assigned forms to all groups.
Enable access for accounts
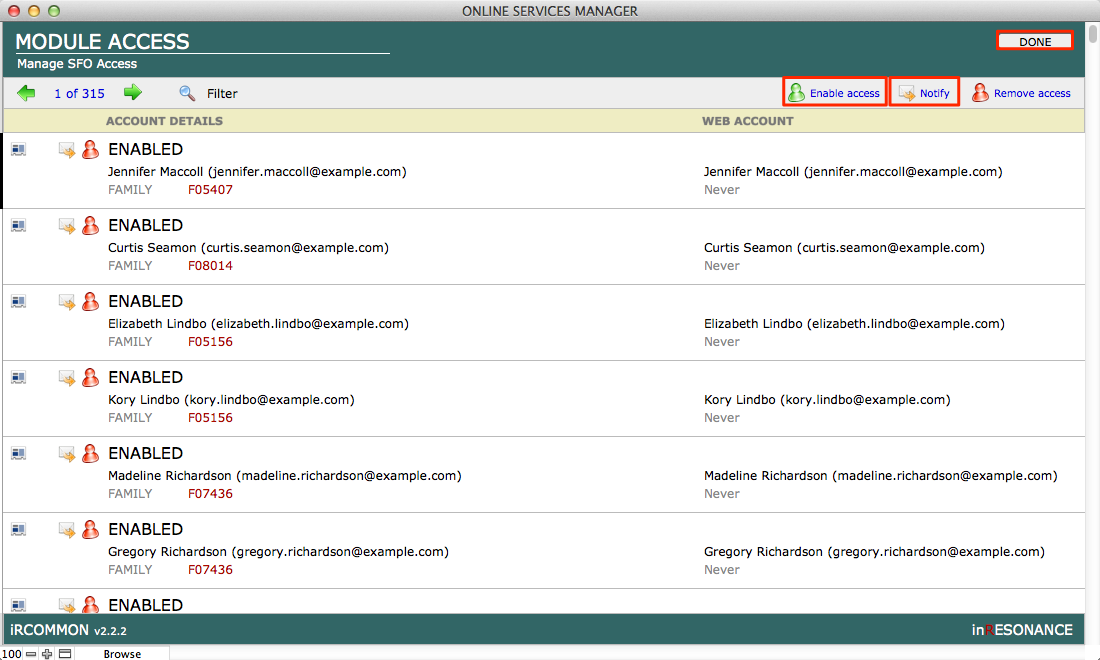
- Click Sync Accounts. This will open Module Access.
- Click Enable Access. Review the list to see if there are any errors to address.
- Click Done.
In Module Access, you will see all the accounts associated with your enrollees. For instance, if you have 100 enrollees, you may have 215 records in Module Access, as some students will have accounts for two parents in Family 1, and also accounts for Family 2.
Notify accounts
- Click Notify when you are ready to notify parents that new forms are available; SFO will send a notification email. Do not notify the parents until you are ready for them to fill out forms.
NOTE: SSO (Single Sign On) clients should not notify via this feature, but instead send an email to the parents informing them of the form availability, and how to access SFO via the school website.