1. Home
  2. KEYSTONE
  3. Master Schedule: Courses

Master Schedule: Courses

The Course records you create in KEYSTONE can be used for multiple years, although some slight changes occur from year to year. Courses, teachers, rooms and timeblocks are combined to create the sections into which students are scheduled.

ksCOURSES

The ksCOURSES file should contain a record for every separate course taught at the school. A course is a specific curriculum taught at the school. Examples of courses include Calculus AB, Spanish 3, 2nd Grade Homeroom, and 7th Grade PE. There will often be multiple sections of a course. The 60 students taking the Chemistry course may be divided into four sections. It is important to understand the distinction between courses and sections (classes).
The best way to create records in ksCOURSES is to use the Creator List.

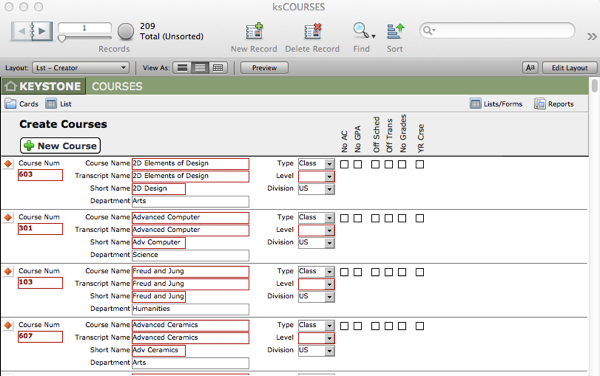
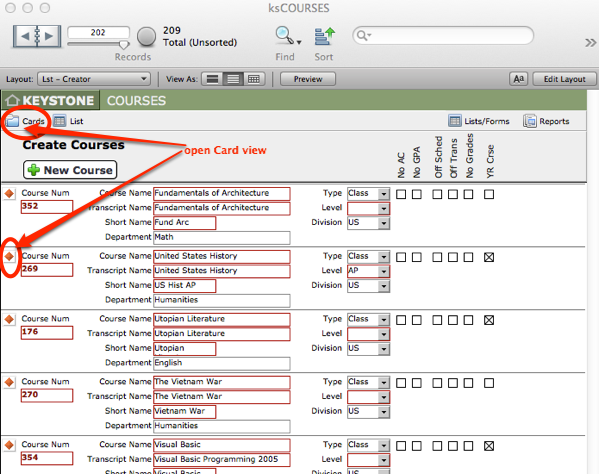
Creating a New Course in the Creator List

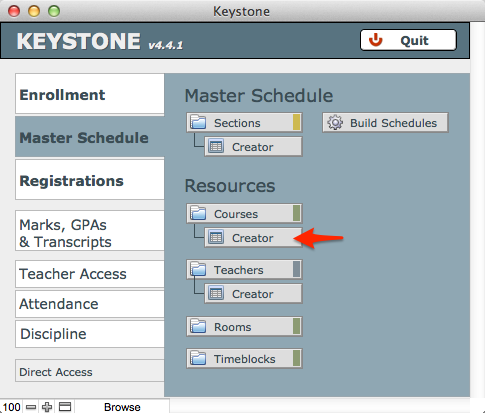
  1. Navigate to the Creator List one of two ways:
  • Central Nav > Master Schedule > Courses Creator, or
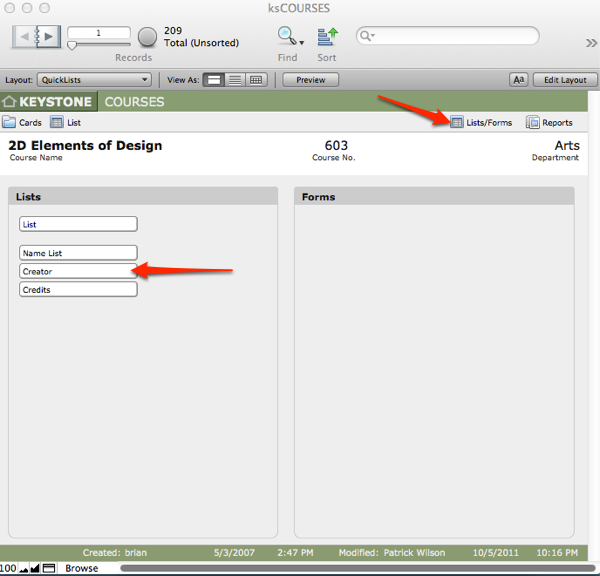
  • from the Lists/Forms Org screen in ksCOURSES
In the Course Creator List, you can enter data for all the important fields and one record can be compared to another.
  1. Click +New Course. A new blank record will appear at the bottom of the Creator List.
  2. Enter the following data:

Course Number (Course ID)

Every course must have a unique key, the Course ID. The Course ID is the same as the Course Number (Course Num) that will be published in a Course Catalog. Course numbers should not be re-used if at all possible. When installing KEYSTONE, the school will revisit the scheme for numbering courses as it may be an opportunity to make this scheme more functional.

Course Names

There are three names for each course:
  • Course Name – Course Name and Short Name are used on most lists throughout the solution.
  • Transcript Name – Transcript Name often is the same as Course Name but in some cases a longer, more formal name is preferred for the transcript. Transcript Name can be overridden at the transcript level, if needed, on a child-by-child basis.
  • Short Name – The Short Name of a course displays well on graphic schedules where space is limited.
✢ BEST PRACTICES It is preferable to use an easy abbreviation for courses’ names for student and teacher schedules: the names that display on schedules are not the official names and need only to help people get to their classes. For example, a mandatory 9th Grade English course officially called “Shakespeare Through the Ages—The Bard and His Influences” could show on the schedule with a short name of “Eng 9”.
Course Name and Short Name must be unique. This is necessary because the pull-down menus in the Creator Lists will show only unique values. If there are multiple courses called Math, only one value will appear in the pull-down.
Transcript Names do not need to be unique.
If the school changes the name of a course, but the course is essentially the same offering, there will need to be a decision as to whether to use the same ID. There is no absolute rule. If Eng101 (English 9) was Shakespeare and now will be World Writers, perhaps it can remain Eng101. If the school stops offering Photography to seniors and now offers Digital Imaging, those two courses should probably have different Course IDs.

Department

Select a Department for the new course from a pull-down value list. This value is used to group courses for the master schedule, as well as for reporting needs. The value list associated with the Department field (Dept. Sort) determines the hierarchic order of printing of courses on grade reports. This value list is one of several that are edited in the Central Nav Scripts menu > KEYSTONE Setup.

Course Type

Course Types can include more than just traditional academic offerings. Course Type is set to Class by default, but courses can be defined as sports, after-school activities, study halls, tutoring, work assignments, advisor/homeroom sessions and more. Any activity that an institution wishes to schedule can be accommodated in a Course Type.

Level

Courses can be designated as H (Honors) or AP (Advanced Placement) or IB (International Baccalaureate), allowing them to have adjusted GPAs and variable credits. These values must be exact and will correspond to the values defined in the GPE Table during setup. This screen is accessed from Central Navigation > Scripts menu > SETUP > GPE Setup.
IMPORTANT: It is important that Levels are defined when the solution is configured and then NOT CHANGED. If the school wishes to edit these, a very detailed effort must be made to correct these values in existing Section and Schedule records for GPAs to calculate correctly. There is no harm in just not using some values, however, so unneeded ones do not need to be deleted from the value list.

Division

Each Course must be linked to a Division. In single division schools this is still important but can be done with a bulk replace and set as a default for new records. Teachers can teach in different divisions but the courses that they teach must be defined as being in one division or another. Children can take courses from multiple divisions if necessary, but there may be limitations on what can be shown in pull-down menus on creator lists or in Drop/Add or on graphic schedules.

Section Flags

Section Flag checkboxes (choose all that apply) define course attributes and are useful for performing Finds. They include:
  • Off Schedule
  • Off Transcript
  • No Grades/Comments
  • Ad Hoc Scheduling
  • Year Course
  • No Academic Credit (No AC)
  • Exempt from GPA

Remember that these are only default values and can be adjusted later on a section-by-section or student-by-student override. Academic Credit is separated from GPA because schools may want to give credit to mandatory courses such as Health or Drivers Ed, but not want to include it in the GPA.

A course should not be flagged [checked] as No Grades/Comments if there is a need to write comments in ANY term. Whether the grade or comment is required each time or not, is handled elsewhere.
Off Sched / Off Trans
The Schedule flag [checkbox] determines if the course section shows on the graphic schedule, which is separate from the Transcript flag. Many offerings such as tutoring, sports, etc., are useful to display on the schedule, but may not be desired on the transcript.
NOTE: Any scheduled STUDENTREG record can later be included or hidden on the transcript. This is done from the Transcript Setup screen available from Central Navigation > Transcripts.
If you have been working in List view, navigate to the Card view to add more detail to the course:
  • Click on the orange diamond at the left end of the Course record, or
  • Click on the Cards icon at the top of the list to enter Card view. Move between records by using the Book in the FileMaker status area.
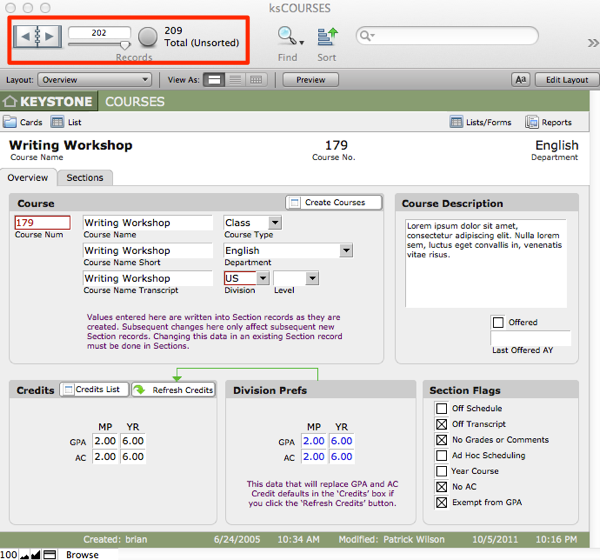
Course Description

Found on the Card view of a course, the Course Description can be used in a course catalog. A sample Course Catalog report is standard in KEYSTONE.

Offered [checkbox]

When you create a new course, the Offered checkbox will be checked, by default. It can be unchecked as needed. The Offered checkbox must be checked for the course to appear in selection pull-down menus in Sections and other places. If desired, a date can be entered in the field Last Offered AY to indicate the last offering of a course.

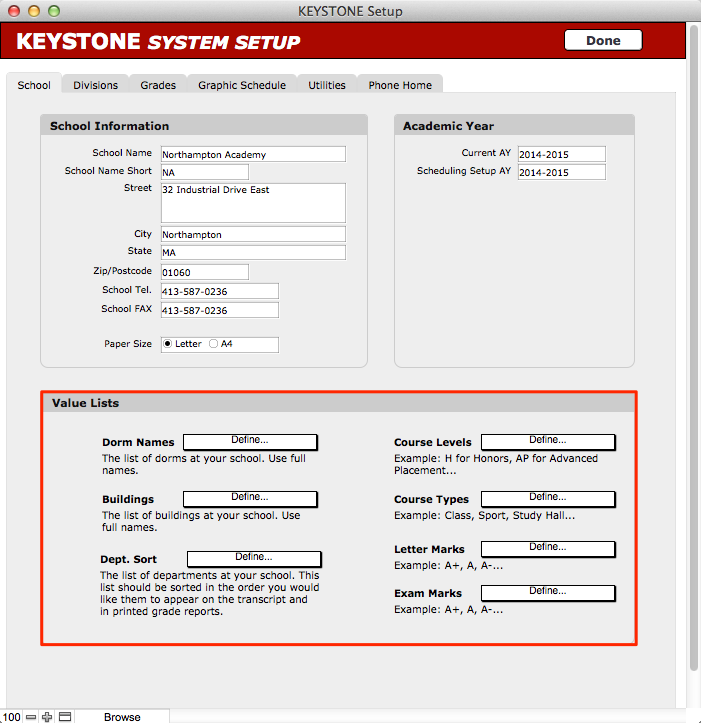
Organization Screens and Scripts in ksCOURSES

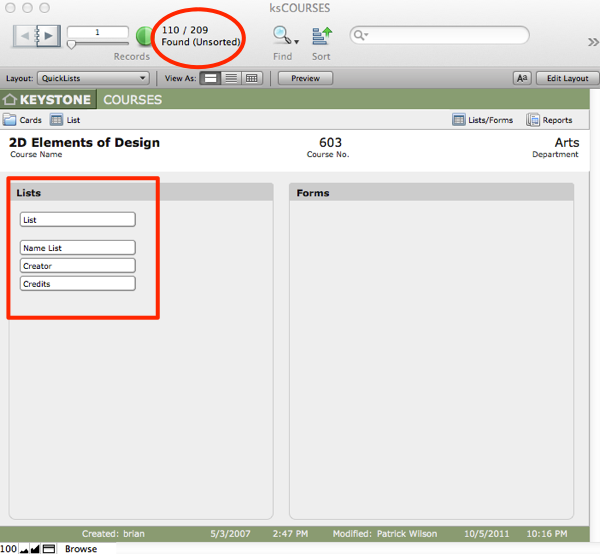
Lists/Forms Organization (Org) Screen

The Lists/Forms Org screen provides an organized view of lists for the Course area. The Creator List is the best place for creating and editing the courses, as you can see patterns across the records.

Lists/Forms are foundset based.

  1. Select All, or perform a Find to gather the group of courses you wish to examine.
  2. Navigate to Lists/Forms in ksCOURSES by clicking the Lists/Forms button in the top right task bar.

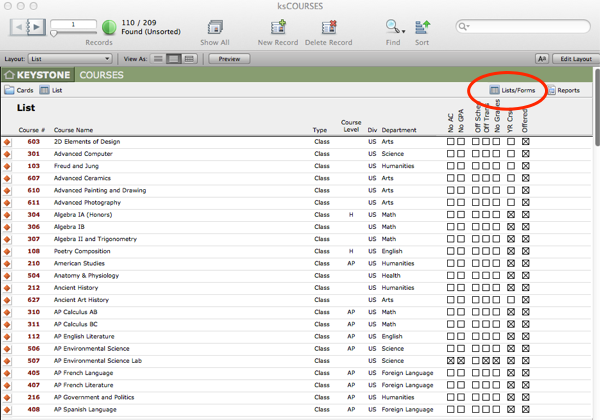
  1. Click the button under the heading Lists for the list you want to see.

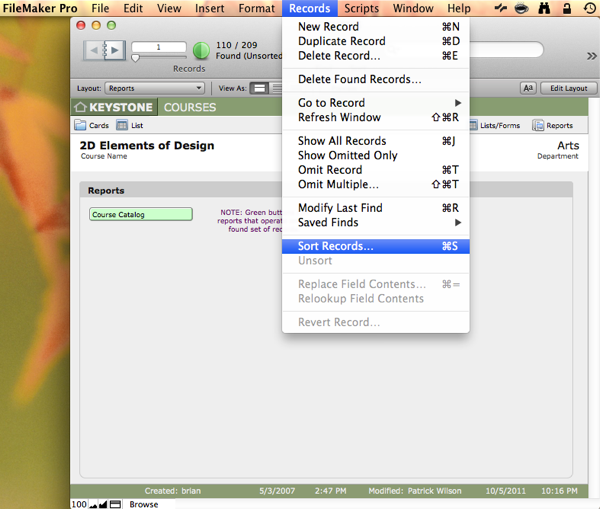
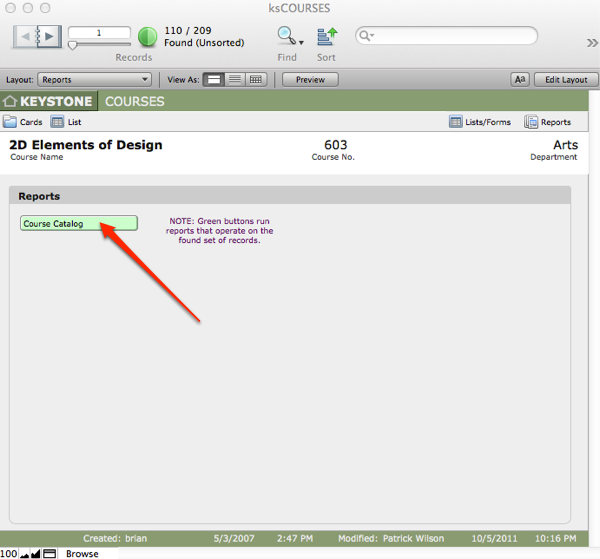
Reports Organization (Org) Screen

Reports highlighted in green are found set based. In ksCourses, an editable Course Catalog report is available as a starting point. A Level 2 user can adjust the layout to conform to the school’s needs.

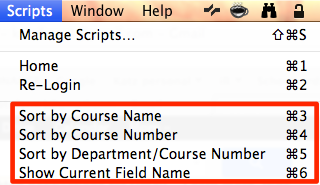
Scripts Menu (Sort Scripts)

There are pre-defined scripts for sorting a found set of courses under the FMP Scripts menu.
Records can also be sorted by any combination of fields in the file by using the FMP > Records menu > Sort… dialog box.

Creating a Course Catalog

  1. Perform a Find to get your found set of courses for the current Academic Year.
  2. Within Master Scedule > Courses, click the Reports button.

  1. Click Course Catalog.

  1. Adjust the layout. This sample document can be edited by a Level 2 user to make it conform to school needs.
Need Support?
Can’t find the answer you’re looking for? Don’t worry we’re here to help!
Create a Ticket