The Household tab in FAM contains the Family Contact Information form that your families will use to update contact information with the school. FAM is implemented with a basic form; your FAM administrator can edit this form at will. Most fields from the Families file are available to use on this form, both to display the information the school currently has on file, and for parents to make changes to the data and submit updates to the school.
This form is always available to the family within the web interface, in the Household screen.
To Build/Edit Your Family Contact Information Form
- From inside your FileMaker FAM, click on the More menu at the top right in the task bar.
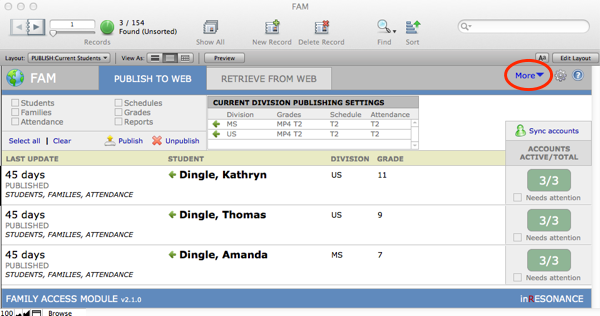
- Select Forms from the pull-down menu.

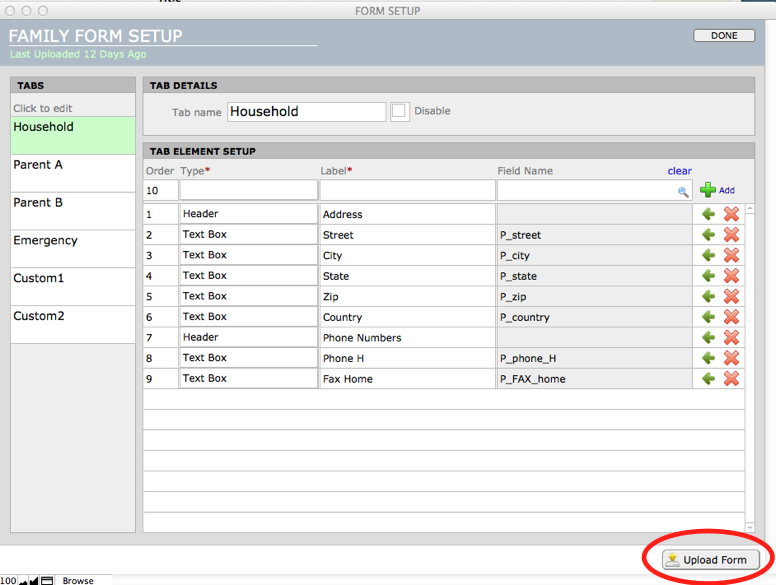
- The Family Form Setup window opens.
- On the left side of the screen are 6 tabs, including:
- Household
- Parent A
- Parent B
- Emergency
- Two are unassigned and completely customizable by the school.

- Click on a tab to edit its content.
- The tab whose content is displayed is highlighted in the left column and also named in the Tab Details area.

- To enable/disable a particular tab in the Family’s web view, use the Disable checkbox.
- Within Tab Element Setup, edit elements that already exist, add or delete elements and change their order.
- When you have a finished form, click Upload Form to add it to the web site.
- Click Done.
Understanding Tab Element Setup

The Tab Element Setup portion of the screen comprises five columns:
- The numerical Order in which elements on your form appear.
- Change the number in the left column to change the position of an element in the form.
- The element Type defines the format of the element. For a fuller description of form elements, see the following chapter, FAM Form Building Elements Explained.
- Checkbox
- Checkbox Group (can select multiple choices)
- Date Drop Down menu
- Date Panel
- Drop Down menu
- Header
- Multiselect List
- Paragraph
- Radio Group (can select only one of many)
- Read Only
- Text Area
- Text Box

- Label is the text that will appear on your form next to the element.
- Field Name is the actual name of the field whose data will display in your element.
- Click on the spyglass icon in the Field Name field.
- A Select Field window with available fields pops up.
- Select the field whose data you want on your form.

Note that this is a form for Family Contact Information, so the only fields available for this form are fields in the Families file.
- If the name of the field you want to use on your form does not appear in the list in the Select Field window,
- Click on the green arrow by Edit field list.
- In this new window, enter the exact field name and click the green “+”. This will add the field to your list of available fields. Return to the Field Picker and select your newly added field from the list.
The fifth column in Tab Element Setup allows you to:
- Delete an element by clicking on the red X at the right end of the row.
- Define the detail for the element by clicking on the green arrow in the row. This includes display text, multiple choices, clarifying text, and value lists.
In this example, the Emergency tab contains a Drop Down element called Relationship.
- Click on the green arrow to see how the choices (the Values) in the menu have been entered.


Click the Advanced tab to see where you can enter a Hint for an element. The hint will display to the right, and is intended to assist the parent in formatting a phone number, for example.

Upload Form
The final step in editing your form is to click Upload Form. This saves your new form to the web site.
For any questions about creating your Family Contact Information form, contact [email protected].